

Let's explore how to create a dial campaign with multiple contacts using the Built-in Power Dialer by WAVV from your Call List in Wise Agent. You can also access a helpful video tutorial on our blog that goes over how to set up a campaign as well by clicking here. Before starting your first Power Dialer campaign, please visit our help article on how to Activate the Wise Agent Power Dialer by WAVV to ensure that you have set up all of your default settings.
Let's get started!
- Login to your Wise Agent CRM and click Dashboard and then click the Call List sub-option.
- From there apply any filters or sorting you need in order to identify the contacts you would like to add to your dial campaign from within your Call List. Once you have applied any filters to your list and have the contacts you'd like to add to your campaign, select the check box next to the leads and then click Start Dialer button at the top of the page.
NOTE: You can also access your Power Dialer settings by clicking the settings cogwheel next to the Start Dialer button. - If you have selected the Multi-Line Dialer plan, your dialer campaign will automatically add the number of contacts you have indicated in your General Settings under Dialing Lines to your campaign. (This settings tells the dialer how many contacts to call at once.) In this example this setting is set at 3 which is the default. Your calls will be displayed at the top of your screen and will indicate a status of Pending until you begin your campaign.
NOTE: If you have not selected the Multi-Line Dialer plan only one call will be placed at a time.
- When you are ready to begin your campaign, click DIAL to begin your dialing your contacts. Upon clicking Dial the status will update under each contact from Pending to Calling.
NOTE: You can pause the dialer campaign once it has started by clicking the PAUSE button. Once you are ready you can click RESUME to begin your campaign again.
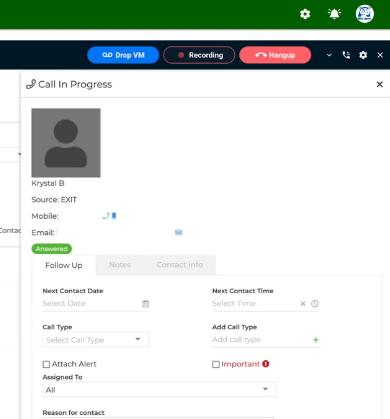
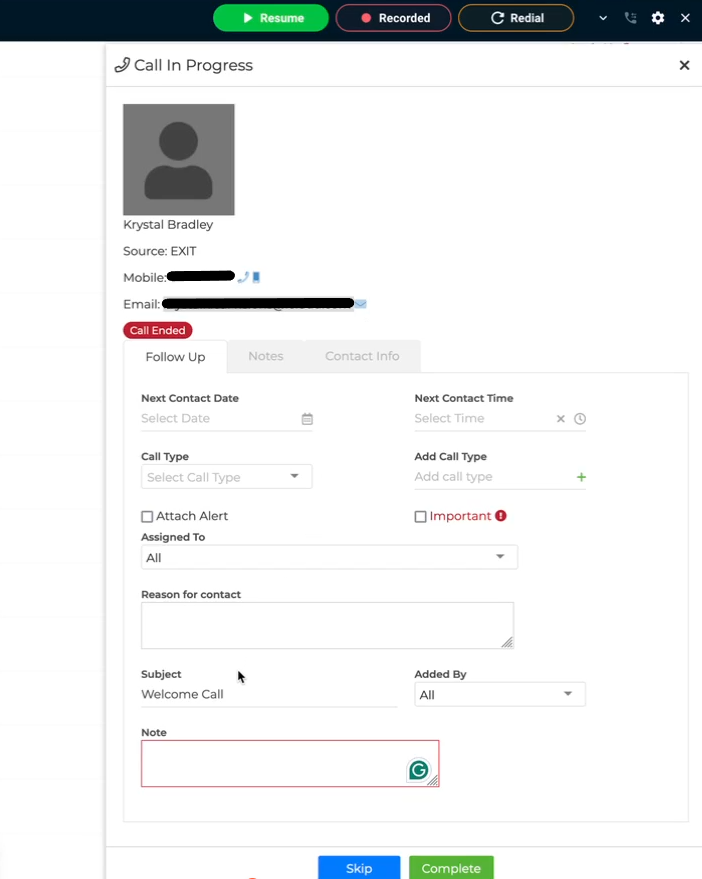
- Once a contact answers the phone, the number at the top of the screen will highlight to identify which contact has answered and a slide out will appear with their contact details allowing you the option to log notes while you are on the call.
(The first contact to answer the phone will be connected to you and their information will be displayed in the slide out, if you are using the Multi-Line dialer and another contact answers the phone while you are live with the first, they will receive the callback recording.) - While your call is live and in progress you will have several options displayed in the Dialer bar. You can choose to Hang Up the call Drop Voicemail or Record your call. (In your General Settings you have the option to set your call recording to Auto Save Recordings and this will set your dialer up to automatically record every call.)
- Once you've completed your call, click Hang Up. From there, you can click the Skip button to skip adding notes, or click Complete to complete your note-taking and move on to the next call in your queued dialing campaign.
(We do NOT recommend clicking the Complete button before you Hang Up the call. If you click Complete, the dialer will automatically move on to the next call without providing you time to enter in your notes.)
IMPORTANT NOTES ABOUT THE MULTI-LINE DIALER
If you use the Multi-Line Power Dialer and have elected to call more than one lead at a time, you will have the option to view the status of each call that is made simultaneously. As you can see in the screenshot below, the WAVV Power Dialer will provide you with a status of the outcome of up to three calls.
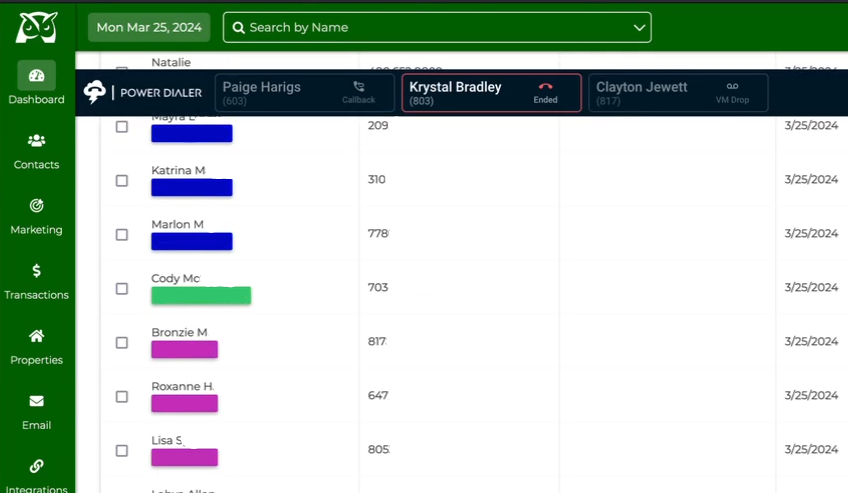
Possible outcomes include:
In Call: This means the call is currently live.
No Answer: This means the call recipient did not answer. Once a voicemail has been dropped the call outcome will update to VM Drop.
No Number: This means that the number is incorrect or not currently valid.
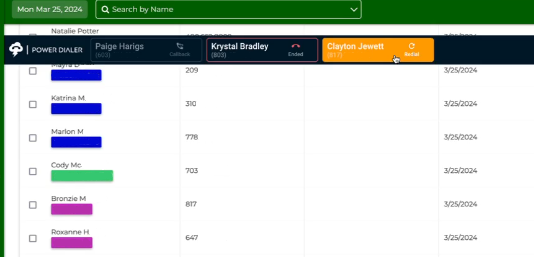
VM Drop: This means that the dialer recognized that a voicemail was picked up and automatically dropped the default voicemail option you have pre-selected in your settings. Any call that received a voicemail drop can be redialed. To redial those contacts, hover over the call outcome and the call will provide you with the redial option.
Callback: This means that another contact has answered the phone while you were on an existing call and the Power Dialer automatically played your pre-recorded Callback message. Once you complete the first call, the dialer will automatically attempt to callback any contact who has received the Callback message before moving on to any other queued leads.
Ended: This means that you were given the live call and clicked Hang Up to end the call.
For more details on how to use the WAVV Power Dialer feel free to visit our blog where you can watch a video tutorial.
For information on how to activate your Built-in Power Dialer by WAVV in Wise Agent click here.
For more details on the General Settings and your Audio Source settings within your WAVV Power Dialer click here.
Learn how to Record & Manage your Voicemails & Callbacks here.
If you need assistance with setting up your WAVV Dialer please don't hesitate to reach out to the Wise Agent support team by clicking on the Contact Us button or call our office at 480-836-0345. Our amazing support is always happy to help and is available 24/7!