

VOICEMAILS
We all know how important it is to call your leads, but leaving a way for them to reconnect with you is equally as important. With the Built-in Power Dialer by WAVV you now have access to create as many voicemail messages as you'd like. With a single click, you can drop the voicemail of your choice without ever having to stop your dialing campaign.
In this section you'll learn how to create pre-recorded voicemails that you can use while making your calls. You can create these voicemails using your computer audio, through a phone call, or an uploaded audio file. To access these options open your Built-in Power Dialer by WAVV settings. Start by clicking INTEGRATIONS then SETTINGS. Locate the Built-in Power Dialer by WAVV option, then click the settings cogwheel next to Manage Subscription as pictured below.
(NOTE: You can also access your WAVV Power Dialer settings from your Call List. Dashboard> Call List> Click the Settings icon next to Start Dialer.)

RECORDING NEW VOICEMAILS
Once your WAVV Power Dialer settings are opened, click the Voicemails tab. Then, click the Record Voicemail dropdown to select your desired method of creating a Voicemail. Below are the options available to save your Voicemails for use during your dialing campaigns.
Record via computer: To record a voicemail message using your computer's speakers/microphone or a USB/Bluetooth headset you will need to ensure that your microphone permissions are enabled on your browser. For your convenience here are instructions on how to enable your microphone permissions in Chrome or in Safari.
Record via phone: Select this option to record your message by phone. Once you select this option you'll receive a pop up message prompting you to call WAVV and enter a 3-digit pin number to access the recording feature.
Upload audio file: Use this option to upload an mp4 audio file from your computer.
MANAGING YOUR VOICEMAILS
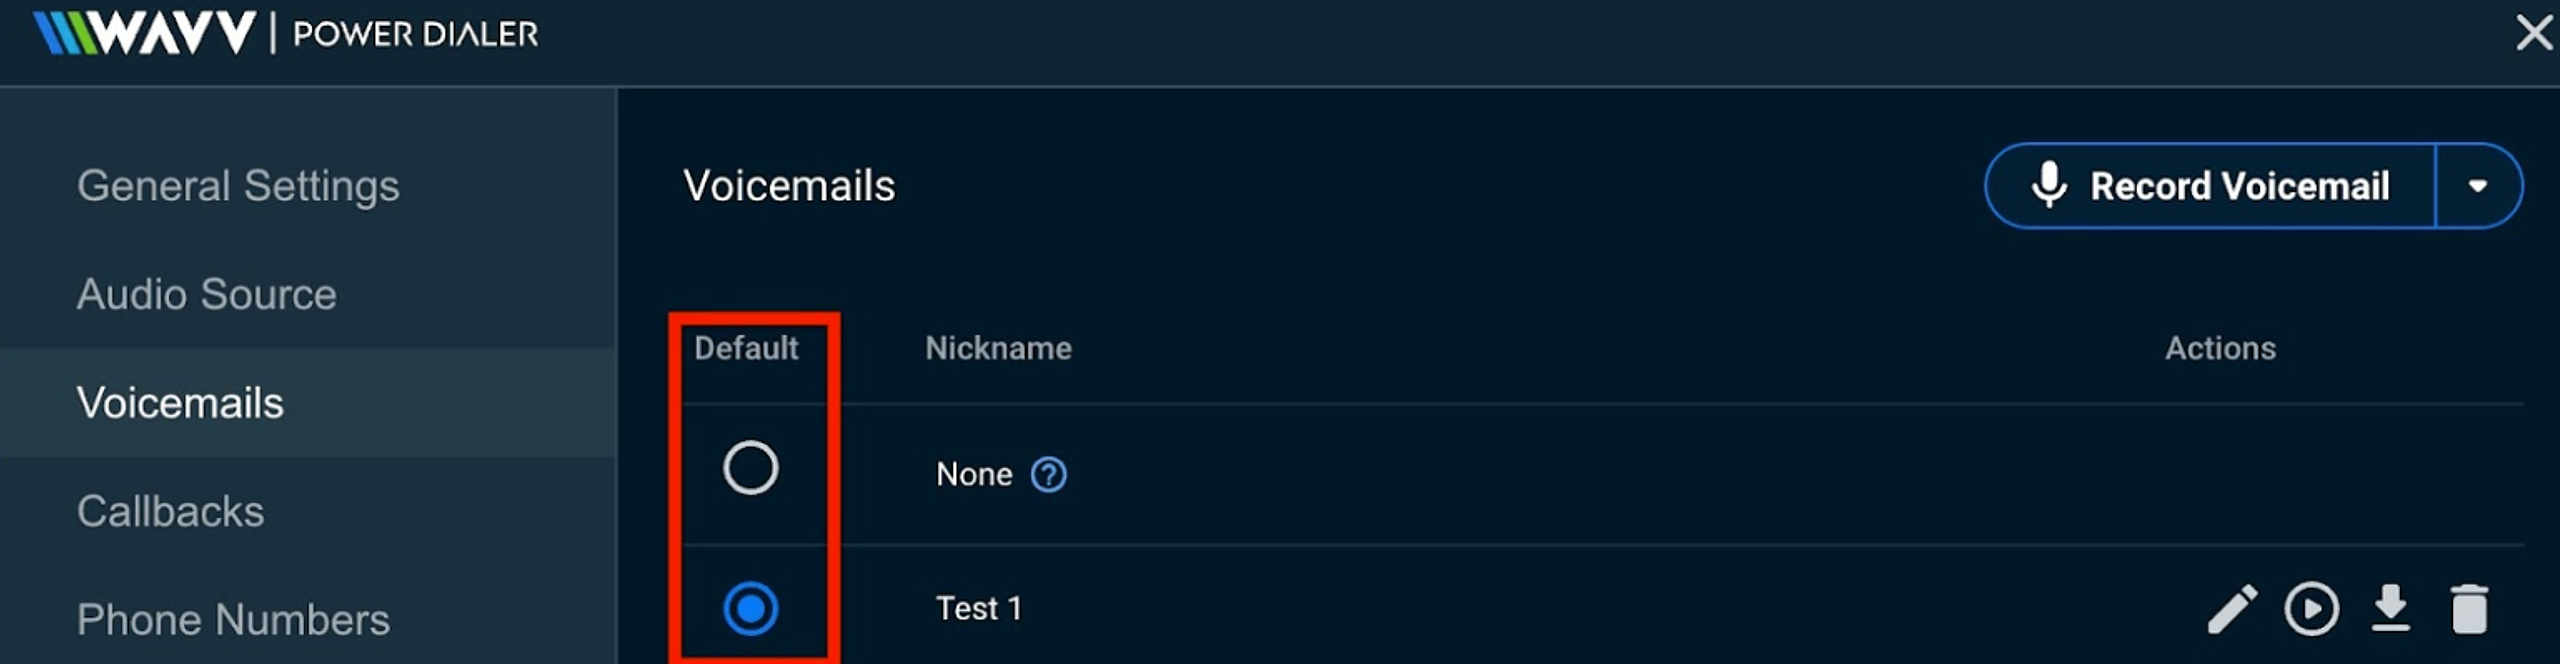
Once you have a file uploaded, next to each audio file you'll have several icons and columns to help you manage your voicemails.
Default: This column allows you to indicate which of the voicemails you've recorded will be used as your default message. The default selection voicemail will be used if a call recipient does not answer the phone.
Nickname: This column indicates the Nickname that you have elected to call each voicemail recording.
Actions: This column has several icons available to help you manage your recordings including the following:
- Pencil which allows you to edit the nickname of your recordings. This function is important if you are setting up specific call lists for your dialing campaigns.
- Playback - This allows you to play the recording for you to review your content.
- Download - This allows you to download your recorded content to your device.
- Trash - This allows you to delete your recording. (Once deleted you cannot recover your messages and Wise Agent does not have the ability to restore deleted voicemails.)
CALLBACKS
Just like voicemails in the WAVV Dialer, you can record Callback messages and save as many as you need in order to use during your Multi-Line Dialer campaigns. It's important to note, though, the Callback feature is only available if you are currently subscribed to the Multi-Line Power Dialer plan. If you do not have the Multi-Line Dialer plan you will need to update your subscription to have the ability to use the Callback feature.
Callbacks are recorded messages that are played when you have connected with more than a single lead at a time. With the Multi-Line Dialer you can connect with up to 3 contacts at once. If you elect to call three contacts and Caller A answers the phone first, Caller A will be transferred to you live immediately. If either Caller B or Caller C answers the phone while you are speaking to Caller A, Caller B and C will automatically have the default Callback message played for them. This is why if you use the Multi-Line Dialer it is important to set up you Callback messages BEFORE you set up a dialer campaign using multiple lines. Once you have completed the call with Caller A, you have the option to redial Callers B and C.
RECORDING YOUR CALLBACKS
Recording your Callbacks is the same process used when recording your Voicemails. To start, open your WAVV Dialer settings and click Callbacks on the left hand side. From there you can click the Record Callback menu in the top-right corner.

Once you have clicked the dropdown menu, select the method you prefer to use to record your Callback. You can choose from Record via Computer, Record via Phone, or Upload Audio File.
Record via computer: To record a Callback message using your computer's speakers/microphone or a USB/Bluetooth headset you will need to ensure that your microphone permissions are enabled on your browser. For your convenience here are instructions on how to enable your microphone permissions in Chrome or in Safari.
Once you select Record via Computer a blue microphone icon will appear, click the icon to begin your Callback message or click Cancel to return to the previous screen.
Record via phone: Select this option to record your message by phone. Once you select this option you'll receive a pop up message prompting you to call WAVV and enter a 3-digit pin number to access the recording feature.
Upload audio file: Use this option to upload an mp4 audio file from your computer.
TIP: These messages are designed to let your call recipient know that you plan to call them back again as soon as you are available or gives them the option to call you directly. Once your active call has ended the WAVV dialer will give you the option to redial any call recipient who has received a callback message. We recommend calling back any individual who answered a dial and received the callback message immediately.
MANAGE YOUR CALLBACKS
Once you've created your callback messages you can manage them in you Callback tab within your WAVV Dialer settings.
Default: This column allows you to indicate which of the Callbacks you've recorded will be used as your default Callback message.
Nickname: This column indicates the Nickname that you have elected to call each Callback recording.
Actions: This column has several icons available to help you manage your recordings including the following:
- Pencil which allows you to edit the nickname of your recordings. This function is important if you are setting up specific call lists for your dialing campaigns. Be sure to let your contact know that you intend to call them back shortly and leave a callback number for them to reach out to you directly if they choose to return your call.
- Playback - This allows you to play the recording for you to review your content.
- Download - This allows you to download your recorded content to your device.
- Trash - This allows you to delete your recording. (Once deleted you cannot recover your messages and Wise Agent does not have the ability to restore deleted voicemails.)
For information on how to activate your Built-in Power Dialer by WAVV in Wise Agent click here. For more details on the General Settings and your Audio Source settings within your WAVV Power Dialer click here.
If you need assistance with setting up your WAVV Dialer please don't hesitate to reach out to the Wise Agent support team by clicking on the Contact Us button or call our office at 480-836-0345. Our amazing support is always happy to help and is available 24/7!