Updating the information on your profile is one of the first steps to begin setting up your Wise Agent account.
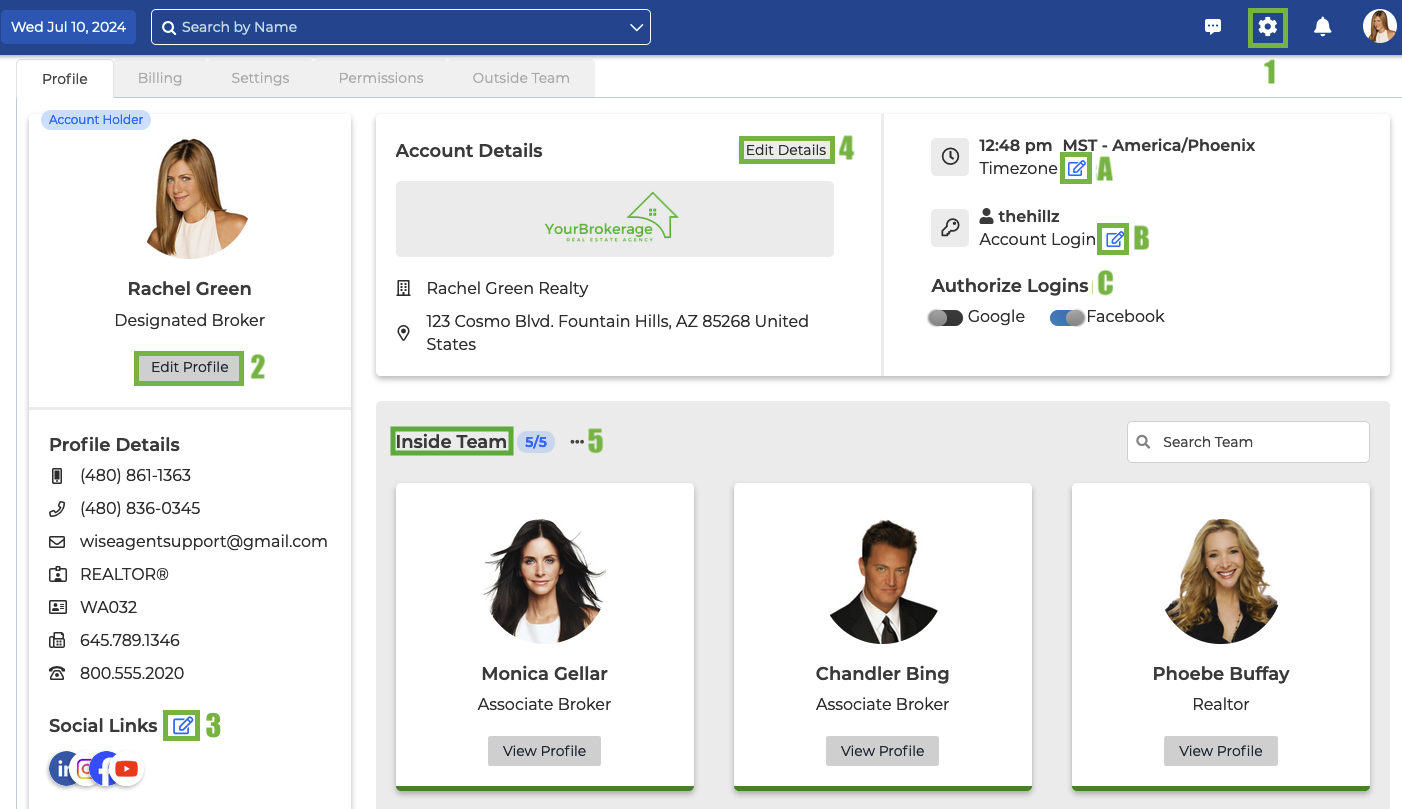
To get into the profile settings, click on the gear icon on the top right corner of the page and select Profile from the drop-down menu. See number 1 on the image below.
Edit Profile
Begin by selecting the Edit Profile button, number 2 on the image. This opens up a text edit section for you to input your personal information, including name, job title, numbers, email, and National Realtor Database System ID. The mobile number you provide is where you will receive text notifications. Under this same edit information is the option to add your profile image. Selecting the camera icon opens a pop-up window with options to drag and drop an image or choose one from your computer. When you have entered all information and the profile image, select the Save button to continue.
Social Links
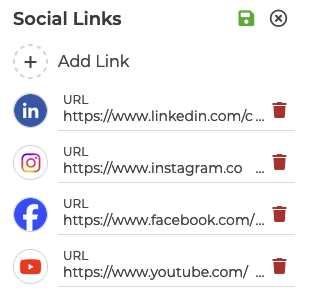
Underneath the Profile Details is a section to add all your Social Links this is 3 on the image. Selecting the pencil and notepad icon expands the section. When clicking on the plus Add Link button the different social media icons will populate with the option to add your URL. By updating this information it will automatically be added to your email signature. When done adding links click the green disk icon at the top of the section.
Account Details
Selecting the Edit Details button opens the Account Details section 4. Here is where you can add information about your company including the address, company name, ID, website, and slogan.
At the top of the section is the section to add your logo. Select the camera icon, drag and drop an image, or select one from your computer. Select the green Save button when done.
To the right of the Account Details section are three editable options to pay attention to. First is the Timezone section image A, which needs to be in your correct time to sync properly. The Account Login section image B when the pencil icon is clicked displays your username, recovery number, and option to change your password. Lastly, moving the Authorize Login image C toggle for either Google or Facebook to the right will open a pop-up window to add the social media account to your profile.
Inside Team
All inside team members section 5 can be easily viewed in your profile. You can rearrange the order by clicking and dragging the boxes. To view the team member's profile select the View Profile button below their name.


