

Before you begin the process please review the following requirements below:
- Do you have access to your DNS settings? If yes, please proceed.
- If not, we cannot proceed unless you have access to these settings or have a technical contact who does.
- Do you have an existing mail exchange record (MX)? If yes, please proceed.
- If not, these records will need to be set up before you can add the AWS records we provide. This will need to be done by your webmaster or your technical contact for domain management.
- Do you have an existing SPF record? If yes, you will need to add " include:amazonses.com " to this record. If not, we recommend connecting with your webmaster or technical contact to create the SPF record for your domain before proceeding with the steps outlined in this article.
Part 1: Request DNS Records
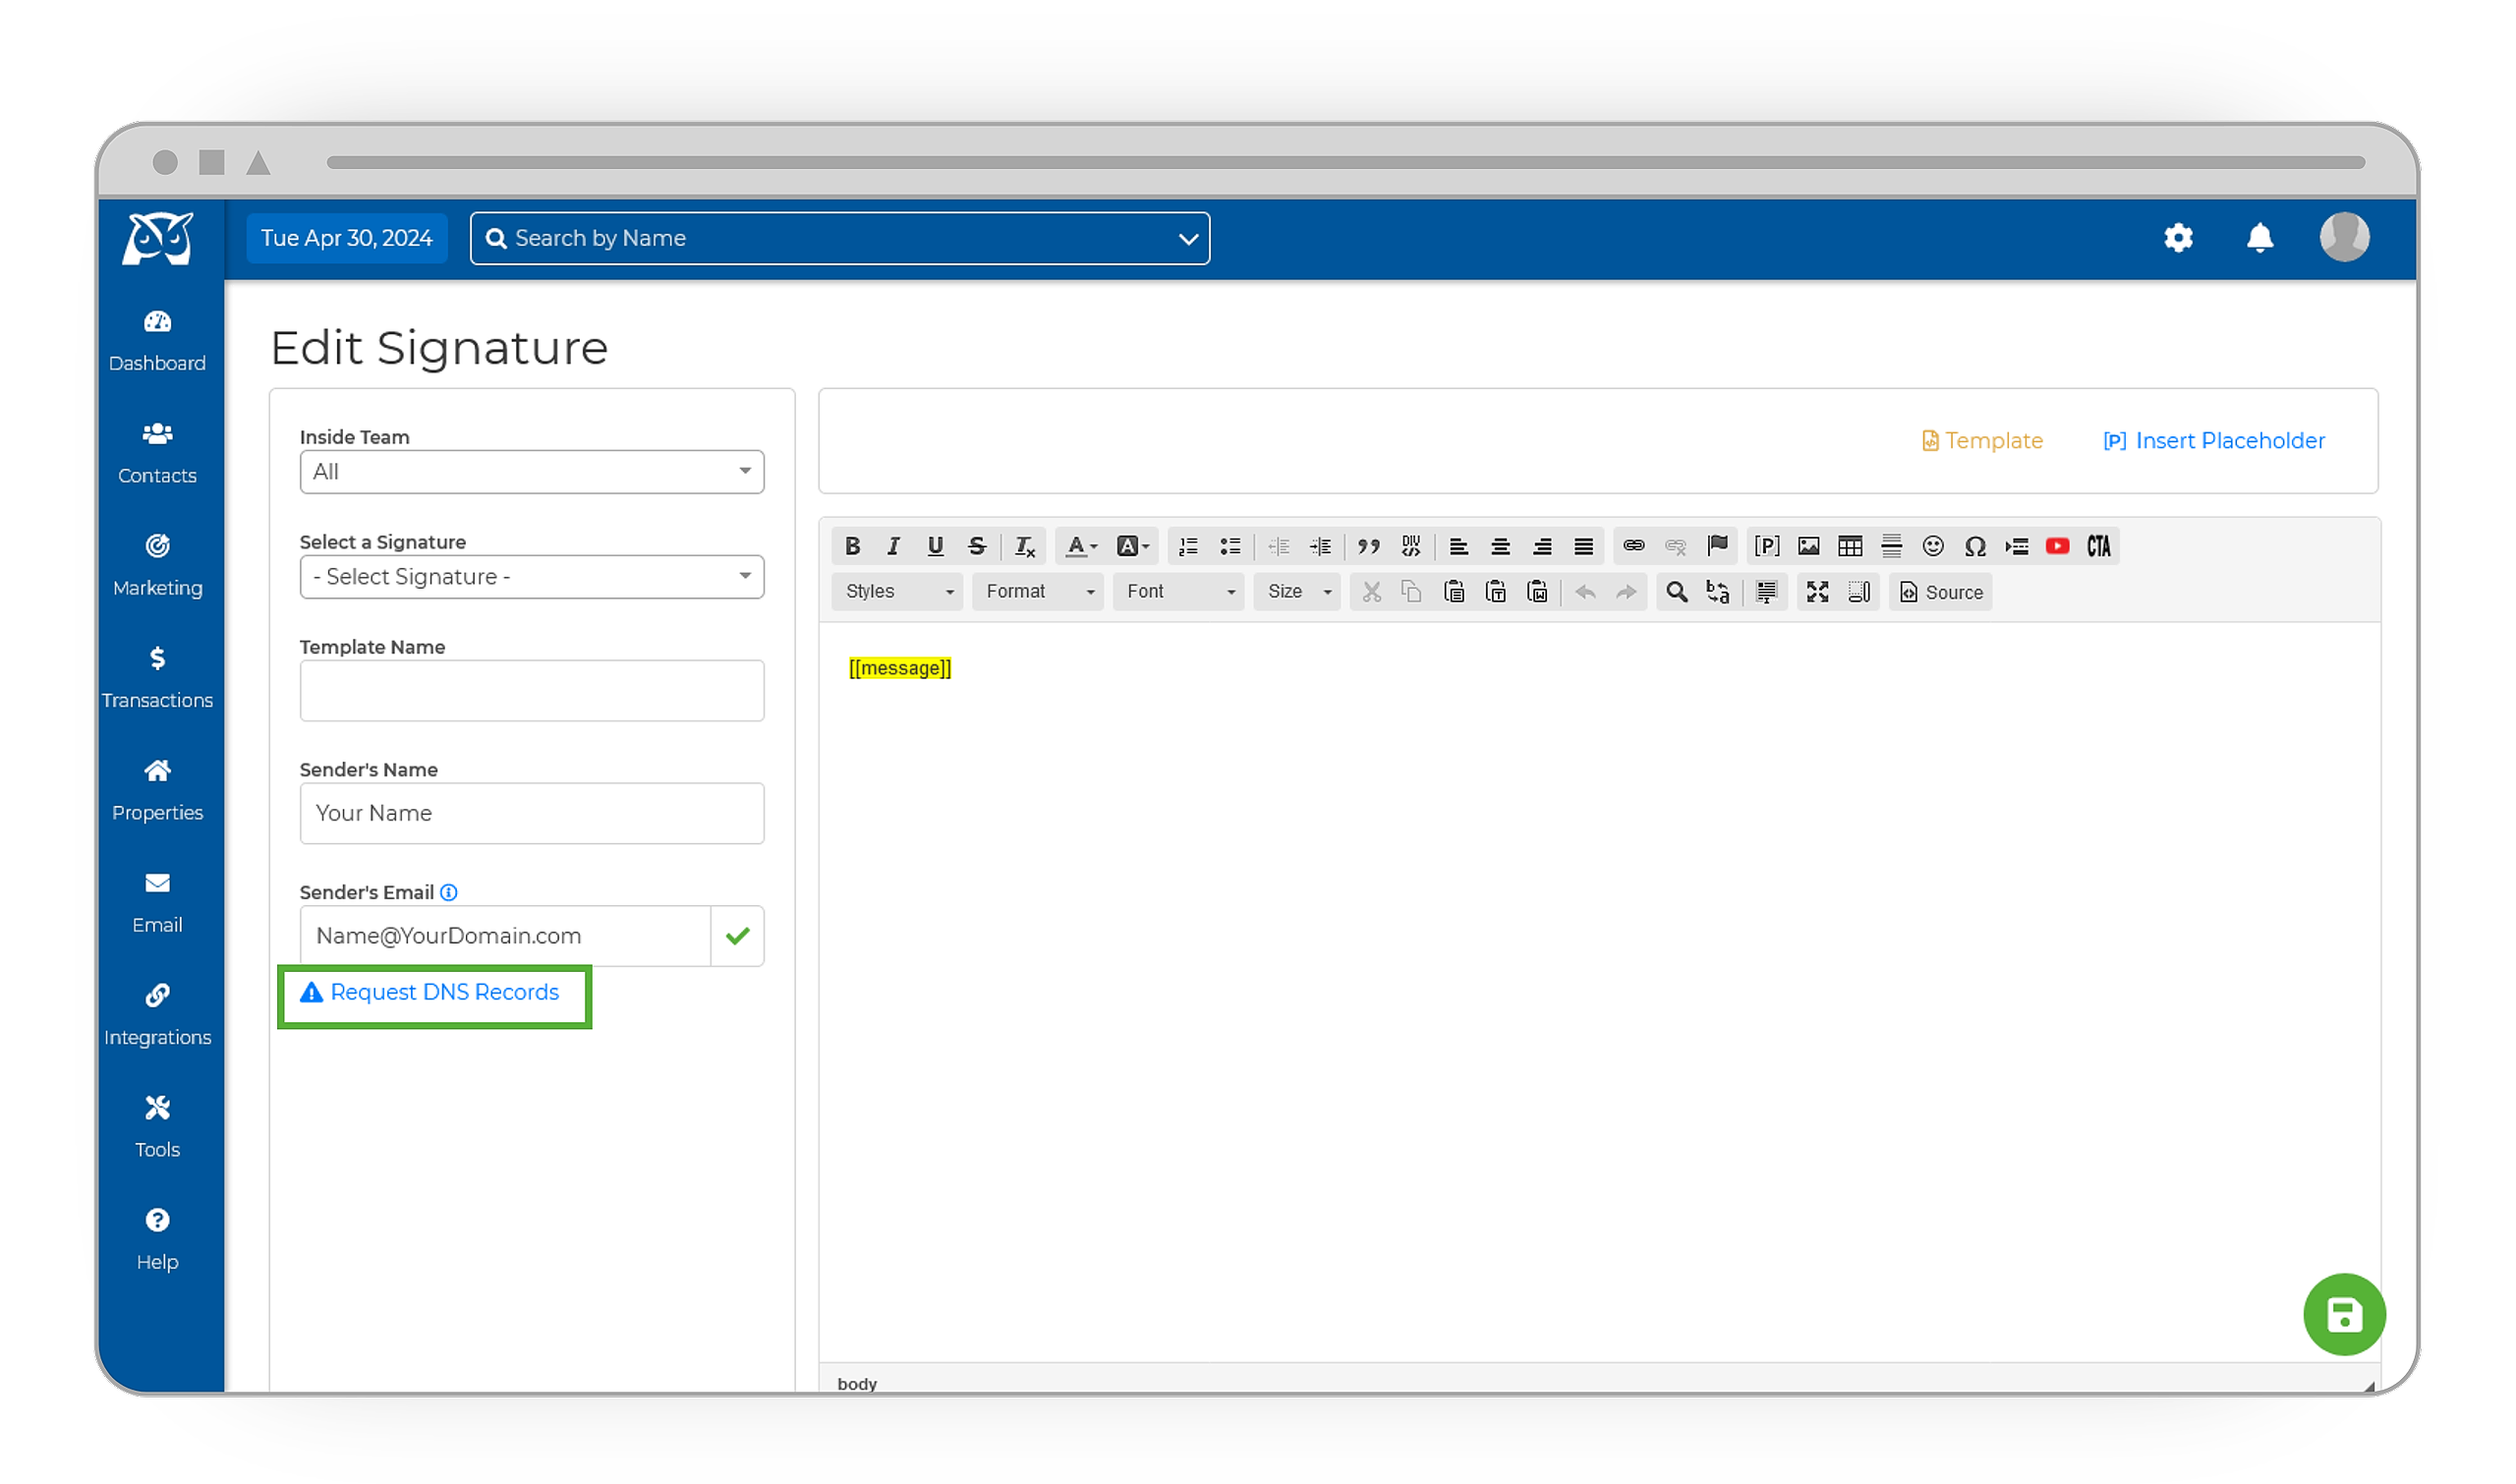
- To retrieve your DNS records, begin by logging into your Wise Agent account
- From the sidebar, select Email ➜ Email Signature
- Under Sender's Email, locate and click on the ⚠︎ Request DNS Records button.
- Our support desk will receive a notification, and our team will email you a CSV file containing the unique DNS keys you will use to update your records. (we have included an example screenshot of what these records would look like)
💡 Alternatively, you can email our support team directly at help@wiseagent.com to request your DNS records. Please note that these records are provided 'by request' and can only be obtained from a Support Specialist.
After receiving your unique set of DNS keys from our team, log into your domain management system and locate your DNS settings. (the location of the DNS settings varies depending on your domain provider)
On the DNS settings page, you will copy the unique DNS record keys we provided and save them in your DNS settings.
Part 2: Updating Your DNS Records
Creating CNAME Records
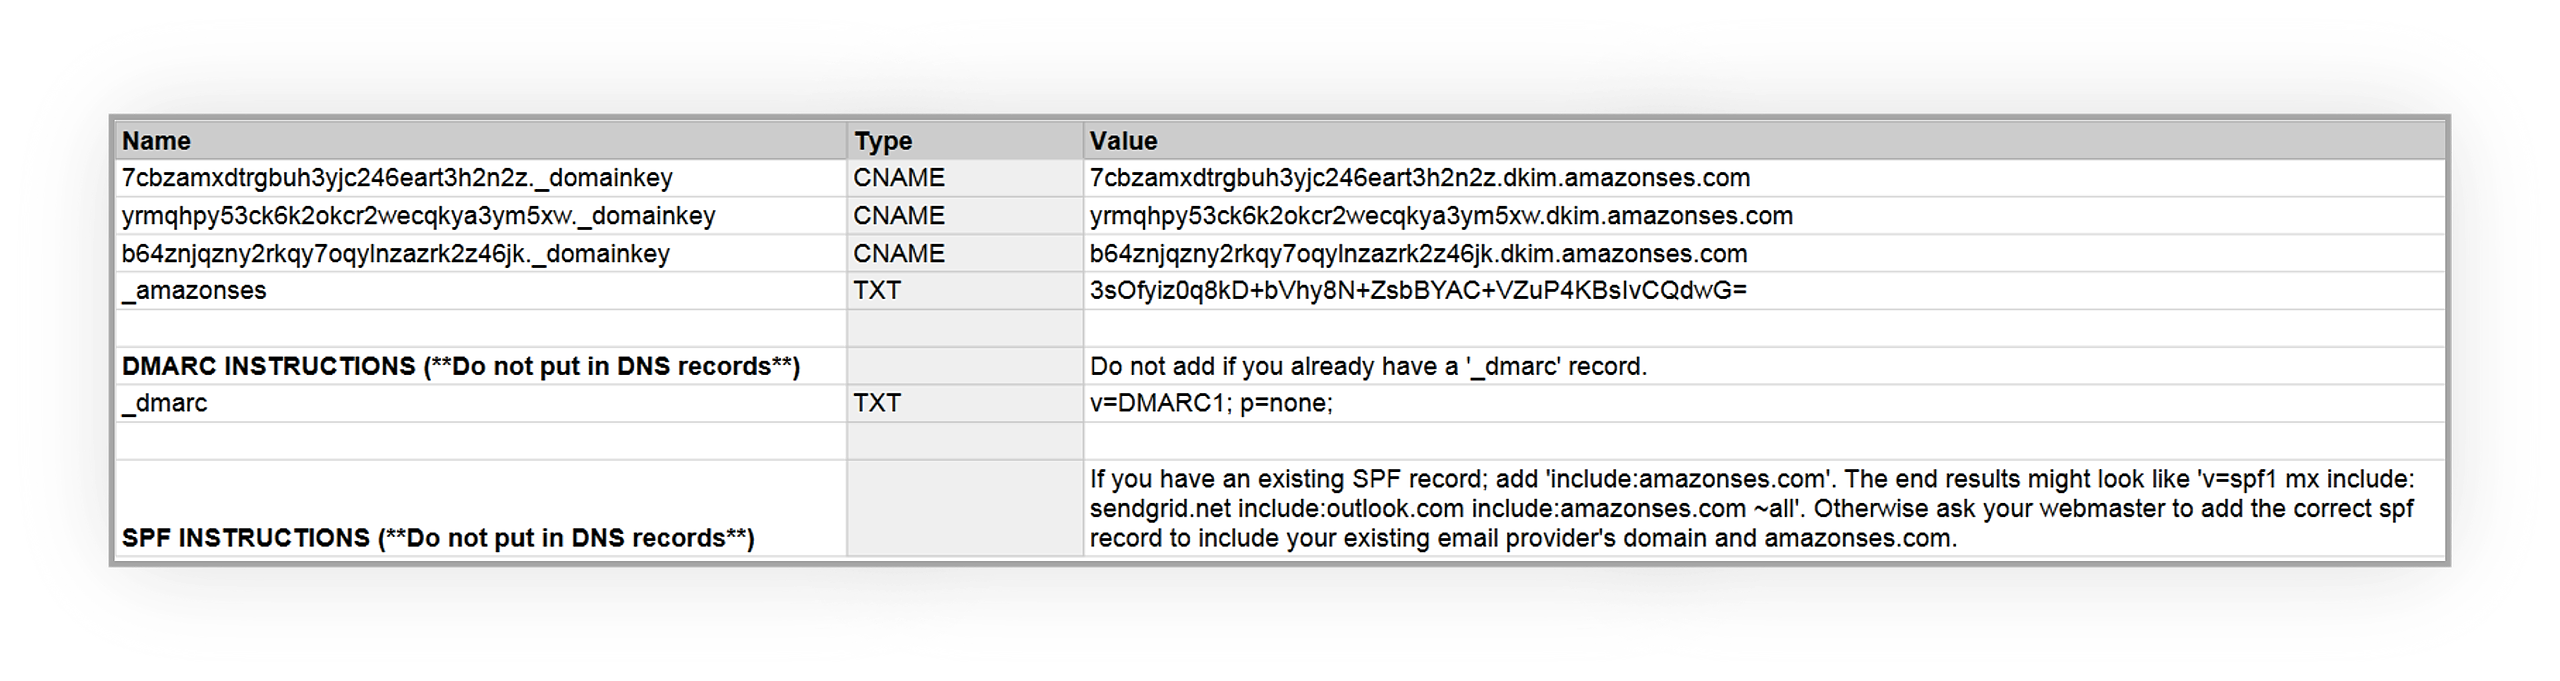
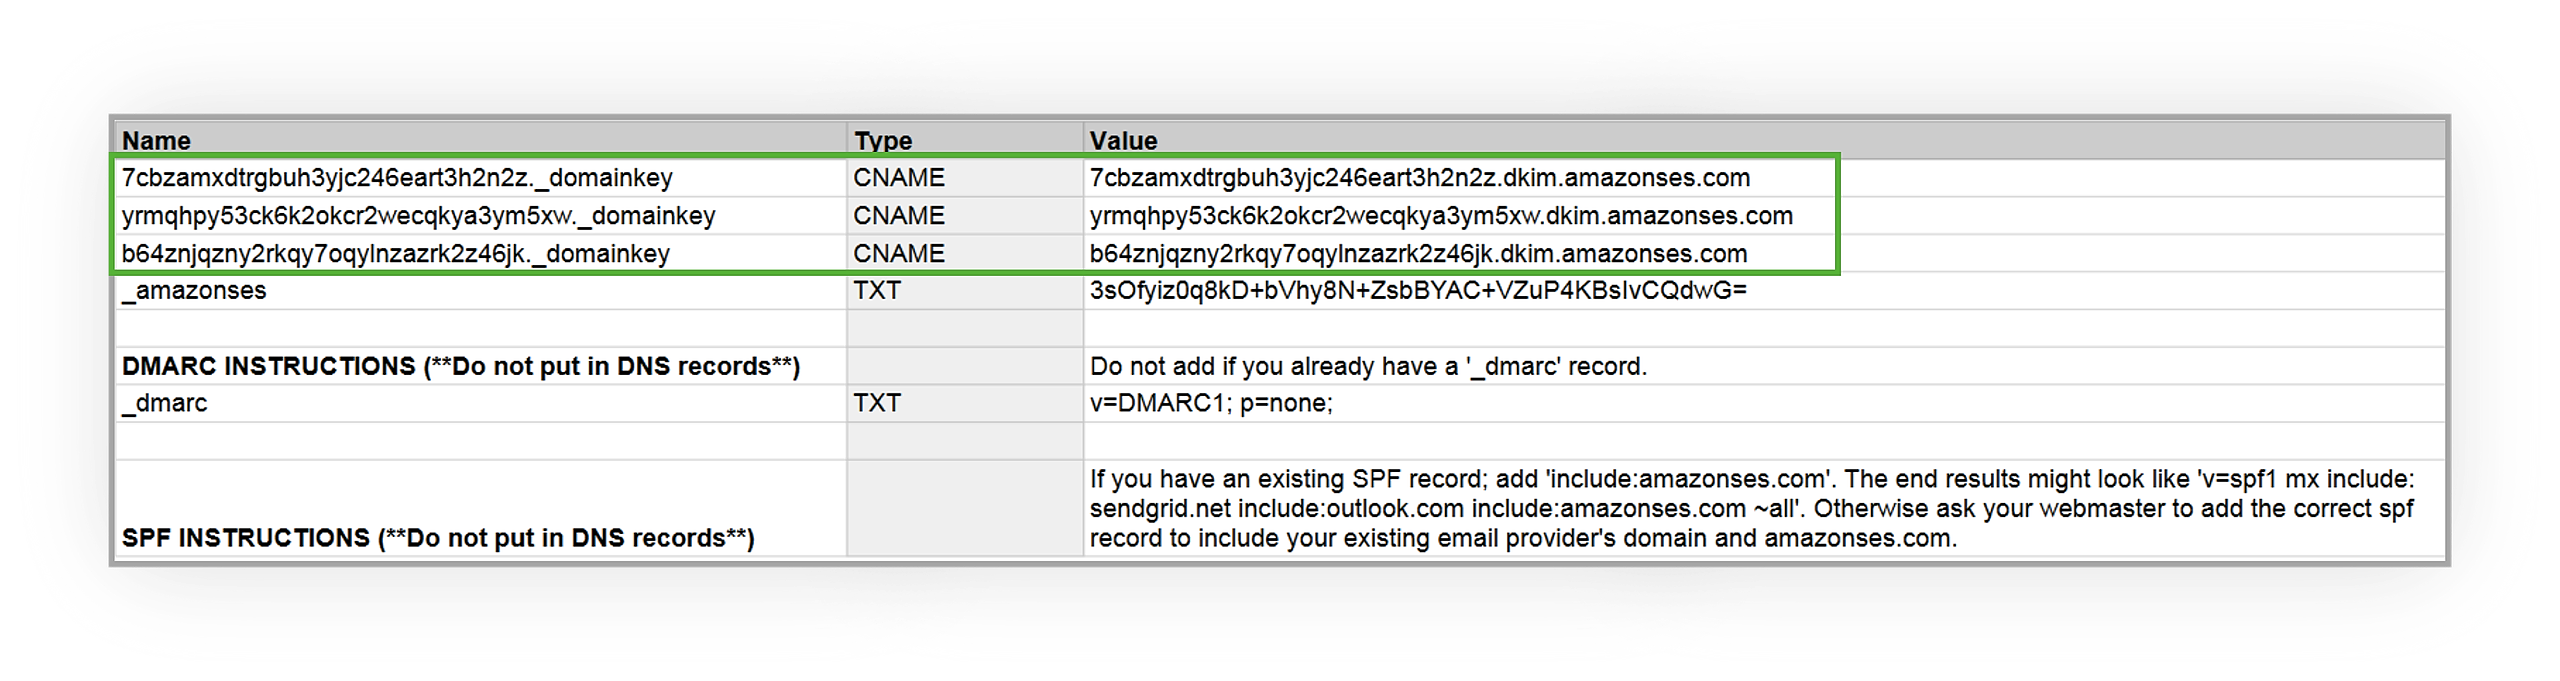
There are three CNAME records in the file we provide to you. You will add/create a new record for each CNAME in the file. Copy the values from the second through fourth row and paste them to the matching fields in your DNS settings.
In the screenshot provided, we highlighted the rows that will be used to create three different CNAME records:
Example of CNAME 1:
- For the “Type” field you will select CNAME.
- For the “Name” field you will enter the unique key provided: 7cbzamxdtrgbuh3yjc246eart3h2n2z._domainkey (this is an example and will be different than the key provided in the file you received)
- For the “Value” field you will enter the unique key provided: 7cbzamxdtrgbuh3yjc246eart3h2n2z.dkim.amazonses.com (this is an example and will be different than the key provided in the file you received)
Example of CNAME 2:
- For the “Type” field you will select CNAME.
- For the “Name” field you will enter the unique key provided: yrmqhpy53ck6k2okcr2wecqkya3ym5xw._domainkey (this is an example and will be different than the key provided in the file you received)
- For the “Value” field you will enter the unique key provided: yrmqhpy53ck6k2okcr2wecqkya3ym5xw.dkim.amazonses.com (this is an example and will be different than the key provided in the file you received)
Example of CNAME 3:
- For the “Type” field you will select CNAME.
- For the “Name” field you will enter the unique key provided: b64znjqzny2rkqy7oqylnzazrk2z46jk._domainkey (this is an example and will be different than the key provided in the file you received)
- For the “Value” field you will enter the unique key provided: b64znjqzny2rkqy7oqylnzazrk2z46jk.dkim.amazonses.com (this is an example and will be different than the key provided in the file you received)
Creating The TXT Records
On your DNS settings page, select the option to add/create a new record. We will be creating two TXT records: one for the _amazonses record and another for the _DMARC record.
The _amazonses TXT Record: For example, as seen in the screenshot provided we highlighted the row that needs to be used to create the _amazonses TXT record. You will copy the unique keys we provided and paste them into the matching fields in your DNS settings.

- For the Name field, you will enter _amazonses
- For the Type field, you will select TXT
- For the Value field, you will enter the unique key provided in the value column of the CSV: 3sOfyiz0q8kD+bVhy8N+ZsbBYAC+VZuP4KBsIvCQdwG= (this is an example and will be different than the key provided in the file you received)
The _DMARC TXT Record: If a _DMARC record is already included in your domain's DNS settings, you do not need to add the one provided in the CSV file, just ensure that the single _amazonses record is added. The following are steps if a _DMARC record is not yet present in your domain's DNS and needs to be added.
For example, as seen in the screenshot provided we highlighted the row that needs to be used to create the _dmarc TXT record. You will copy the unique keys we provided and paste them into the matching fields in your DNS settings.
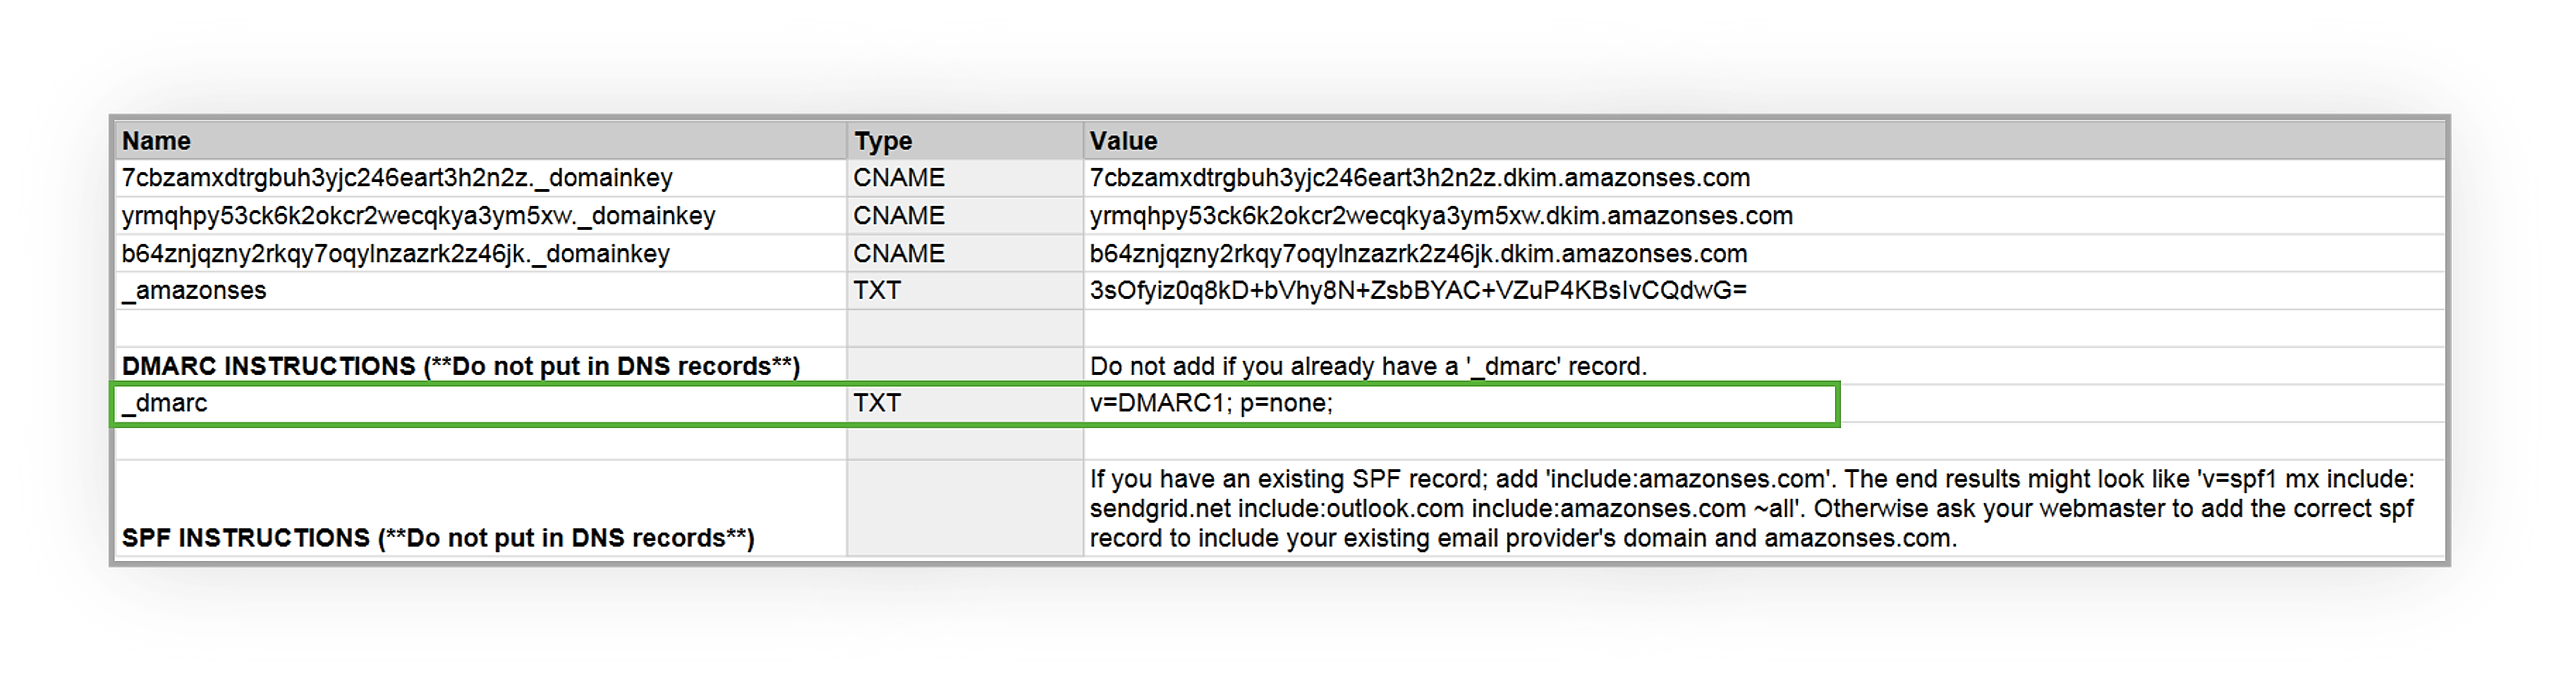
- For the Name field, you will enter _dmarc
- For the Type field, you will select TXT.
- For the Value field, you will enter v=DMARC1; p=none;
** Once you've added these records, please inform us so we can monitor the verification process.
Note: The domain verification process might take up to 72 hours
---
Grant Delegate Access Provider Instructions: If you are having trouble updating your DNS records, you can grant us delegate access to the Domain management system.
|
Access Level: Tech You will send the invite to dev@wiseagent.com. |
|
| Dreamhost: | Account Privileges: Domains You will send the invite to dev@wiseagent.com. |
|
|
GoDaddy: |
You will send the invite to dev@wiseagent.com. |
|
|
Google Domains: |
Please reach out to our support team for which email delegate access will need to be given to. |
***Once we have verified your domain, please remember to remove dev@wiseagent.com from having delegate access to your domain management system.