

In order to start dialer campaigns using your new Built-in Power Dialer by WAVV you must first add a phone number and verify it within the WAVV Power Dialer settings. Once that number has been added it can be used as your outgoing caller ID and also as the method used to complete your dialing campaigns. In this section will explore how to add a new phone number and verify it for use in your Power Dialer.
ADDING A PHONE NUMBER
-
- Login to the Wise Agent dashboard and click Integrations then click Settings.
- Click the Built-in Power Dialer by WAVV bar to access the Settings icon.
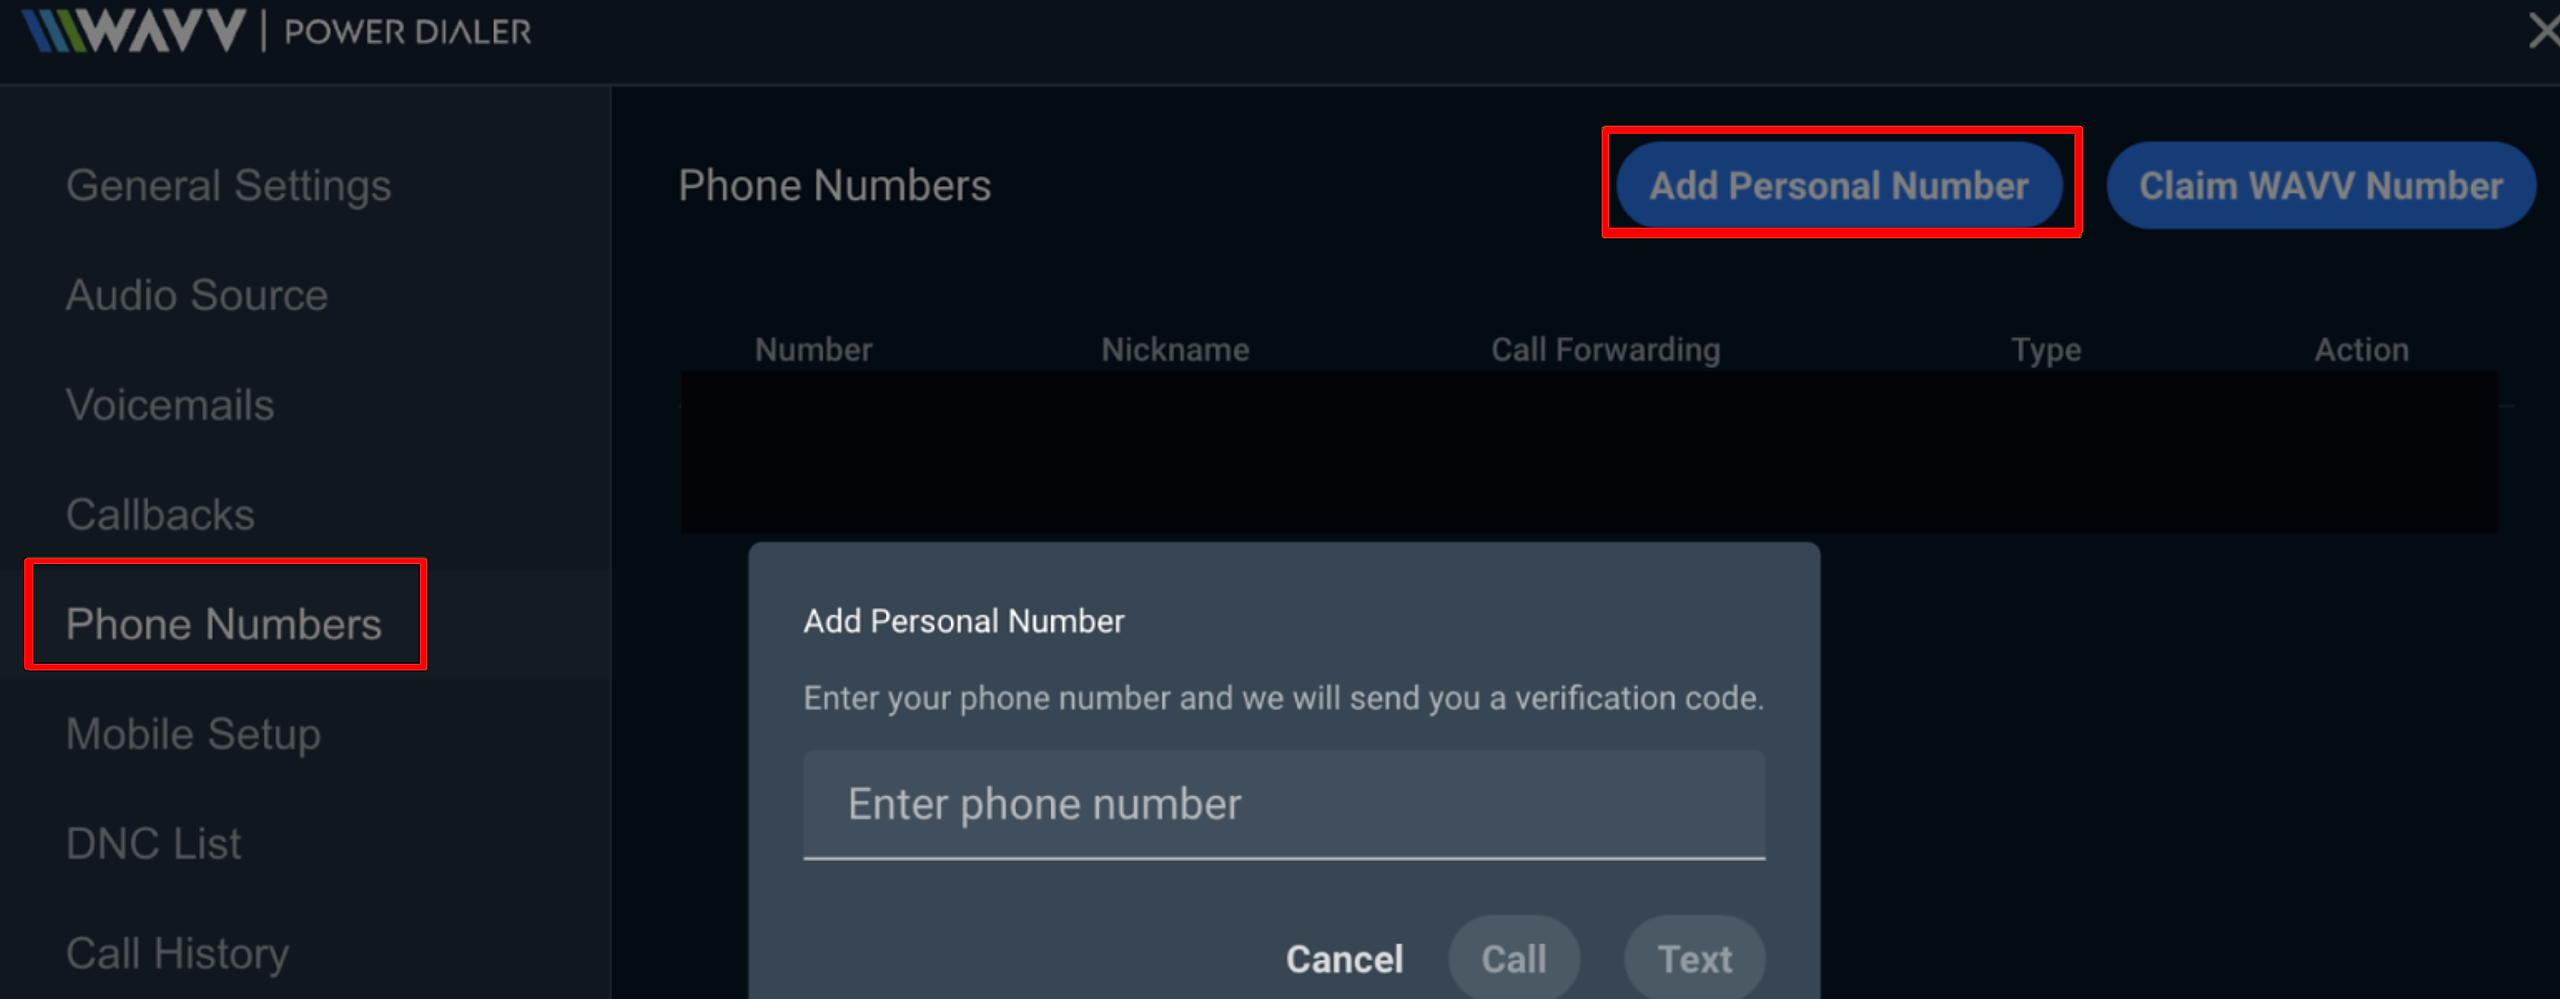
(NOTE: You can also access your WAVV Power Dialer settings from your Call List. Dashboard> Call List> Click the Settings icon next to Start Dialer.) - Click the Phone Numbers tab and then click the blue button labeled Add Personal Number.
- Enter your phone number in the field provided. You will be required to verify your phone number by entering in a 5-digit code. Click Call or Text to have the Power Dialer either call your or text you with your 5-digit pin.
- Once your phone number has been added and successfully verified you can click the pencil icon to add a Nickname to your phone number. (We recommend doing so if you plan to use more than one personal number in your WAVV Settings.)
- Now that you have a Personal Number added, you will also need to claim a WAVV number. Click the blue button labeled Claim WAVV Number.
- Select your desired area code and enter it in the field provided and click Claim Number.
- Once you've created a WAVV Number, make sure to select one of your Personal Numbers in the Call Forwarding pull down menu. (This is to ensure that if someone attempts to call your WAVV Number that call is forwarded to a valid phone number.)
- Login to the Wise Agent dashboard and click Integrations then click Settings.
That's it! Now you have your own WAVV Number and personal numbers stored in your settings. You can now use either of these numbers as the primary outgoing Caller ID number in your General Settings.
MANAGING YOUR PHONE NUMBERS
Once you've added your Personal Number(s) in the WAVV Power Dialer you can manage them in the same place. Below is a breakdown of this section and how you can make changes as necessary.

Number: The Number column displays the phone number.
Nickname: This column displays the custom nickname created to help you manage multiple numbers.
Call Forwarding: This column provides you with the option to have your WAVV number forward calls to another number. (This must be set up if you intend to use the WAVV number as an outgoing caller ID to ensure that the call is forwarded to a valid phone number.
Type: This column displays whether this number is a WAVV number or a Personal phone number.
Action: This column provides you access to the Action icons. Actions include the Edit Pencil, which allows you to add/remove/edit Nicknames and the Trash icon which allows you to delete a number. This option is only available for personal numbers. WAVV numbers cannot be deleted unless you cancel your subscription.
For details on how to Activate your Built-in Power Dialer by WAVV using our default setting recommendations click here.
If you need assistance with setting up your WAVV Dialer please don't hesitate to reach out to the Wise Agent support team by clicking on the Contact Us button or call our office at 480-836-0345. Our amazing support is always happy to help and is available 24/7!