First, make sure you've signed up for a Zapier account. It's free to start!
Obtain Your Wise Agent API Key
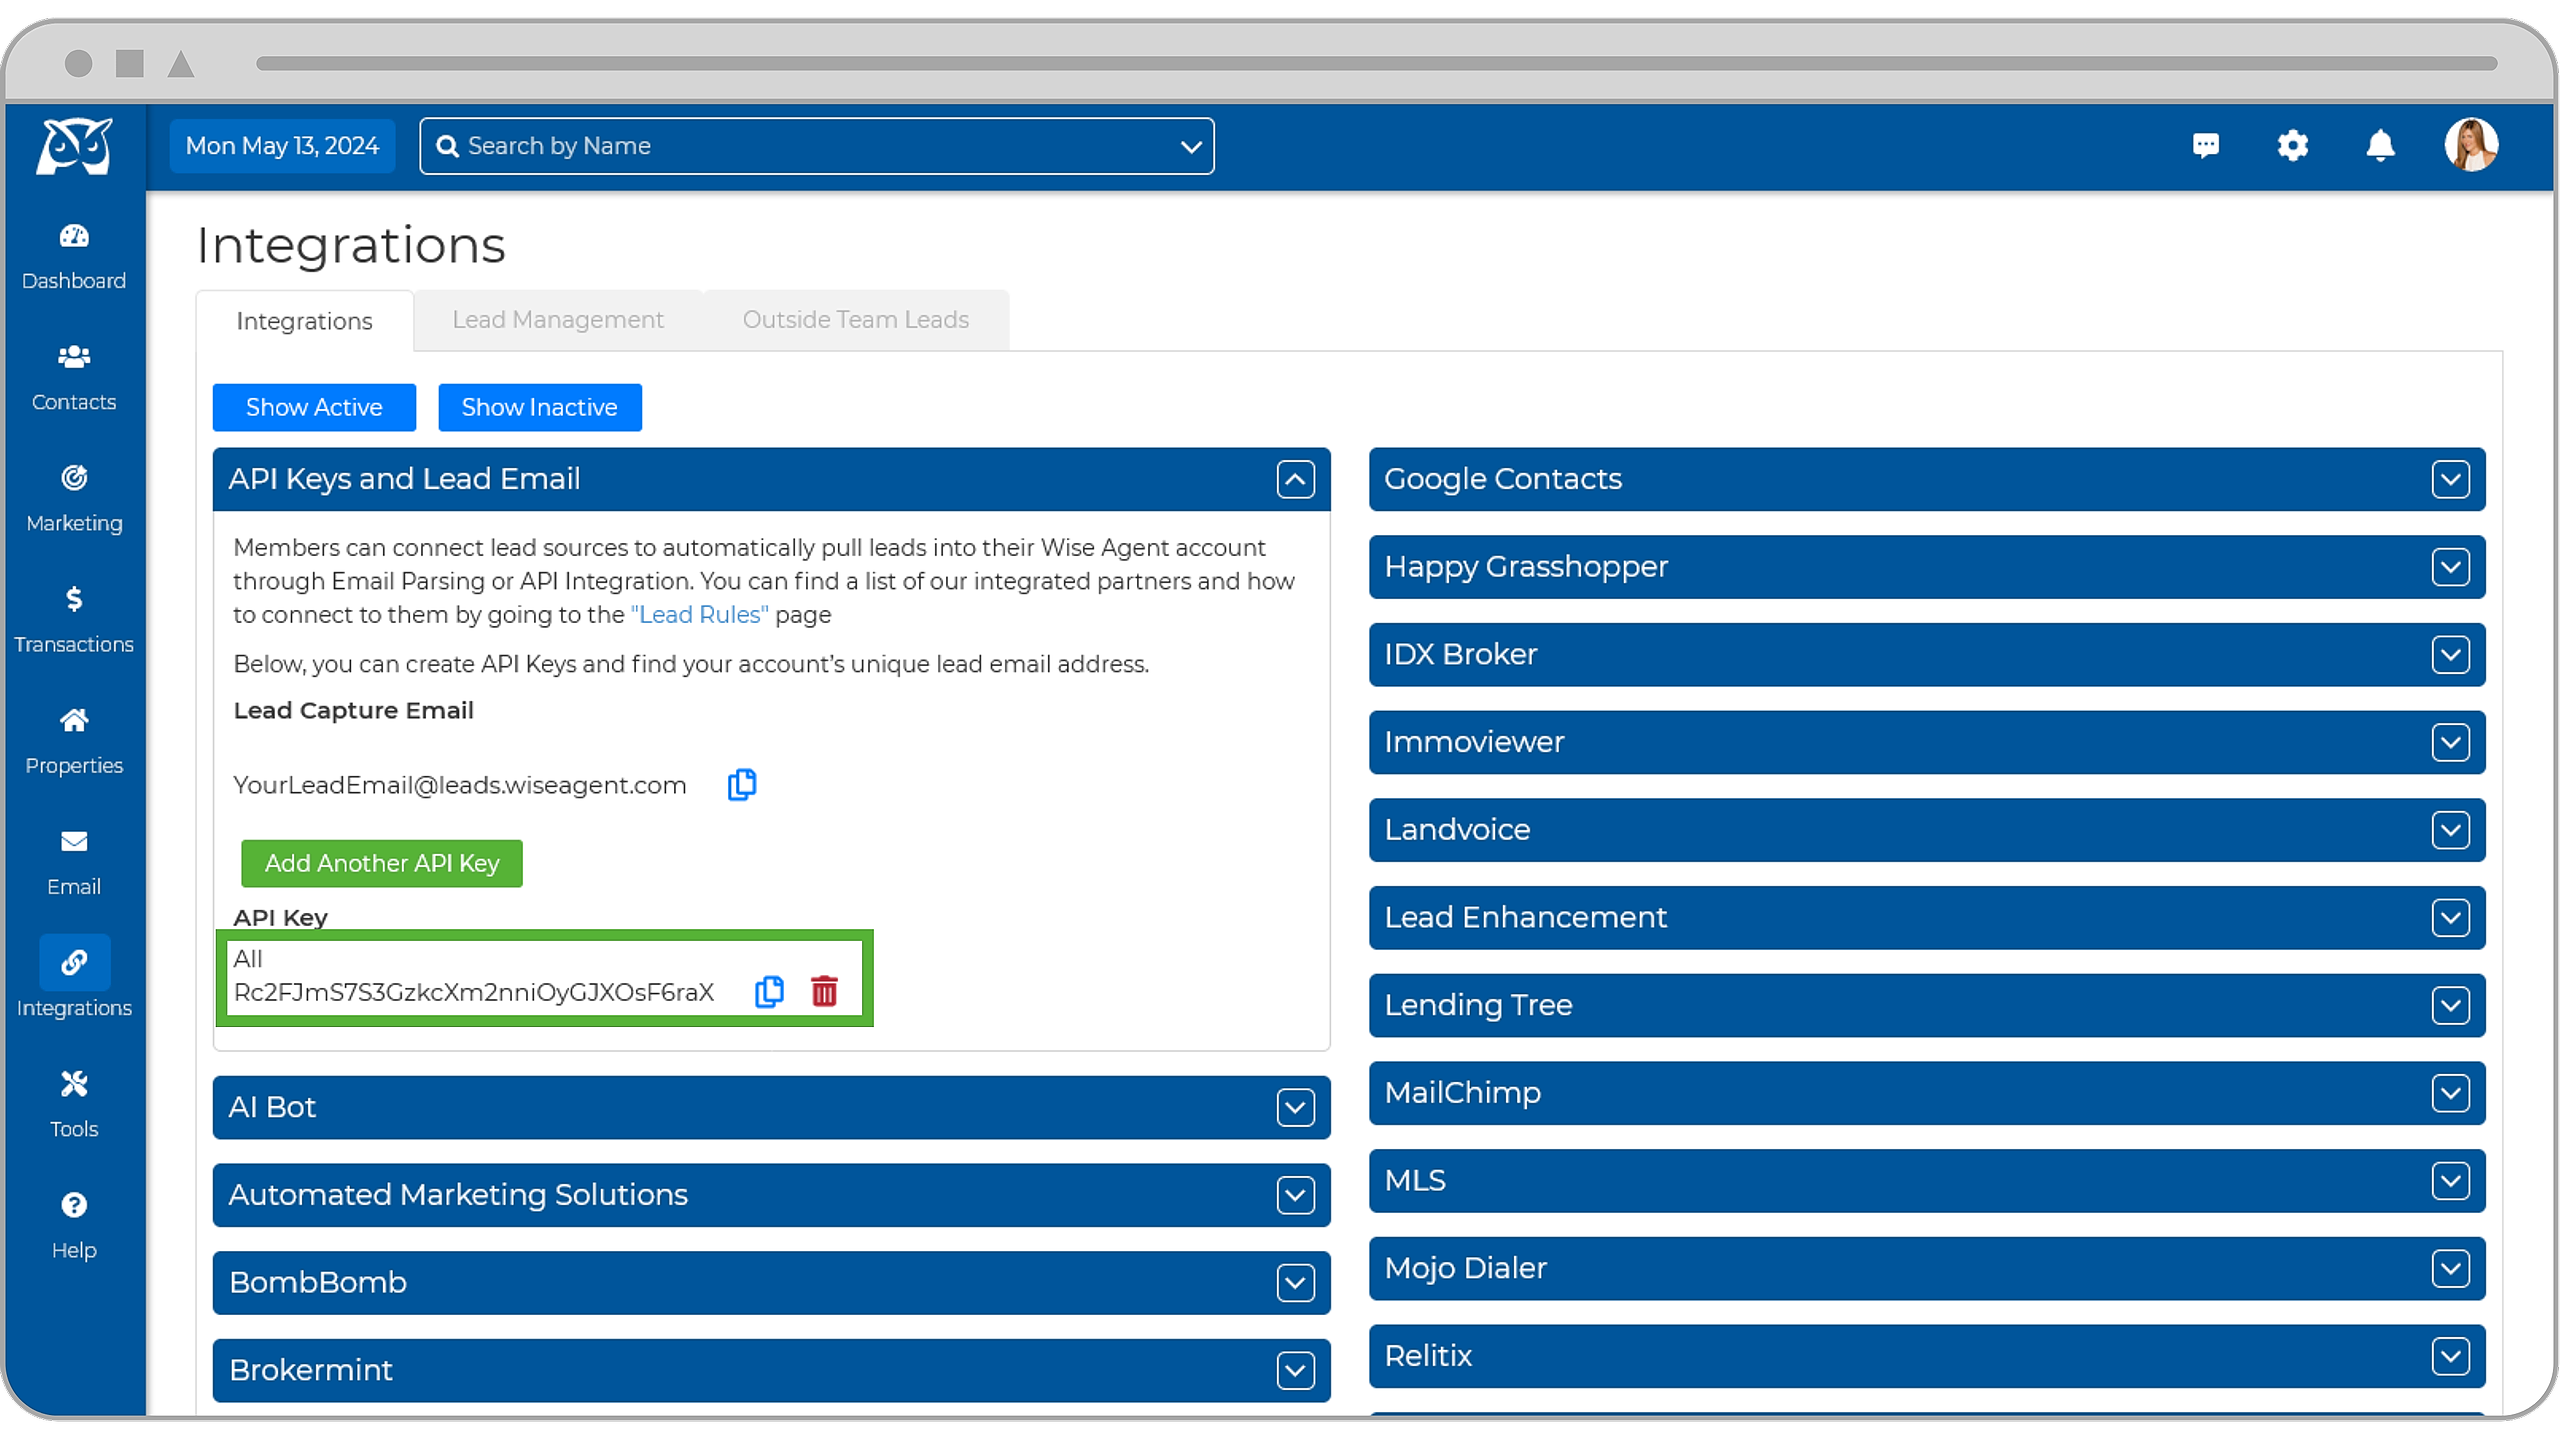
- First, you will need to copy your Wise Agent API key. To find the API key associated with your Wise Agent account, please follow the instructions below:
- Login to your Wise Agent account.
- From the sidebar, select Integrations, then click Settings from the menu.
- On the Integrations Settings page, locate and click on the API Keys and Lead Email tab and click to expand.
- From this section, locate and copy your API Key.
Setting Up a "Trigger"
💡 The Zap editor is where you'll create new Zaps and edit existing ones. Remember: A trigger starts your Zap. (Think of it as the WHEN of any automation.)
Select Your Trigger App & Event
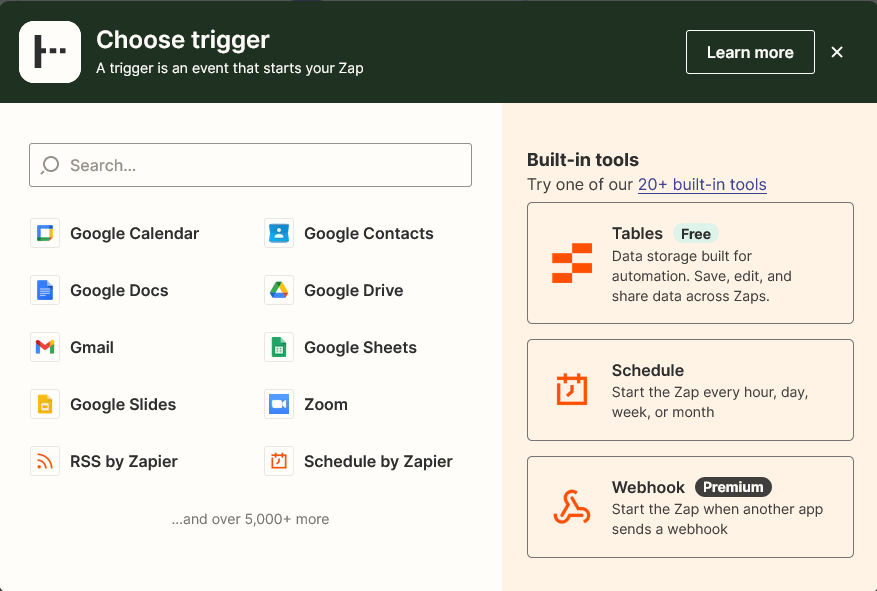
When you open the Zap editor, you'll be prompted to pick an app as your trigger. You'll see the apps you use most frequently, built-in apps from Zapier, and popular apps. You can select from one of these, or look for the app you want to use in the search bar.
This is where you will want to search for the platform that you wish to be integrated with Wise Agent!
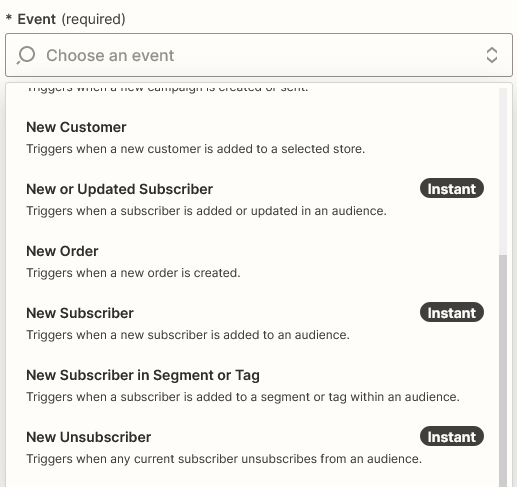
Next, you'll be asked to choose a trigger event
This is the event that happens in your trigger app that signals Zapier to start your Zap. In this case, it's when a new form entry comes into our form app. Since this integration can only add new leads to Wise Agent, it is advised you select an event that pulls contact information (I.E. new subscriber, new attendee, incoming lead, etc.)
💡 Trigger events vary between different apps and app types. For example, a task management app might have New Task as a trigger, while a spreadsheet app could have Create New Row.
Connect to Your App Account & Customize Your Trigger Event
You'll be prompted to sign into your app account if you haven't connected it before. Once you've connected your app, select the account you want to use with your Zap. For each app you connect, Zapier will ask for a general set of permissions which allows you to be flexible with your Zaps. The only actions Zapier takes on your app accounts are those a given Zap needs to accomplish what you've set up.
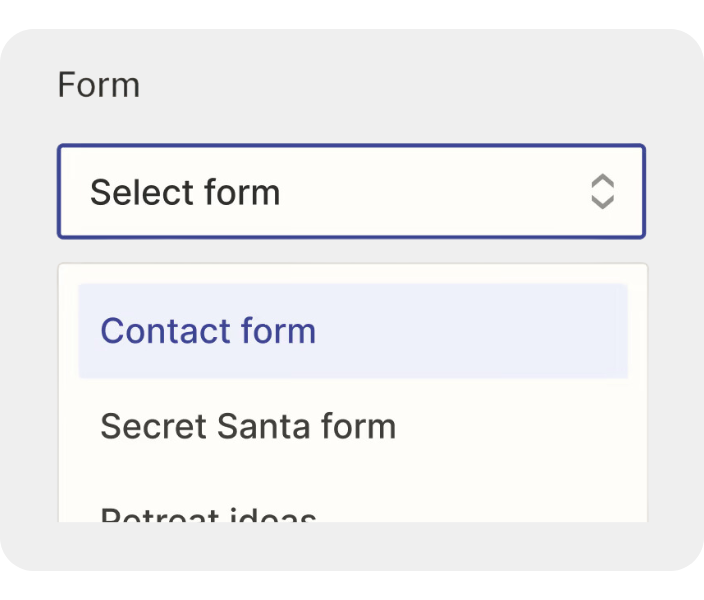
Next, you'll customize your trigger event. Click the dropdown menus in this step to select the right options. In this case, we need to select the specific form we want to trigger our Zap.
💡 Customizing your trigger event will look different, depending on your trigger app. Sometimes, you might not need to do any further customization.
Test Your Trigger
Once you've set up your trigger, you need to test it to ensure it works. When you click Test trigger, Zapier will look for data that already exists in your trigger app account and pull that information into the Zap editor. That means you need to have one real instance of your trigger so Zapier can use it as a "sample submission."
We need at least one form submission to already exist in our form app in order for Zapier to use it as a "sample submission." Zapier pulls in the last form submission that our form app received. If a submission doesn't exist yet, try submitting a form before testing your trigger.
Setting Up The "Action"
💡 The action is the DO part of your automation. Actions are the events you want your Zap to perform after your trigger occurs. Without an action, you don't have a complete Zap. Wise Agent can only be an ACTION; This is where you will want to select 'Wise Agent'.
Select Your Action App and Event
Just like you did with your trigger, select your action app—this time by clicking the dropdown menu and searching for your app. Once you've selected your app, choose your action event—which is what you want your Zap to do
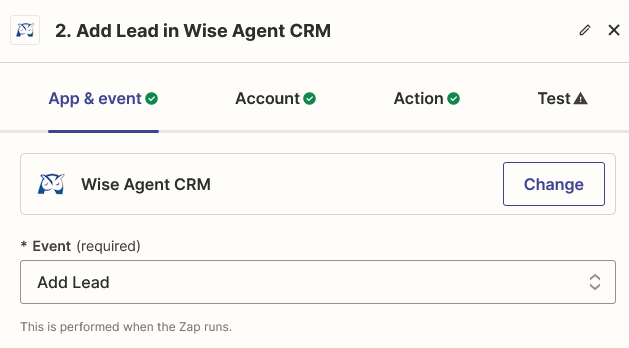
This is where you will want to select Wise Agent! Once selected, you will want to choose the action event "Add Lead".
Connect Your Wise Agent Account
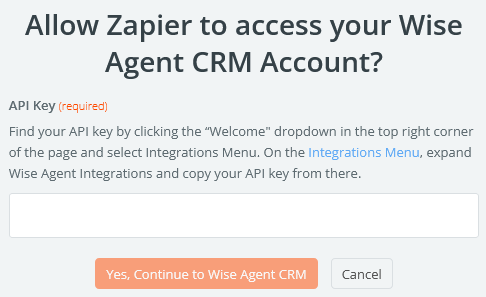
Next, you'll be prompted to sign in to your Action app account if you haven't connected it before. Here, you will want to enter your Wise Agent API key!
Mapping The Fields
💡 Next, the Zap editor will prompt you to further customize your action event. You will usually see Customize [action event] in the editor. Zapier separates the data that comes in from your trigger event into individual pieces, which can then be used in your action fields. In order to get your information from App A to App B, you need to tell Zapier what information from your trigger app should be sent to which place in your action app. We call this "mapping" those fields.
Filling Out The "Step Details"
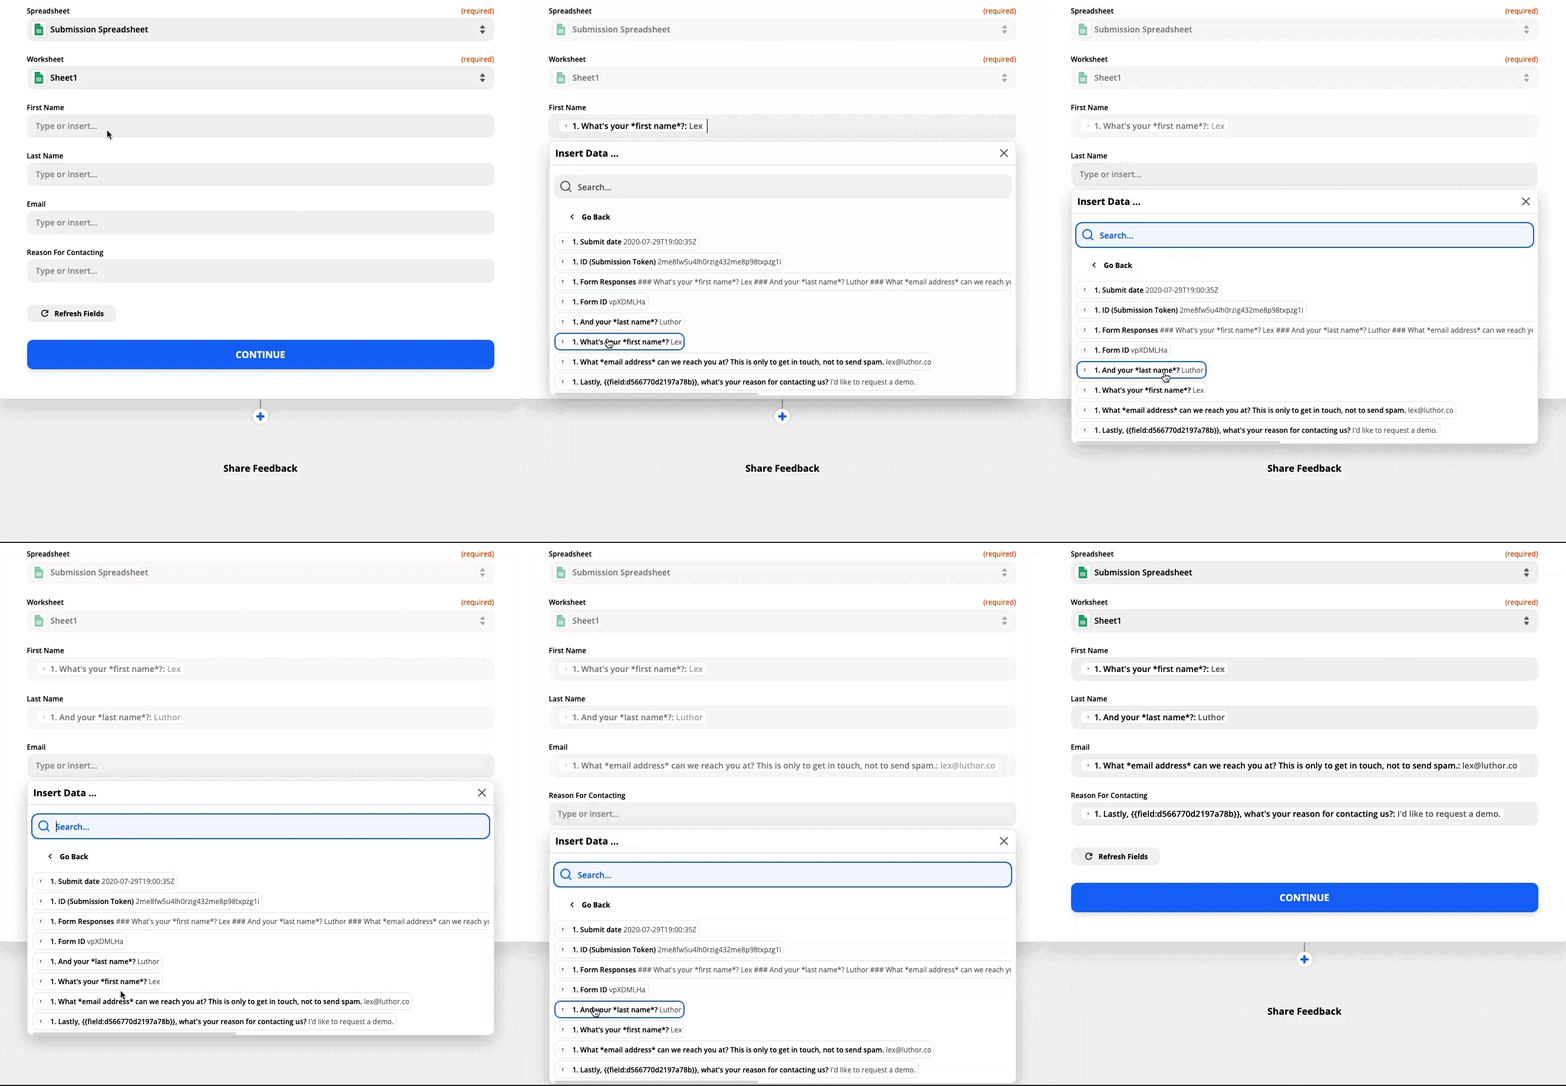
If you want to use information from your trigger app, click an empty field (where you see "Type or insert…") within your action step. A dropdown menu will appear with pieces of data from your trigger app.
Then, select the information you want to add to each field. Think of it like multiple choice: You can select one option or several, and can add custom text. And unless a field is labeled "required" in red, you don't have to add an option.
When you map a piece of data—such as a contact name—what you see in the editor is a placeholder. This placeholder data will only be used by your Zap when you test it. When your Zap is turned on, real data from your apps will be used when your Zap runs.
For Example, we see the name “Lex Luthor” appear when we map it to a field in the Zap editor, as that was the contact name we entered in the test form submission. When the Zap runs, the name of the person who submits the form will be used instead.
If you want the same information to be used in a particular field every time a Zap runs, you can enter text instead.
💡 Important to Note: For the "Source" field, delete 'Zapier' and type the name of the connected trigger. This way, the member can easily distinguish where these leads came from within their Wise Agent account, & set up different lead rules for various other connected lead sources connected via Zapier!
Testing The Zap
After you've set up your action, it’s time to test your Zap. When you click Test & review, Zapier will test your Zap by performing the action, according to how you've mapped your fields in your action step. You'll see a preview of the action your Zap completed, but it's always good practice to check the connected Wise Agent account to ensure the lead adds to their contacts and the fields are accurately mapped.
If something doesn't look right, make any changes you need in the Zap editor and test your Zap again. Once you're happy with how your Zap works, click Turn on Zap.
Now that your Zap is up and running, it will automate tasks on your behalf! Remember, every action your Zap successfully completes is called a task. Tasks are always associated with successful actions.


