DocuSign is an integrated partner with Wise Agent that provides electronic signature technology and digital transaction management services to facilitate electronic exchanges of contracts and signed documents. Features include authentication services, user services, user identity management, and workflow automation.
Our integration with DocuSign allows members to upload contracts and documents to a Transaction Checklist, which can then be sent from within Wise Agent through Docusign to the recipient for electronic signing. Once signed, you can select to re-attach the signed document to the Transaction Checklist. You can also attach envelopes within Docusign to a Transaction Checklist in Wise Agent.
How to activate:
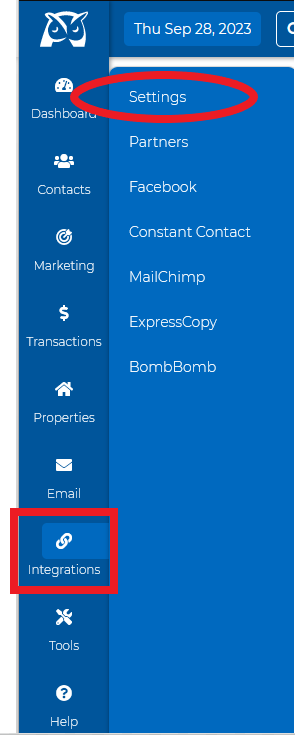
1. Click Integrations on the side navigation bar, then click on Settings.
2. Click on the arrow-down button under DocuSign, and click on Activate. You then need to fill in your DocuSign credentials to log in.
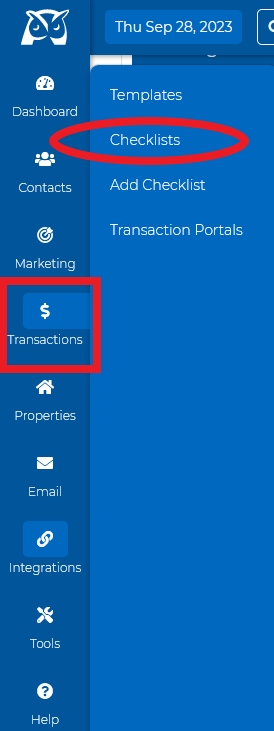
3. Go to the Transactions on the side navigation bar > Checklists.
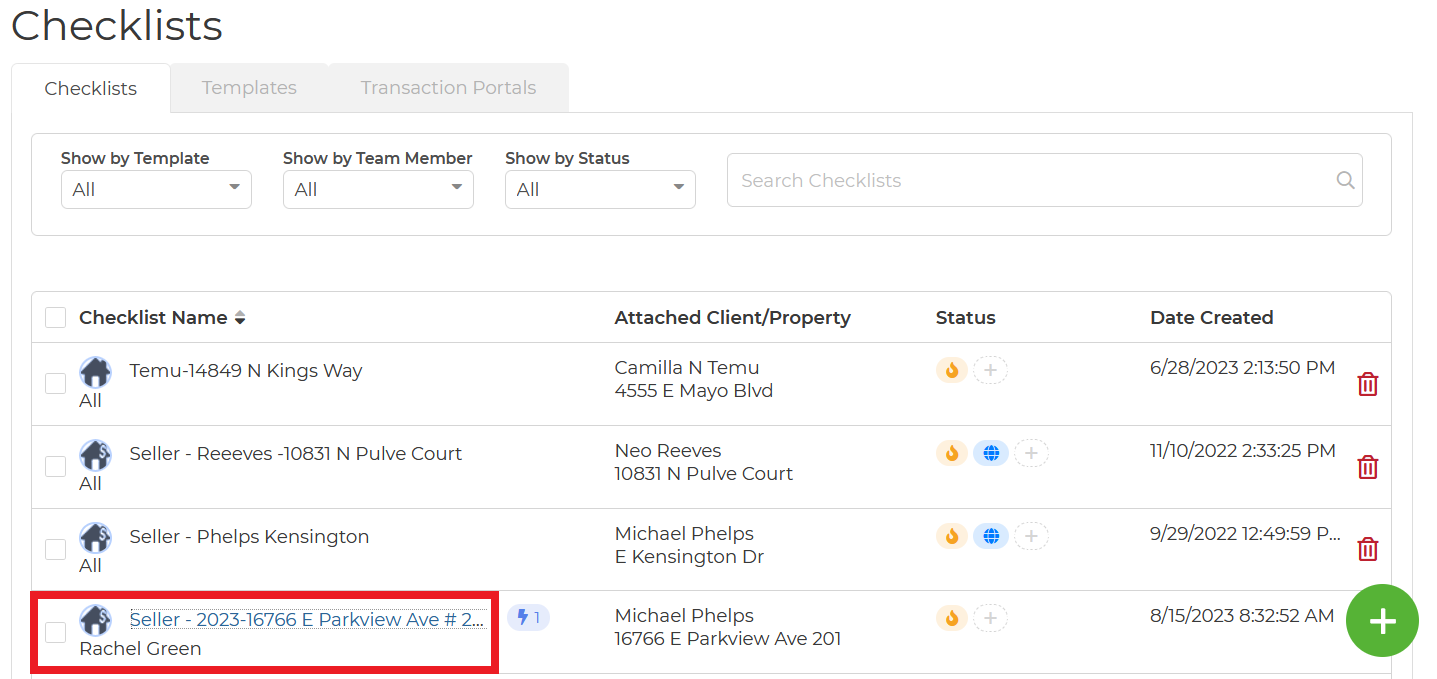
4. From the main Checklist page, select the checklist with the file you want to send.
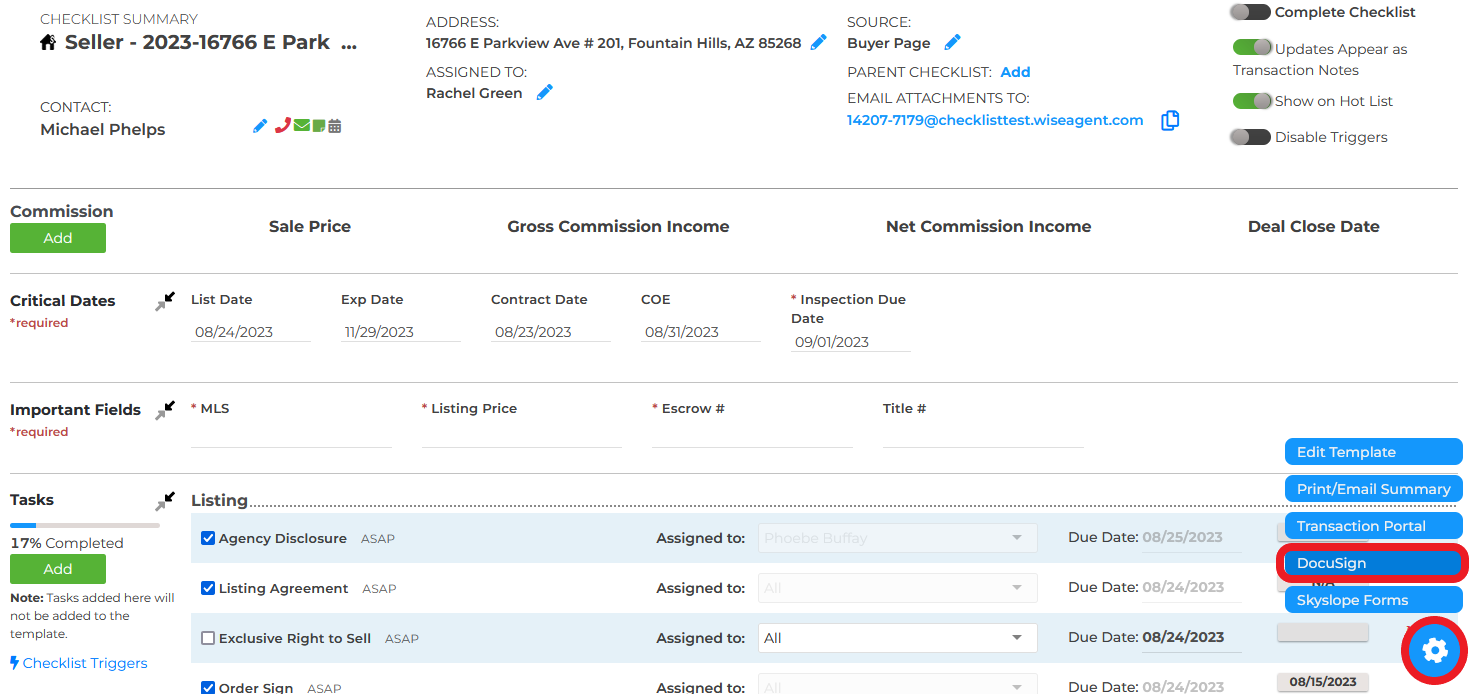
5. Once you have selected the checklist, click the gear icon in the bottom right corner of the web page and select DocuSign.
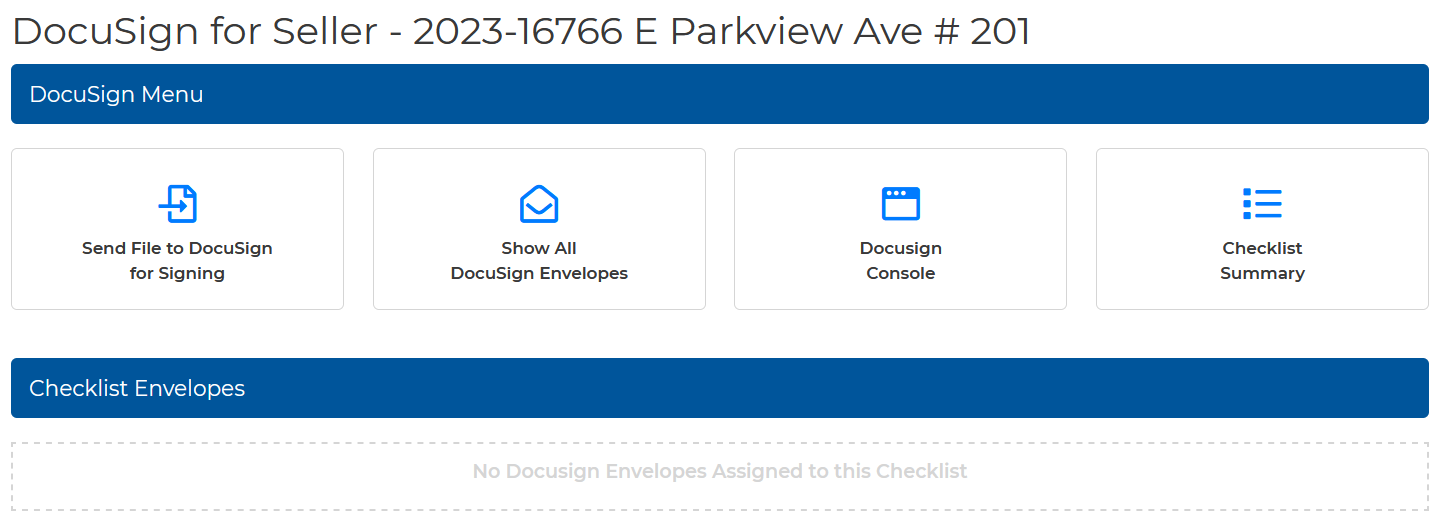
6. You will then be routed to the DocuSign menu where you have the options to "Send the file to DocuSign for signing," "Show all documents envelopes," have access to the "DocuSign Console," and back to your "Checklist Summary."
7. You will also see the statuses of the envelopes you have sent in the past.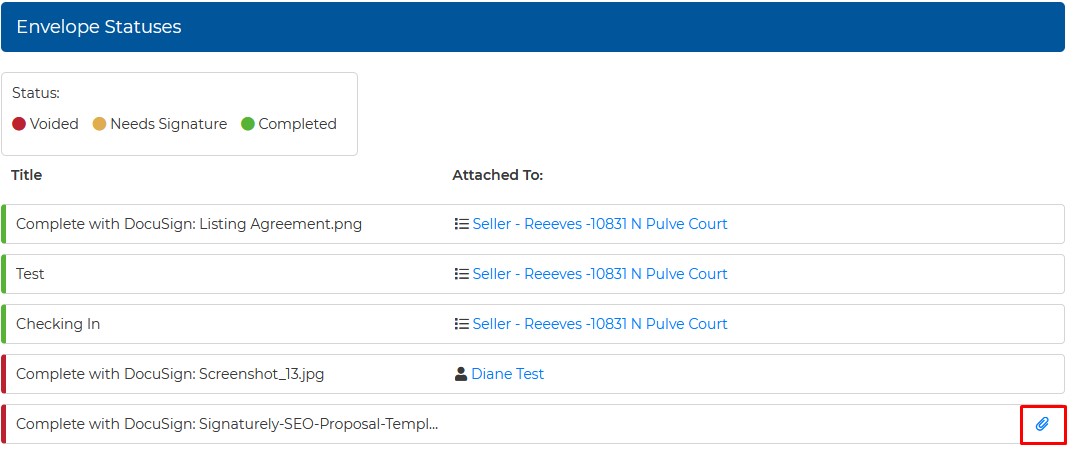
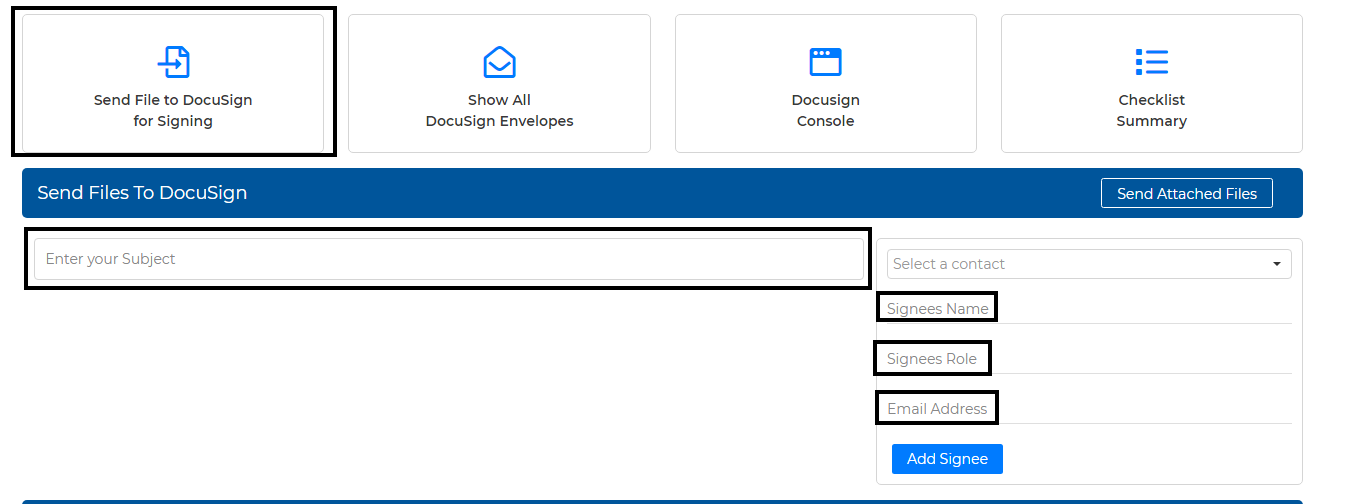
- Put on the subject line for the email being sent with the document
- Fill in the signee's name and role in the transaction and the signee's email address where the document will be sent.
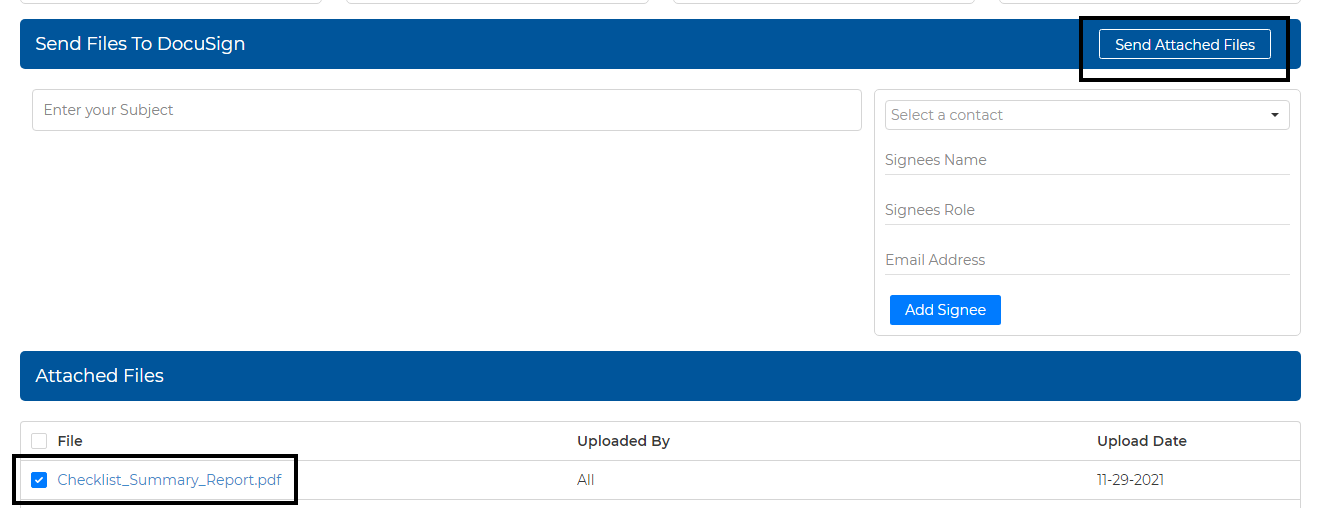
- You can then select your file and click on the "Send attached file" button, It will be directed to the DocuSign
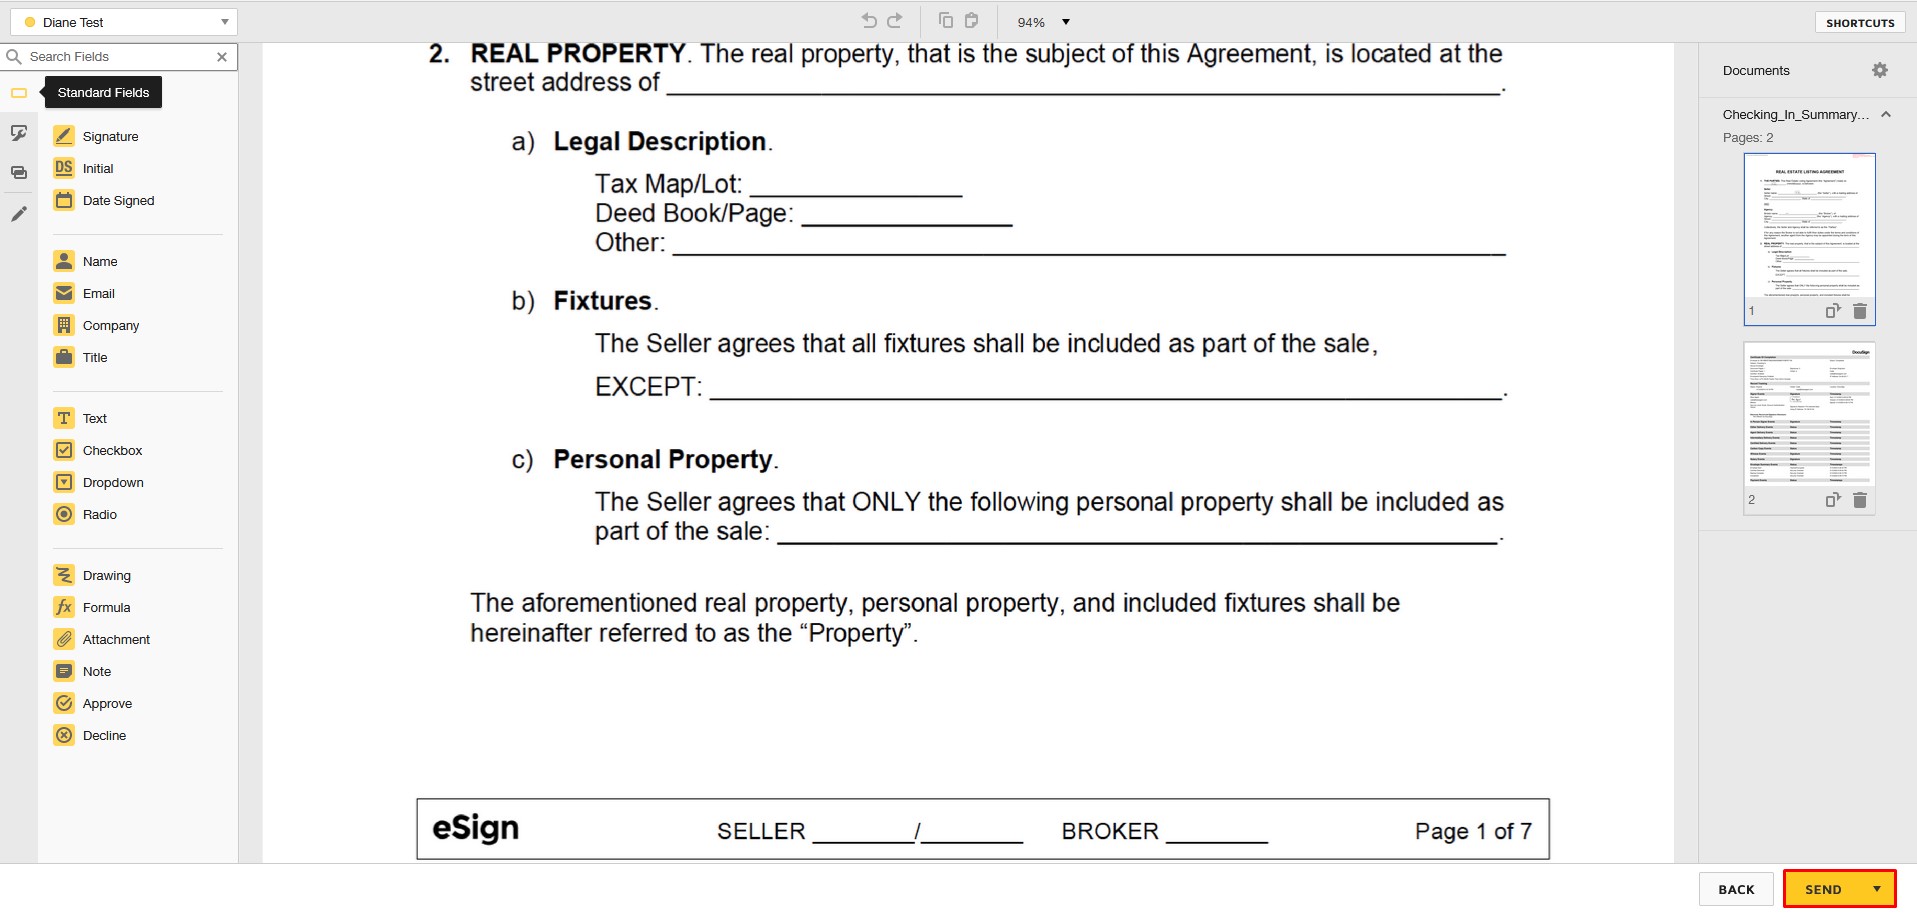
- On the DocuSign page, you can add any body of text you would like to email with your documents.
- You can also add fields to your document before sending it, such as signature, initial, date signed, a dropdown, etc.
- After adding the additional fields, you can click on the "PREVIEW" button to see if it's good to go, then press the "SEND" button.
- Once the document has been signed, the status will turn to green. You can then download it and attach it to your checklist.
- To do so, go back to your DocuSign account, then from the 'completed" envelope section, it will show that the document is completed. You can then click on the download button, and the signed document will download to your computer
- Go back to your checklist summary page and upload the completed document to your checklist.
Here is a video tutorial that goes over this feature:


