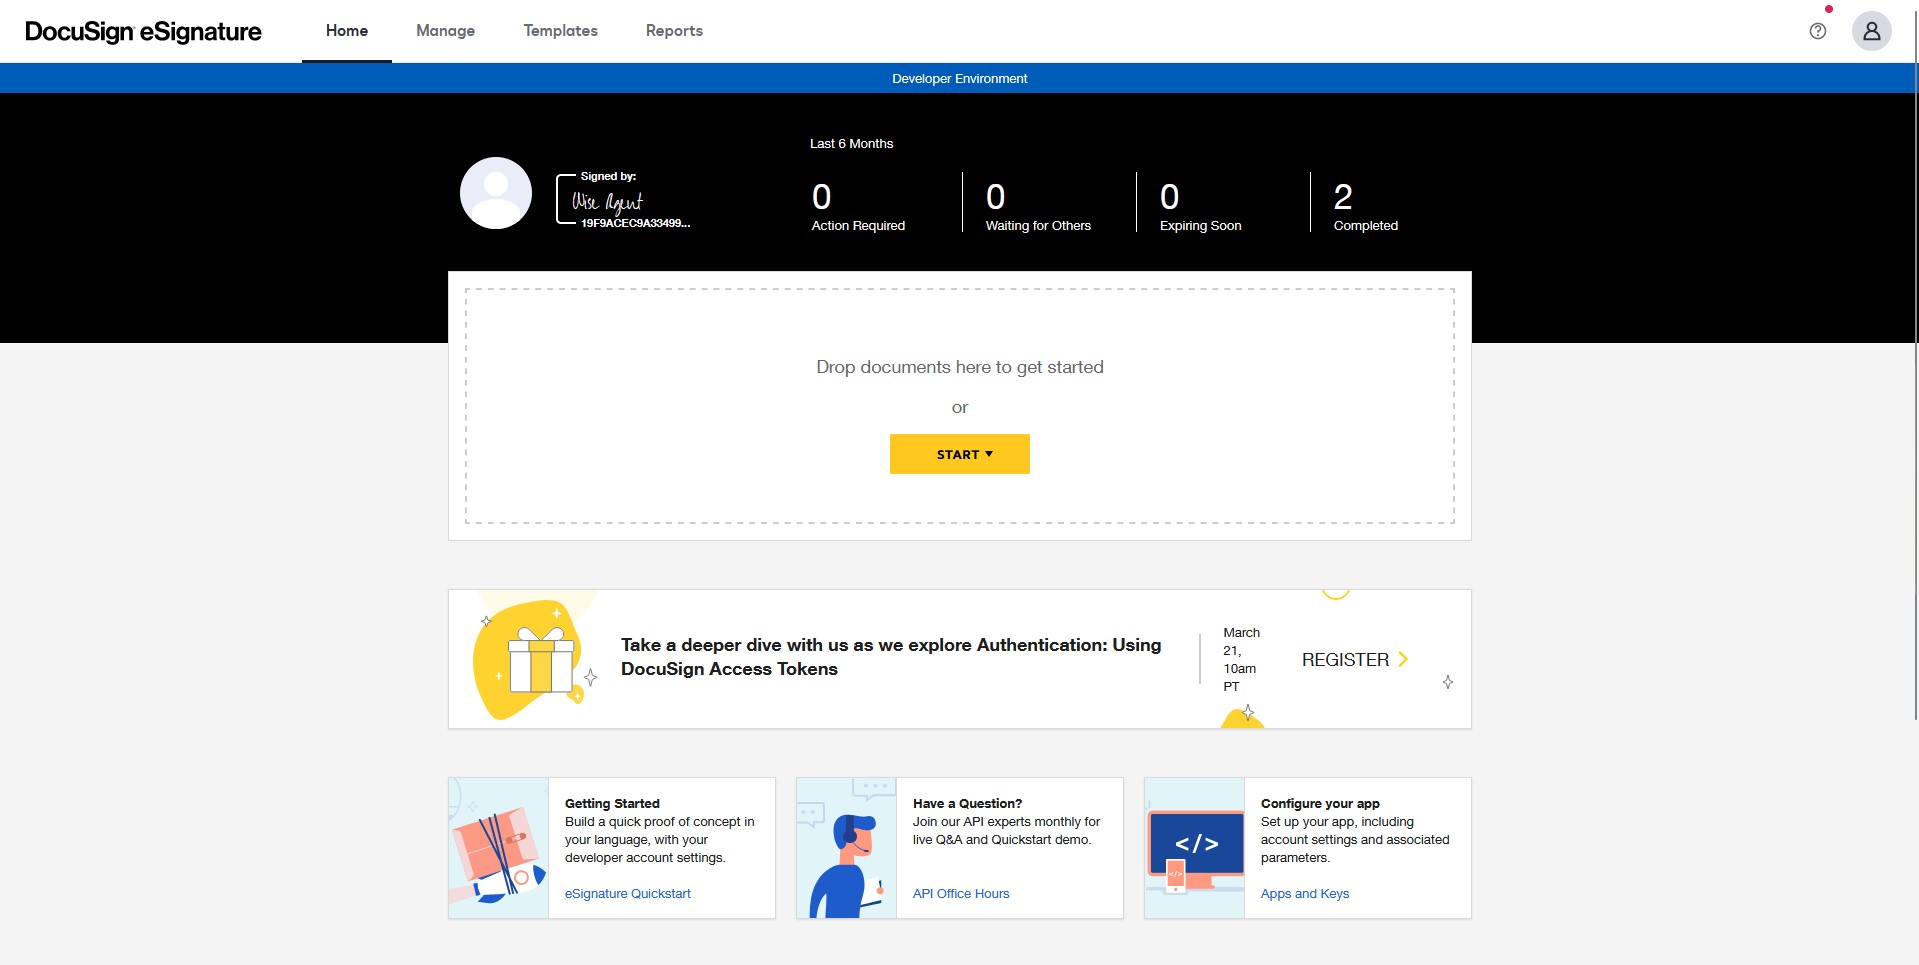
DocuSign allows you to send forms for signature quickly. You can now access DocuSign from within your Wise Agent.
Follow the steps below on how to activate this integration:
1. Go to Integrations > Settings.
2. Go to DocuSign and click on Activate.
3. It will then open a new tab taking you to the DocuSign login page. If you do not have a DocuSign account, you must register first. Once logged in, it will bring you back to your Wise Agent account.
How to send the attached files to DocuSign for signing (Contact/Client)
1. Go to the Contacts drop-down, then Contact List.
2. Click on the Contact's name.
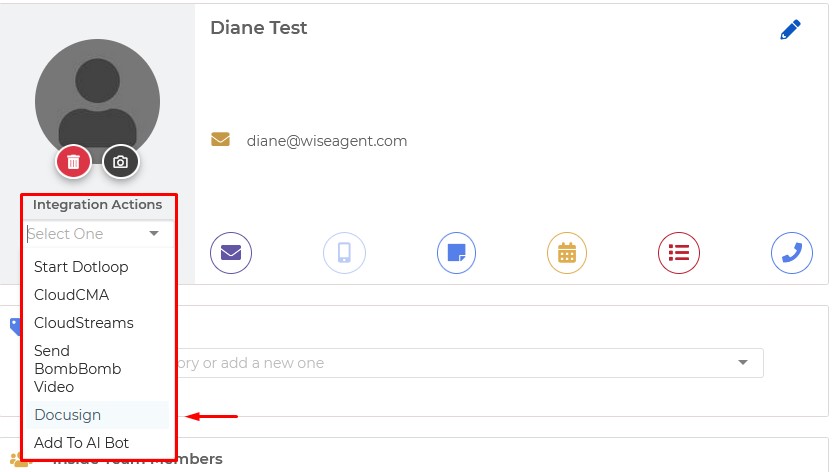
3. Go to the Integration Actions drop-down, and select DocuSign.
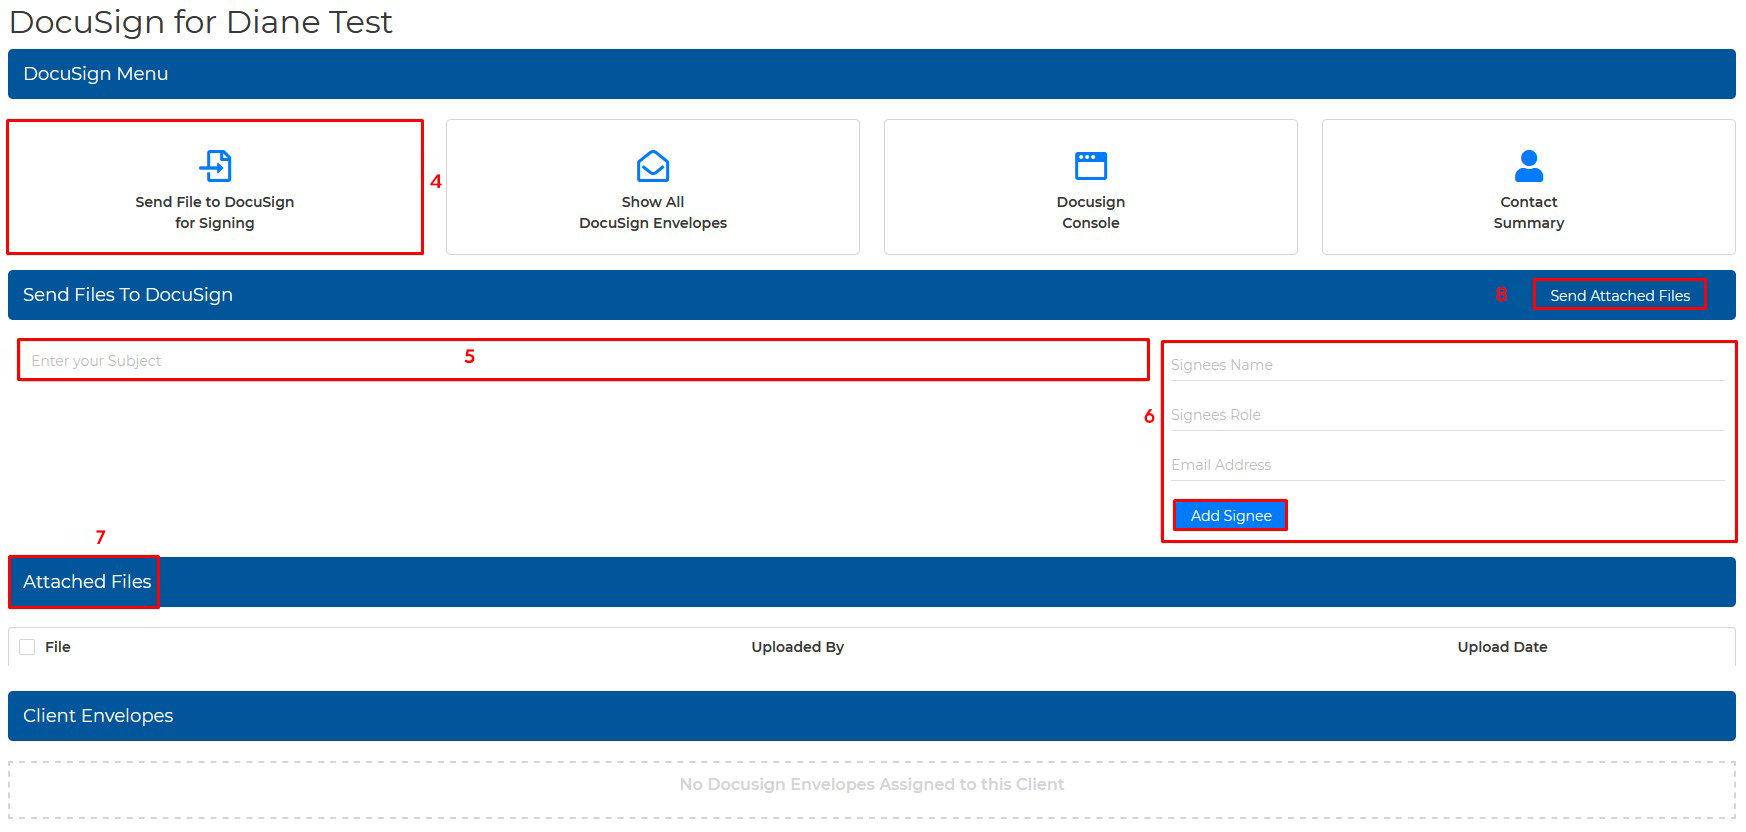
4. Click on the "Send File to Docusign for Signing" button
5. Enter the subject of the email/envelope name.
6. Enter the Signee's Name, Role, and Email Address, then click the "Add Signee" button. You may also add an additional signee.
7. Select one or multiple files from the Attached Files section.
8. Click Send Attached Files in the upper right corner.
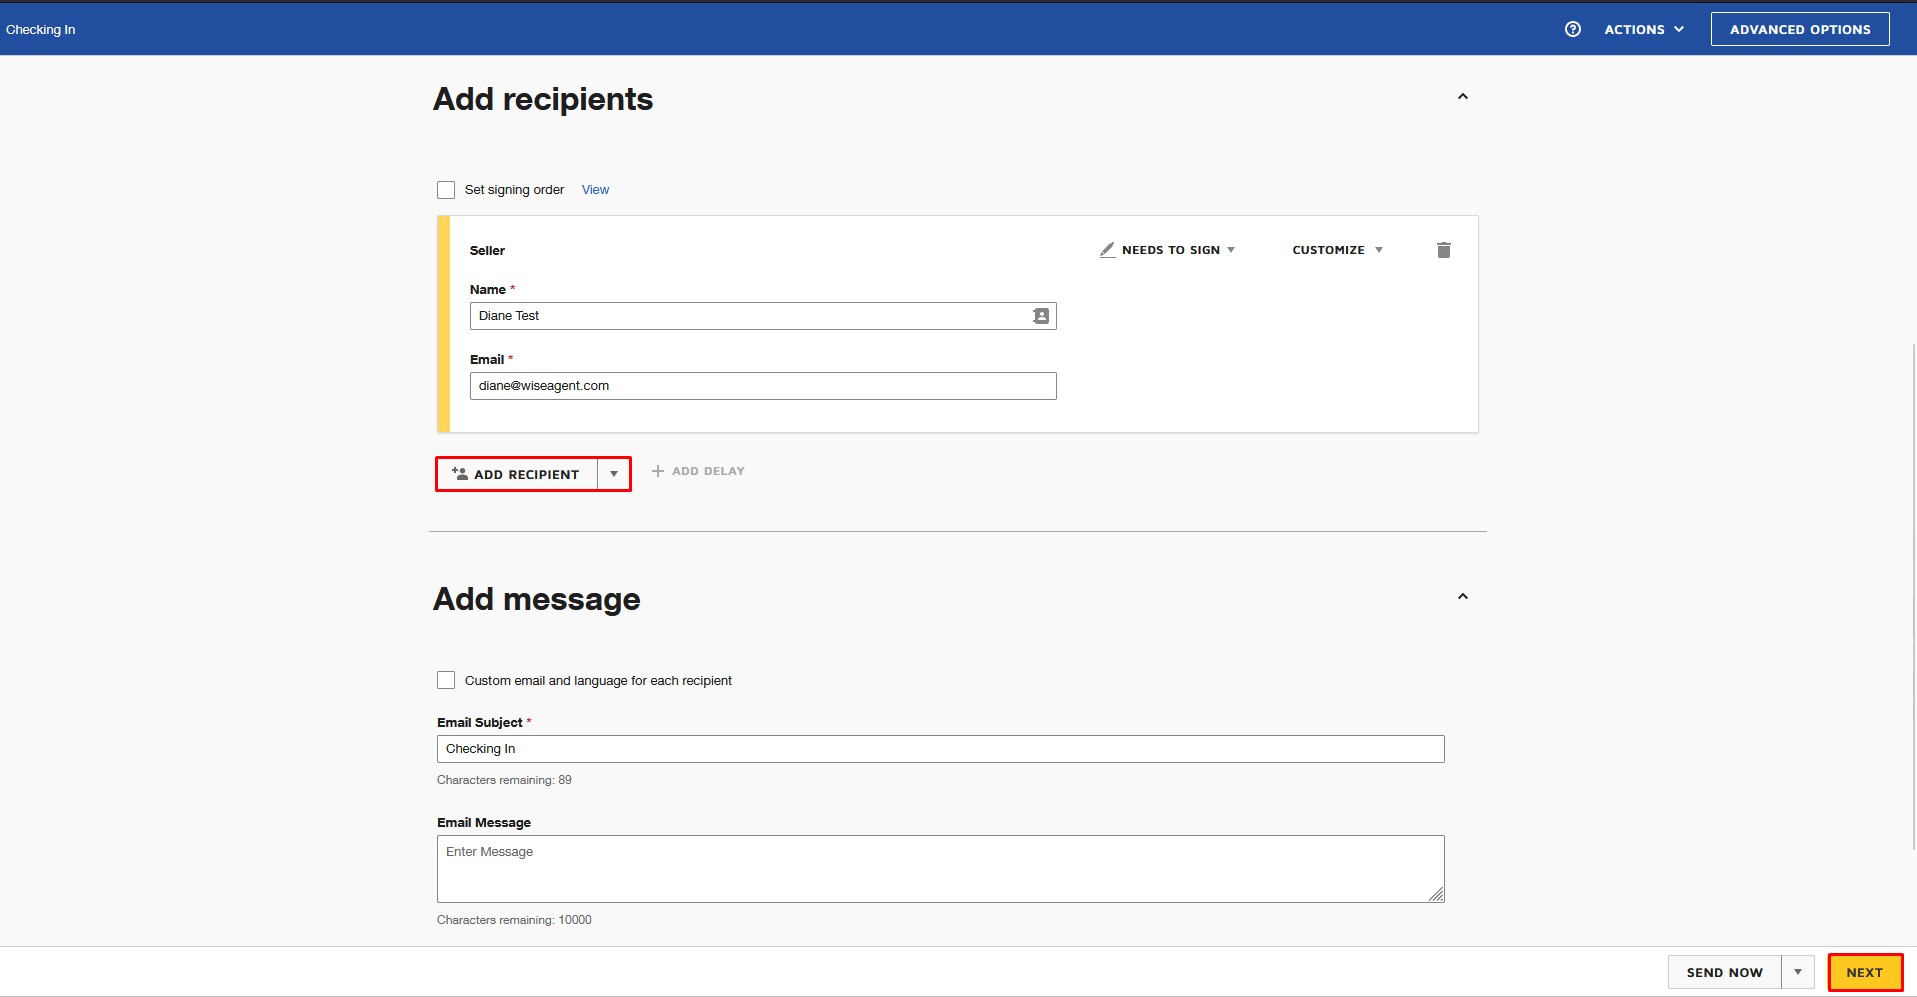
It will then bring you to the DocuSign page, where you can add additional recipients/signees. Write your email message to the recipients and lastly, click on SEND NOW or click NEXT.
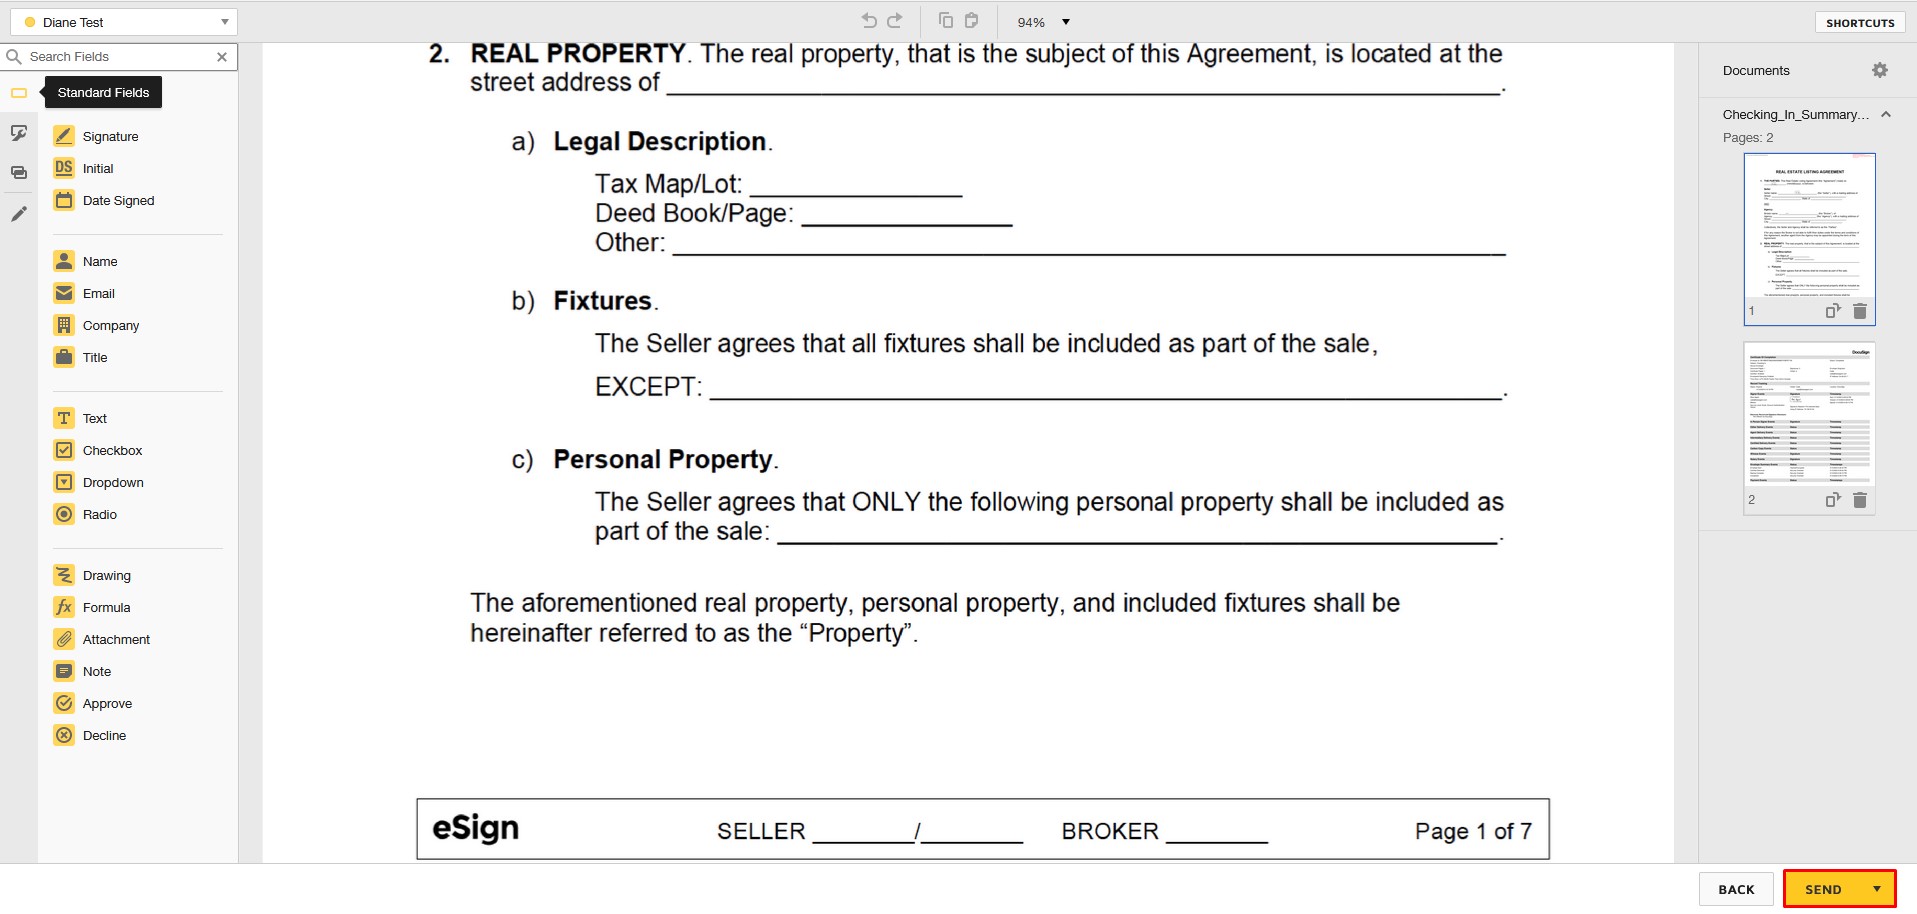
When you click NEXT, it will bring you to the signature page; add the required fields, then hit SEND.
How to send the attached files to DocuSign for signing (Checklist)
1. Click Transactions > Checklists.
2. Click on the name of a Checklist.
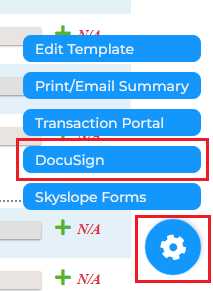
3. Click the gear button at the bottom right of the checklist summary page and select DocuSign.
4. Click on the "Send File to Docusign for Signing" button
5. Enter the subject of the email/envelope name.
6. Enter the Signee's Name, Role, and Email Address, then click the "Add Signee" button. You may add an additional signee.
7. Select one or multiple files from the Attached Files section.
8. Click Send Attached Files in the upper right corner.
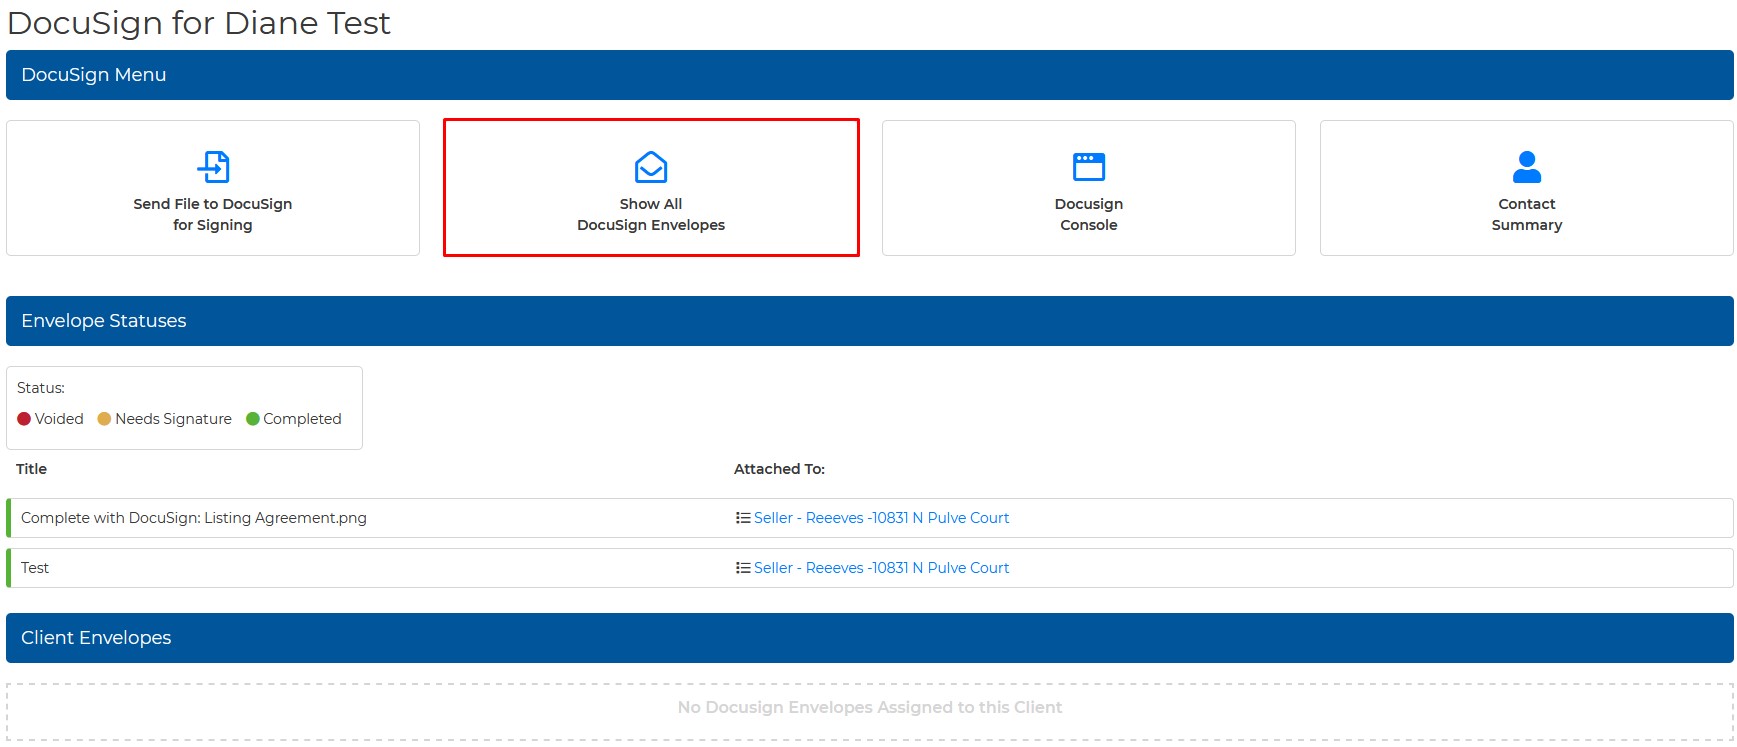
Show All DocuSign Envelopes
This will show all Wise Agent envelopes and any newly added envelopes from DocuSign that were not created in Wise Agent. This page will also display each envelope's status, such as Voided, Needs Signature, and Completed.
To attach the envelope to a contact or checklist:
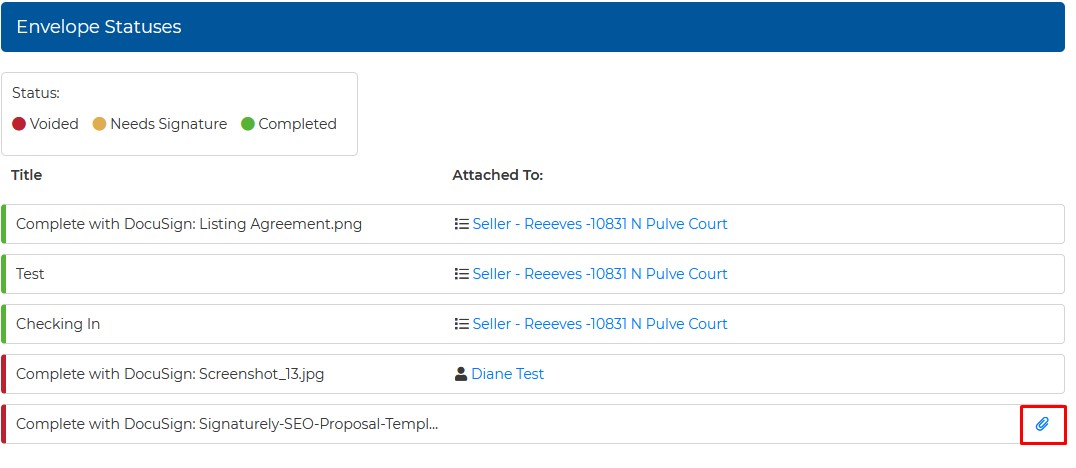
If the envelope is not attached to a contact or checklist, it will show up with nothing attached, but it does give you the option to attach it to your Contact or Checklist by clicking on the paper clip icon.
Client Envelopes
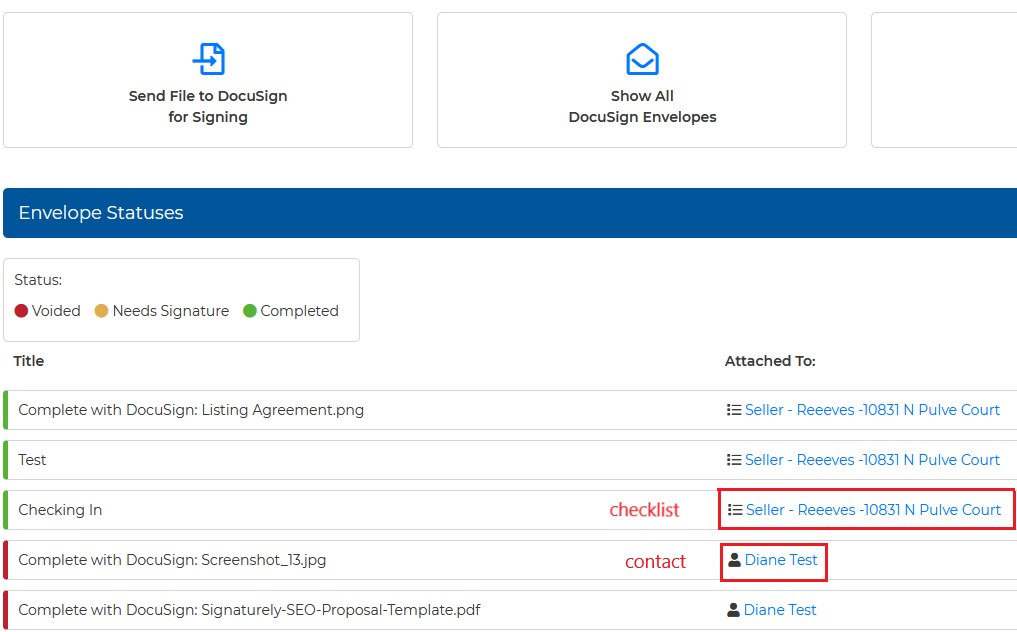
From the "Show All DocuSign Envelopes," click on the Contact's name under "Attached To:" to view all the envelopes attached to that particular contact.
Checklist Envelopes
You can switch to your checklist envelopes by clicking on the checklist's name in the "Show All DocuSign Envelopes" section.
Different Envelope Statuses:
- Voided: When an envelope is either archived or already expired.
- Draft: Envelopes that have been created but have not yet sent.
- Needs Signature: When you have sent the envelope but still awaiting signatures from the signees.
- Completed: When the envelope has been completed or signed by the signees.
How to download the completed envelope and attach it back to the Contact/Checklist on your Wise Agent:
Once the status of the envelope becomes "completed," an option for you to download will show on the right side of each envelope.
It will give you one PDF file attached with a certificate of completion and it will be attached back to the Contact or Checklist automatically. Once the envelope is downloaded, the option to download will disappear.
DocuSign Console
A single-sign-on option. When you click on it, it opens a new tab signing you to your DocuSign account.
Contact Summary/Checklist Summary
This will bring you back to the contact summary page. If you are on the checklist envelopes, the option will show as Checklist Summary.
Here's a video tutorial that goes over the DocuSign integration with Wise Agent.


