Why we chose Callingly
It's no secret that the first five minutes after an individual requests information about home buying are the most important when it comes to internet leads. Statistically, the time that it takes you to connect with your lead after they register can seriously impact the likelihood that a prospect selects you as their Real Estate agent. Reaching out to a lead after the first five minutes can reduce your odds of converting that lead by up to 80%. That's why we wanted to highlight tools that are designed to provide you with the best chances to close deals and being the first to connect to your lead is more important than ever in today's market.
Callingly has been specializing in Lead Response Management since 2016. With their system, not only can you stay confident that your team will always be the first to connect with your leads, but you can also track the productivity of your agents, review call recordings, and ensure that every lead is directed to the perfect sales representative in the least amount of time. If you're still unsure about whether or not Callingly is right for you, click here for details on how you can try it out for free for up to 14 days.
About our integration
Callingly automatically connects to your Wise Agent account, allowing you to instantly trigger calls to your leads using lead rules and categories in Wise Agent. The call results and recording are then synced back to Wise Agent. Both an owner and an admin can set up this integration. To get the best results, we also recommend setting up a new Lead Rule for Callingly once your integration set up is complete.
Let's get started!
You'll need to connect your Callingly and Wise Agent account, but don't worry, you can find the steps below or on Callingly's help center here.
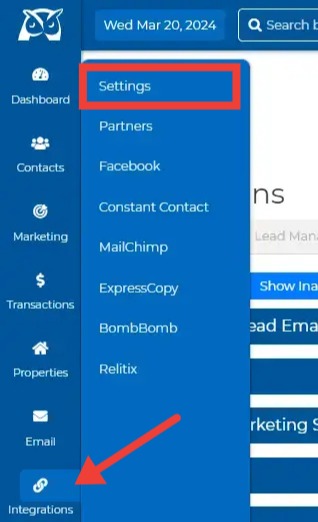
- Login to your Wise Agent account and click Integrations on your navigation pane and select Settings.
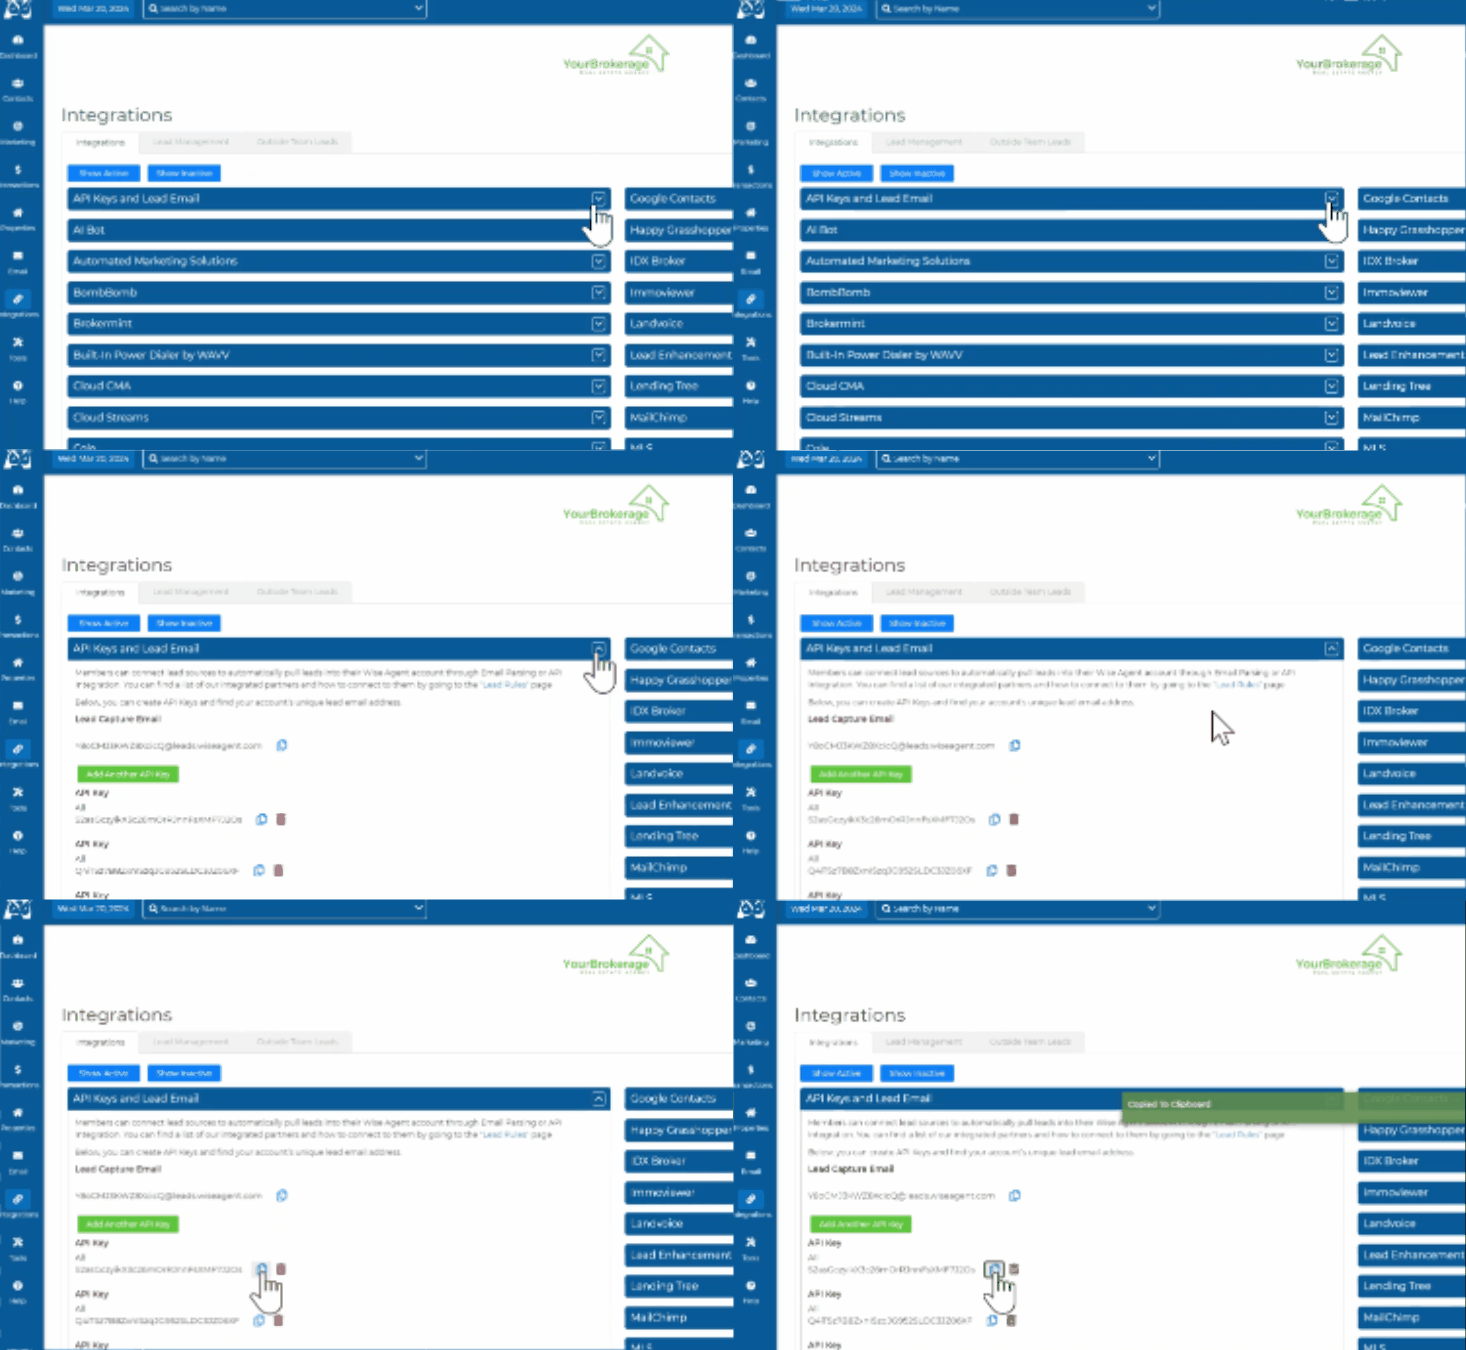
- Click the API Keys and Lead Email drop-down and copy your API Key by clicking the copy icon.
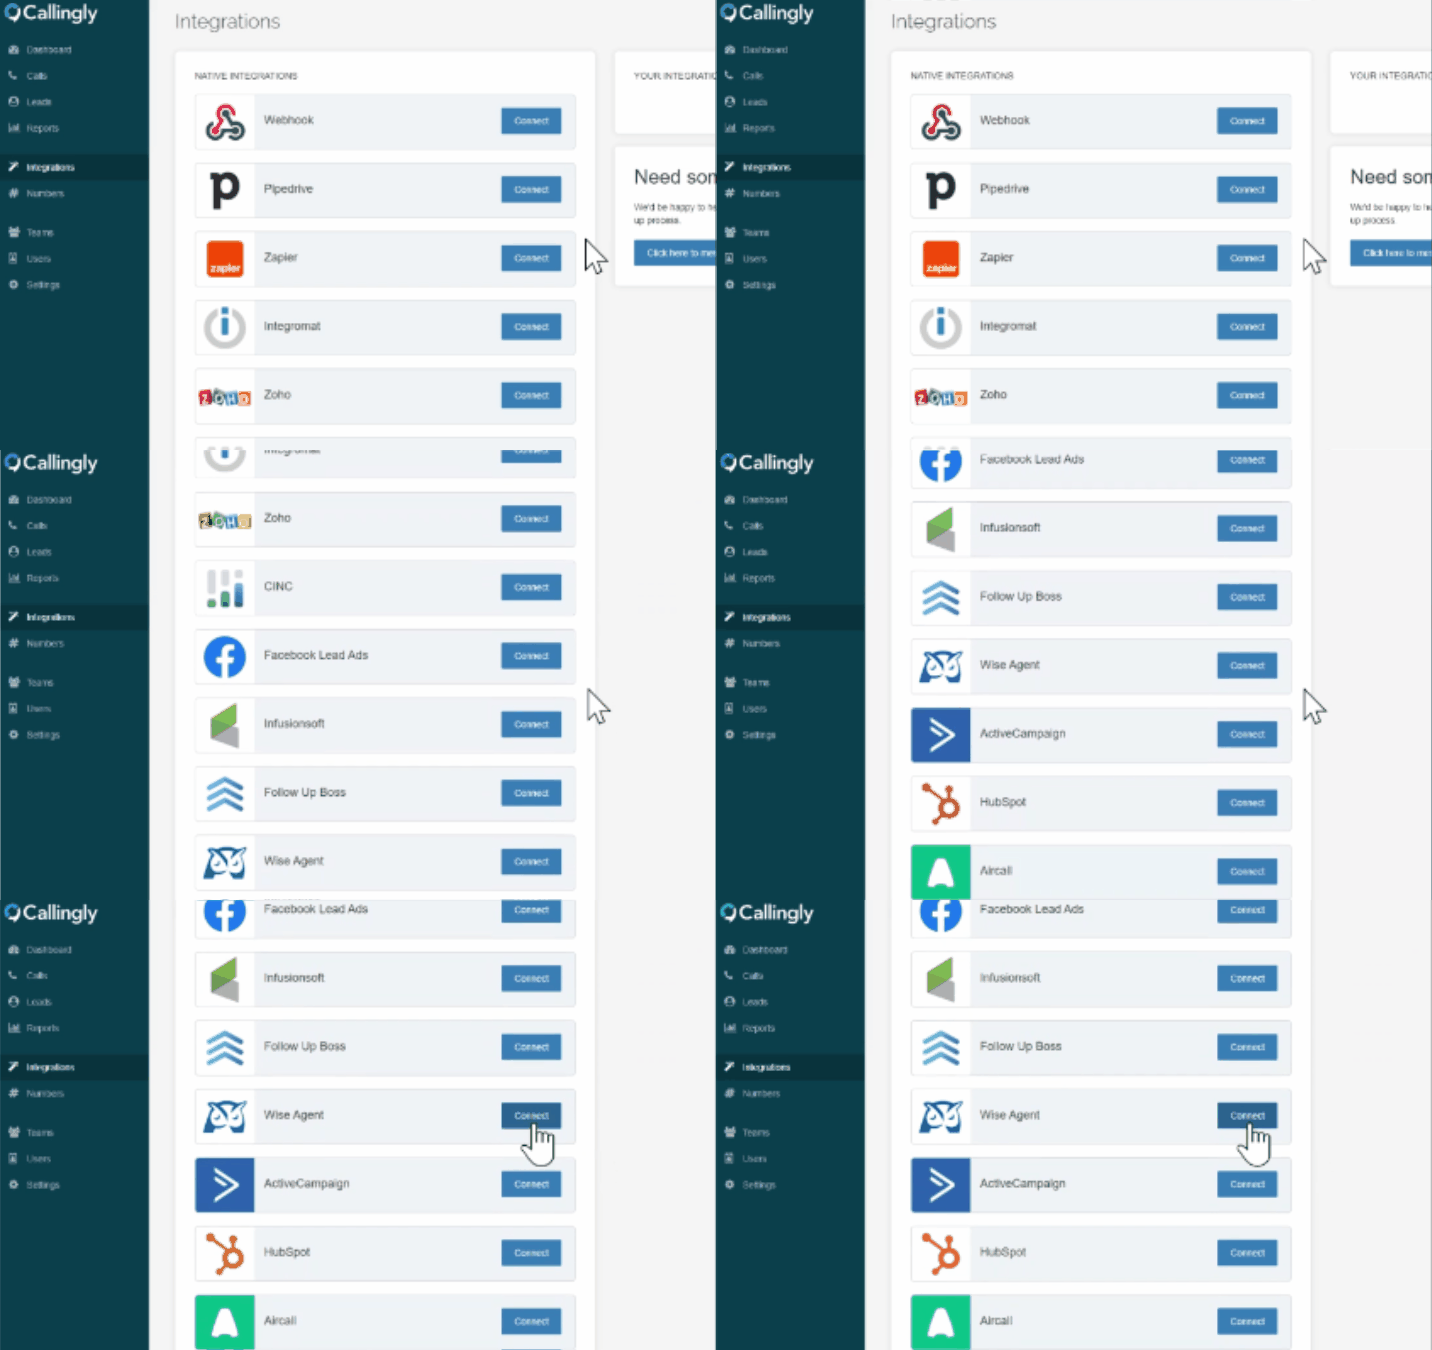
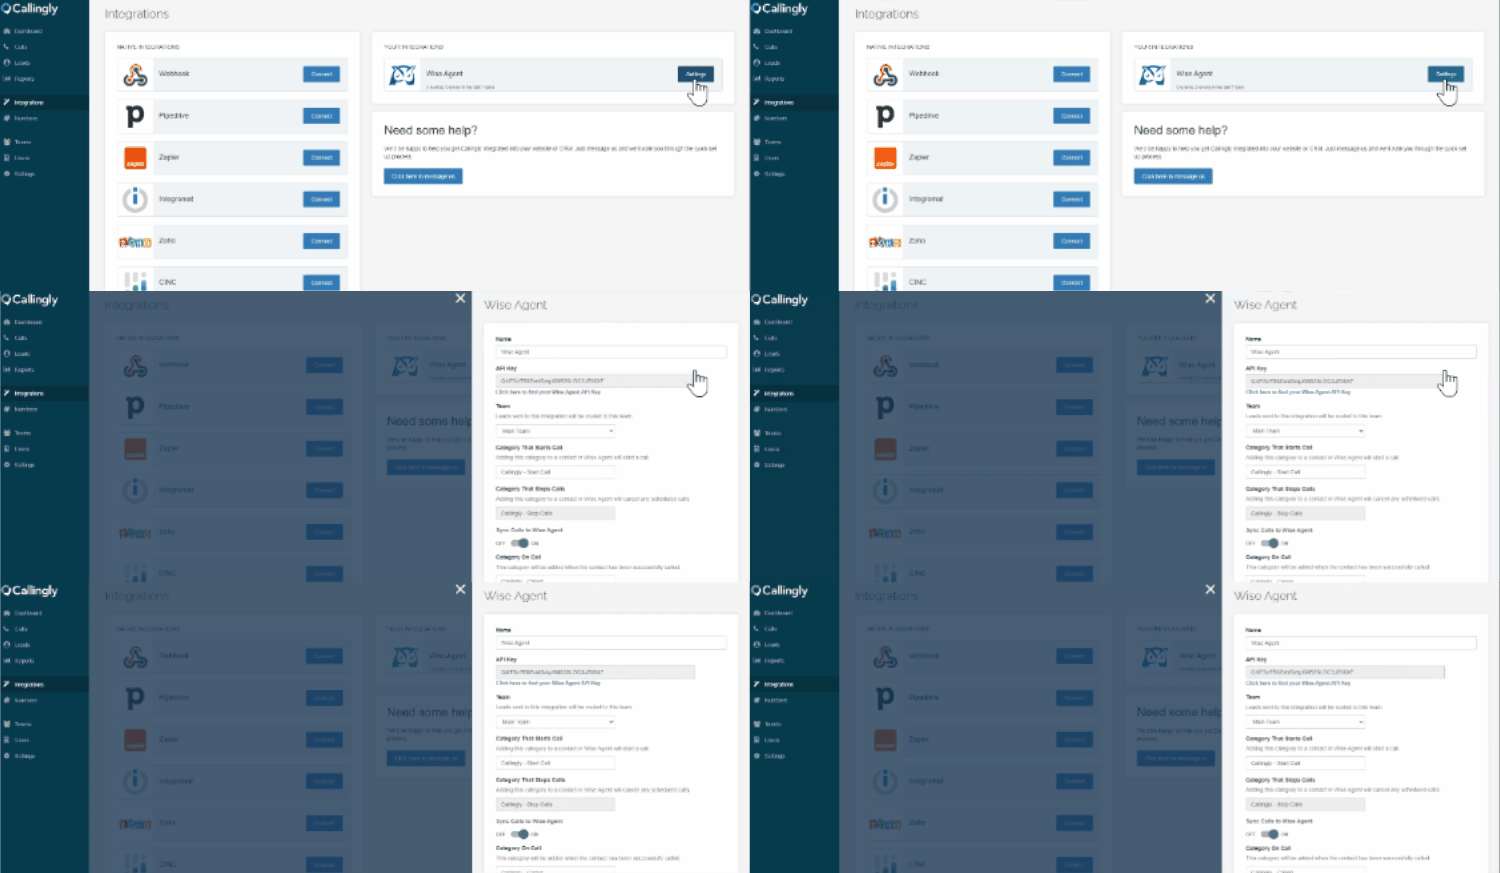
- Now, login to your Callingly account and click Integrations on your left-hand navigation. Then scroll down to the Wise Agent option and click Connect.
- Add your Wise Agent API Key into the field and click Install.
That's it! Now that you're integrated you will need to save your Categories and Settings in both Wise Agent and Callingly to ensure that your integration works properly. Let's start with setting up your Categories in Wise Agent.
Adding categories in Wise Agent
For contacts to be pushed into Callingly's system you'll need to create a Category in Wise Agent, as well as a new Category to stop future calls. We recommend using the default options "Callingly - Start Call" and "Callingly - Stop Call". These options will be set as the default in your Callingly settings.
(NOTE: The start trigger category is customizable in Callingly, so if you already have a preferred category you can change it in your Callingly settings, which you can find below. However, the stop call trigger is NOT customizable in Callingly, so you must create the category "Callingly - Stop Call" in your Wise Agent account.)
The best way to add these Categories without applying them to leads that you're not ready to send to Callingly yet is to follow the steps below:
- Click the New Lead button in the bottom right corner of your screen.
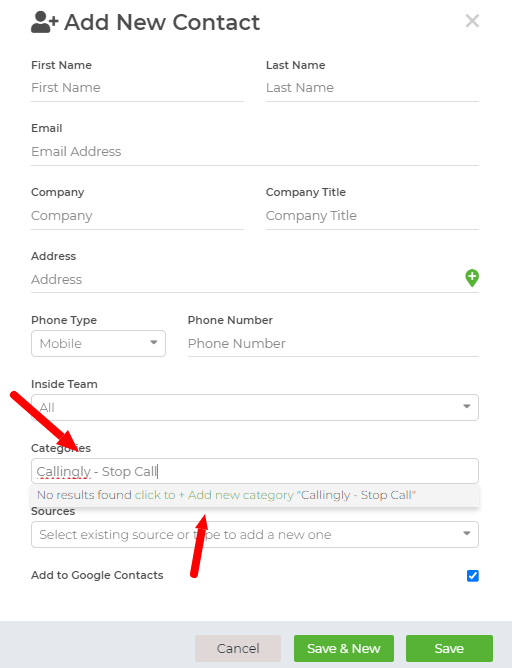
- Type in the new category name in the Category field. We recommend using Callingly - Start Call and Callingly - Stop Call. Be sure to type in the Category with the exact phrase, spelling and punctuation to ensure that the categories trigger the Callingly actions. Once you've typed in the new category name there will be an option to add the Category. Click the option "Click to + Add new category", as pictured below. Close the Add New Contact widget.
Configuring your settings in Callingly
Now that your integration is set up in Callingly and you have Categories created in Wise Agent the next step is to configure your settings Callingly. These settings can always be adjusted in Callingly if you ever wish to make changes.
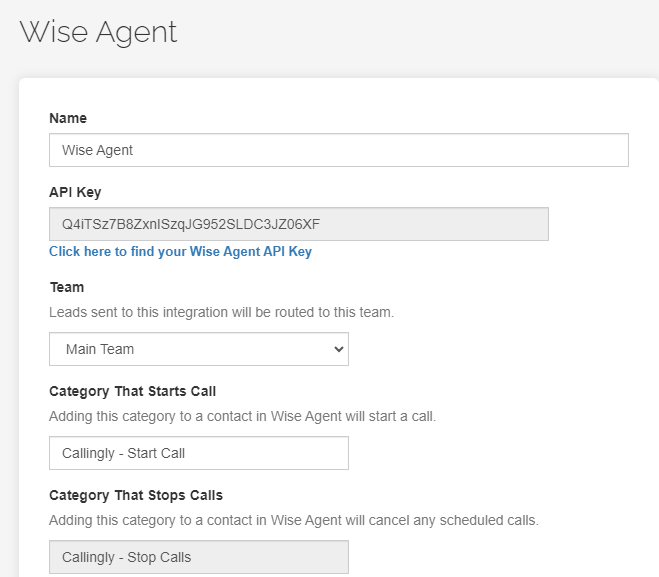
- In Callingly, click Integrations and then click the Settings button next to your Wise Agent integration. A side panel will open with your setting options.
- Name: Add the Name of your Integration. By default, the name of your team will be labeled as Wise Agent. If you plan to have more instances of an integration with Wise Agent, it's a good idea to title your Integration Name as something more descriptive based on your needs.
- Team: Select a Team from the Team dropdown. Click here for instructions on how to create more than one team in Callingly. The default selection will be Main Team until you add more than one team in Callingly. (NOTE: All of your call settings, call routing, and retries are set up on the Teams page for each team of your Callingly account.)
- Category That Starts Call/Category That Stops Call: Select the Category that starts your call. By default, this field will be pre-filled with the category Callingly - Start Call but this is customizable. If you prefer to use a specific Category that already exists in your Wise Agent account you can update this field. Be sure that the spelling and punctuation is an exact match to your Wise Agent Category. The next field for the stop call trigger function is not customizable. You MUST create a new category in Wise Agent called Callingly - Stop Call.
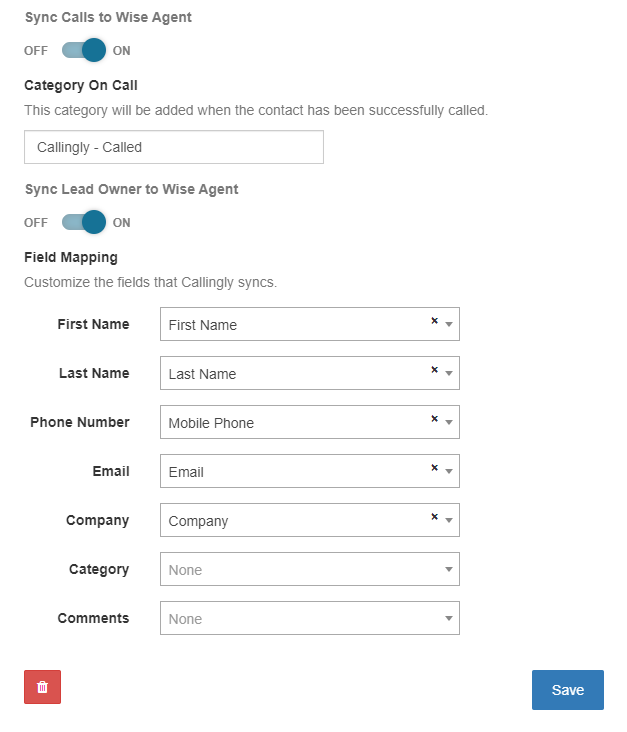
- Sync Lead Owner to Wise Agent: In the next field you can determine whether or not you would like to have Callingly update your dashboard when a Lead Owner is assigned either manually or automatically in Callingly. It is enabled by default, but if you prefer not to have the Lead Owner changes synced simply toggle this permission off.
(NOTE: When a lead is broadcasted to multiple agents and an agent accepts the lead, they will be assigned as the Lead Owner automatically. If you elect to use the Round Robin feature in Callingly the lead is offered to an agent using the priority settings you've added, once an agent accepts a lead the Lead Owner is assigned.) - Field Mapping: Select the Field Mapping options that determine how information is synced from Callingly to Wise Agent. We recommend leaving the default settings as is to avoid any confusion when data is transferred from Callingly to Wise Agent. However, if you would like to make changes note that the left column is the data available in Callingly and the options available on the right are Wise Agent fields.
- Click Save to confirm your changes.
(NOTE: If you ever need to remove an integration you can do so by clicking the red trash can icon to remove your integration.)
That's it! Your configuration of Wise Agent and Callingly is complete! Now, when you receive a lead, you can add the category you've chosen to trigger a new call in Callingly.
You can also set this function up automatically by utilizing the Lead Rules feature in Wise Agent. This way when a new lead comes in they will automatically receive a call from you or your team. Click here to learn how to set up a Lead Rule in Wise Agent to have new leads automatically called through Callingly.
Lastly, if you would like to have any leads that are created in Callingly automatically sent to Wise Agent you must reach out to the Callingly Support team to set up this
Still have questions? Here are some helpful links to make sure you're getting the most out of your integration:
How Callingly Connects you to your Leads - The 10 Step Process
Creating & Managing New Teams in Callingly
Creating & Managing Users in Callingly
Setting Availability Schedules in Callingly
Callingly's Guide to Lead Routing
If you have any questions about how to set up your Callingly Integration or how to set up a Lead Rule don't hesitate to contact our support team by clicking the Contact Us button or calling our 24/7 support team at (480)836-0345.
You can reach Callingly's support team by emailing support@callingly.com or calling them at (602)313-3936. Visit their resource center for helpful tips and tutorials at help.callingly.com.


