First, make sure you've signed up for a Zapier PREMIUM account.
**This approach requires Zapier Premium for looping functionality.**
Why Use Webhooks for Syncing?
Webhooks provide a direct and automatic way to sync real-time changes, such as client updates, across platforms. For instance, instead of creating a Zap for parsing Gmail emails, this method can sync client records between multiple Wise Agent accounts without requiring shared contacts or intermediary tools like Google Sync.
Steps to Set Up the Webhook-Based Sync
Step 1: Obtain Your Wise Agent API Key
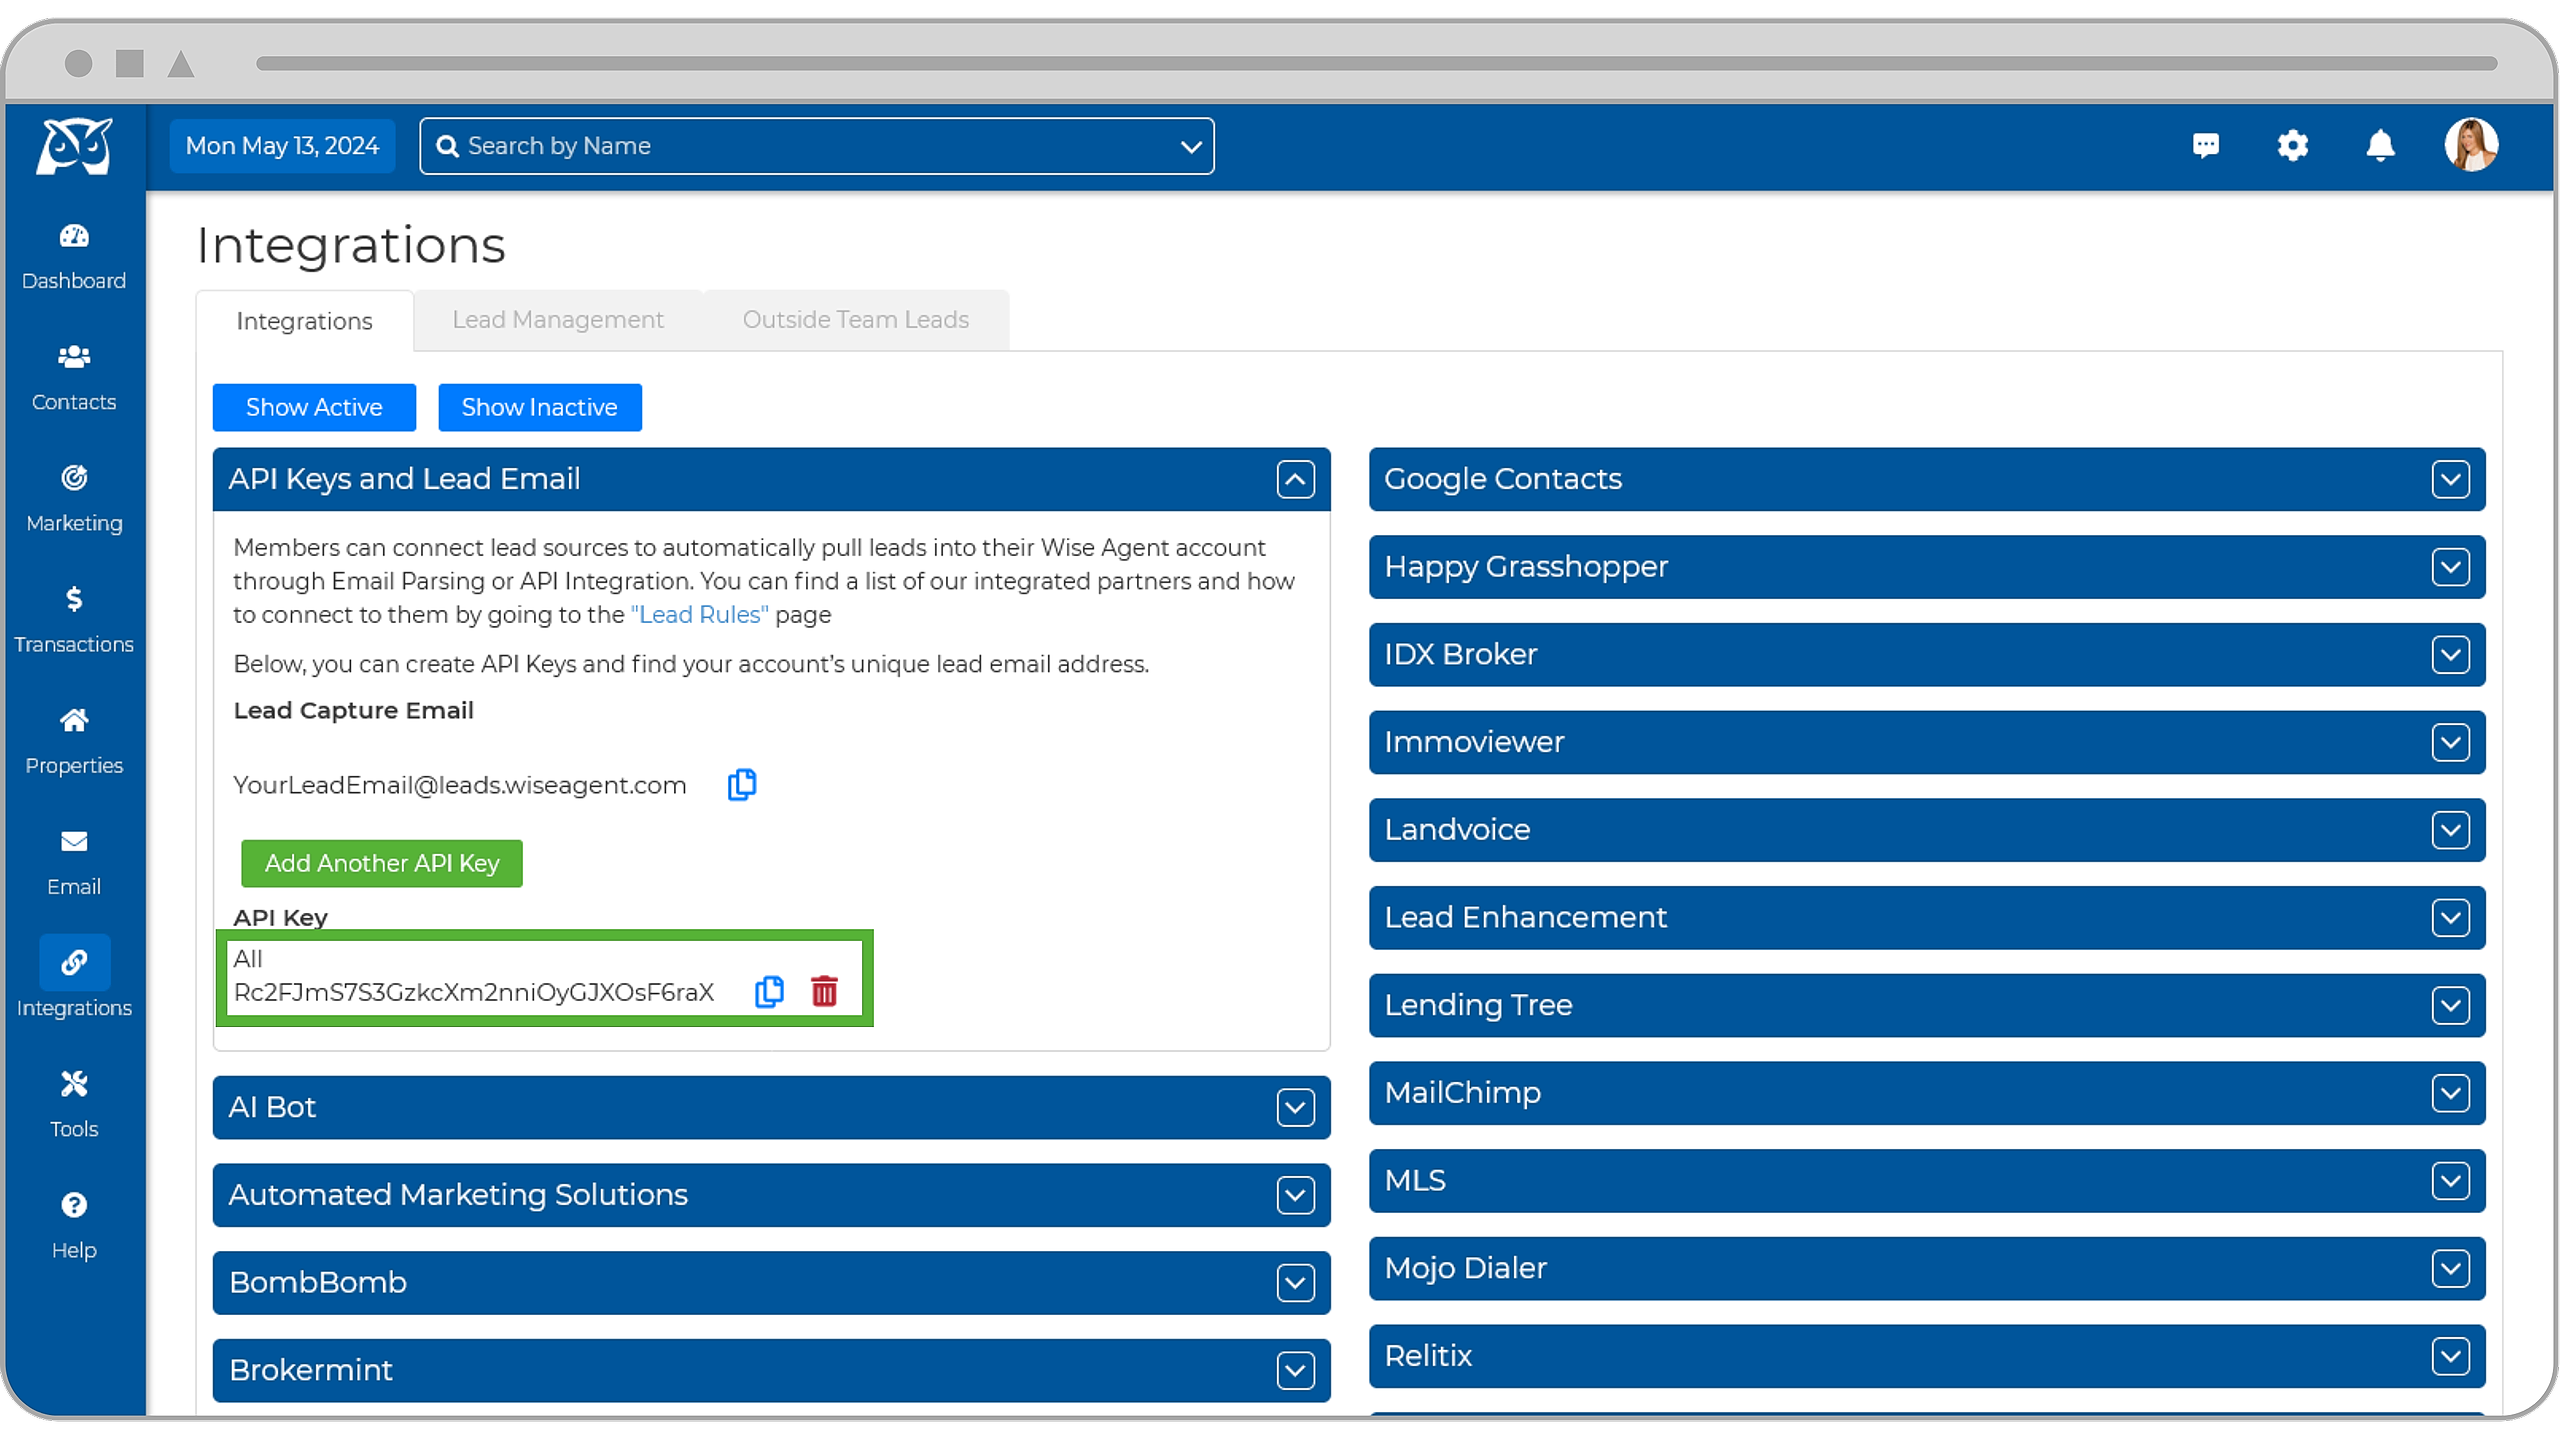
- First, you will need to copy your Wise Agent API key. To find the API key associated with your Wise Agent account, please follow the instructions below:
- Login to your Wise Agent account.
- From the sidebar, select Integrations, then click Settings from the menu.
- On the Integrations Settings page, locate and click on the API Keys and Lead Email tab and click to expand.
- From this section, locate and copy your API Key.
Step 2: Create Lead/ Contact Webhook Trigger
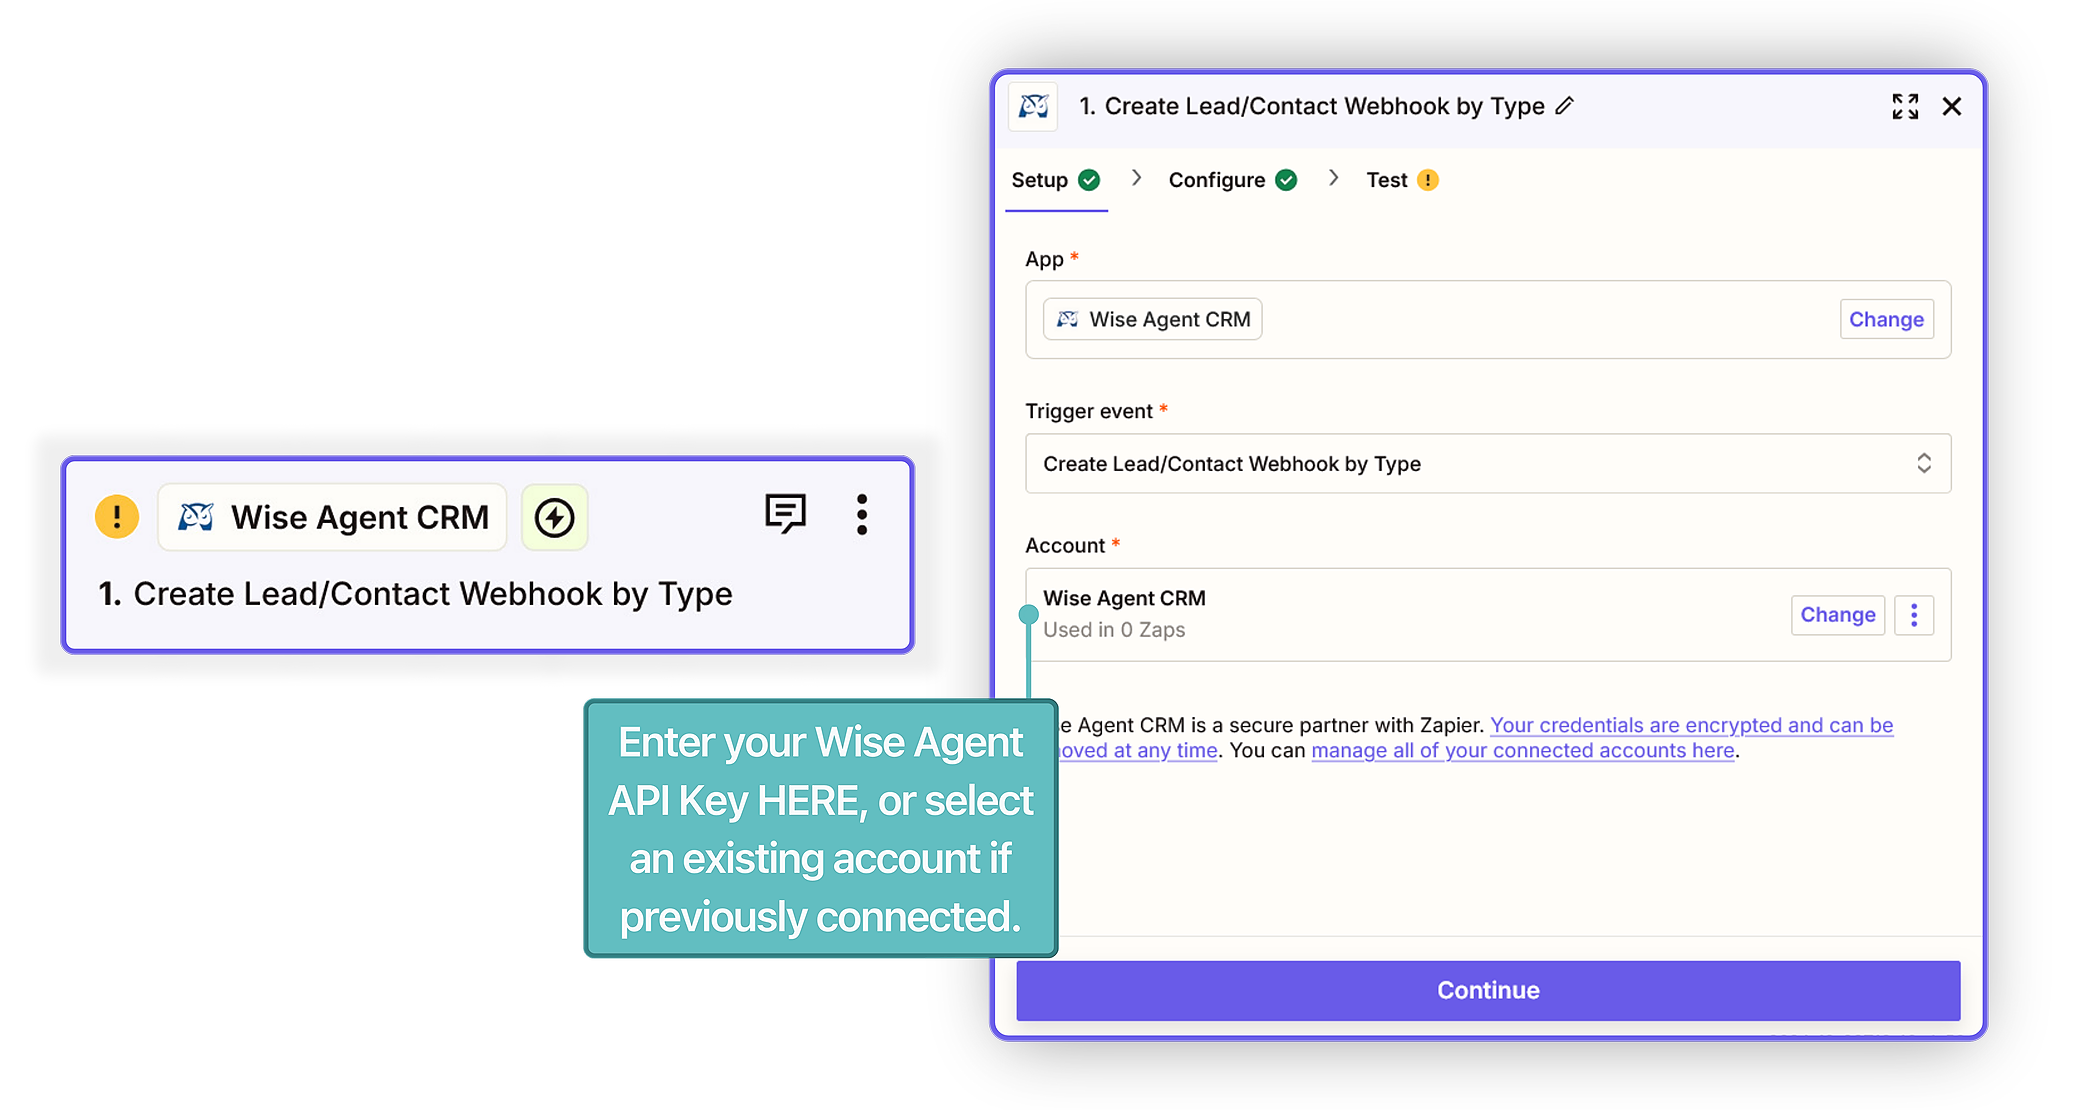
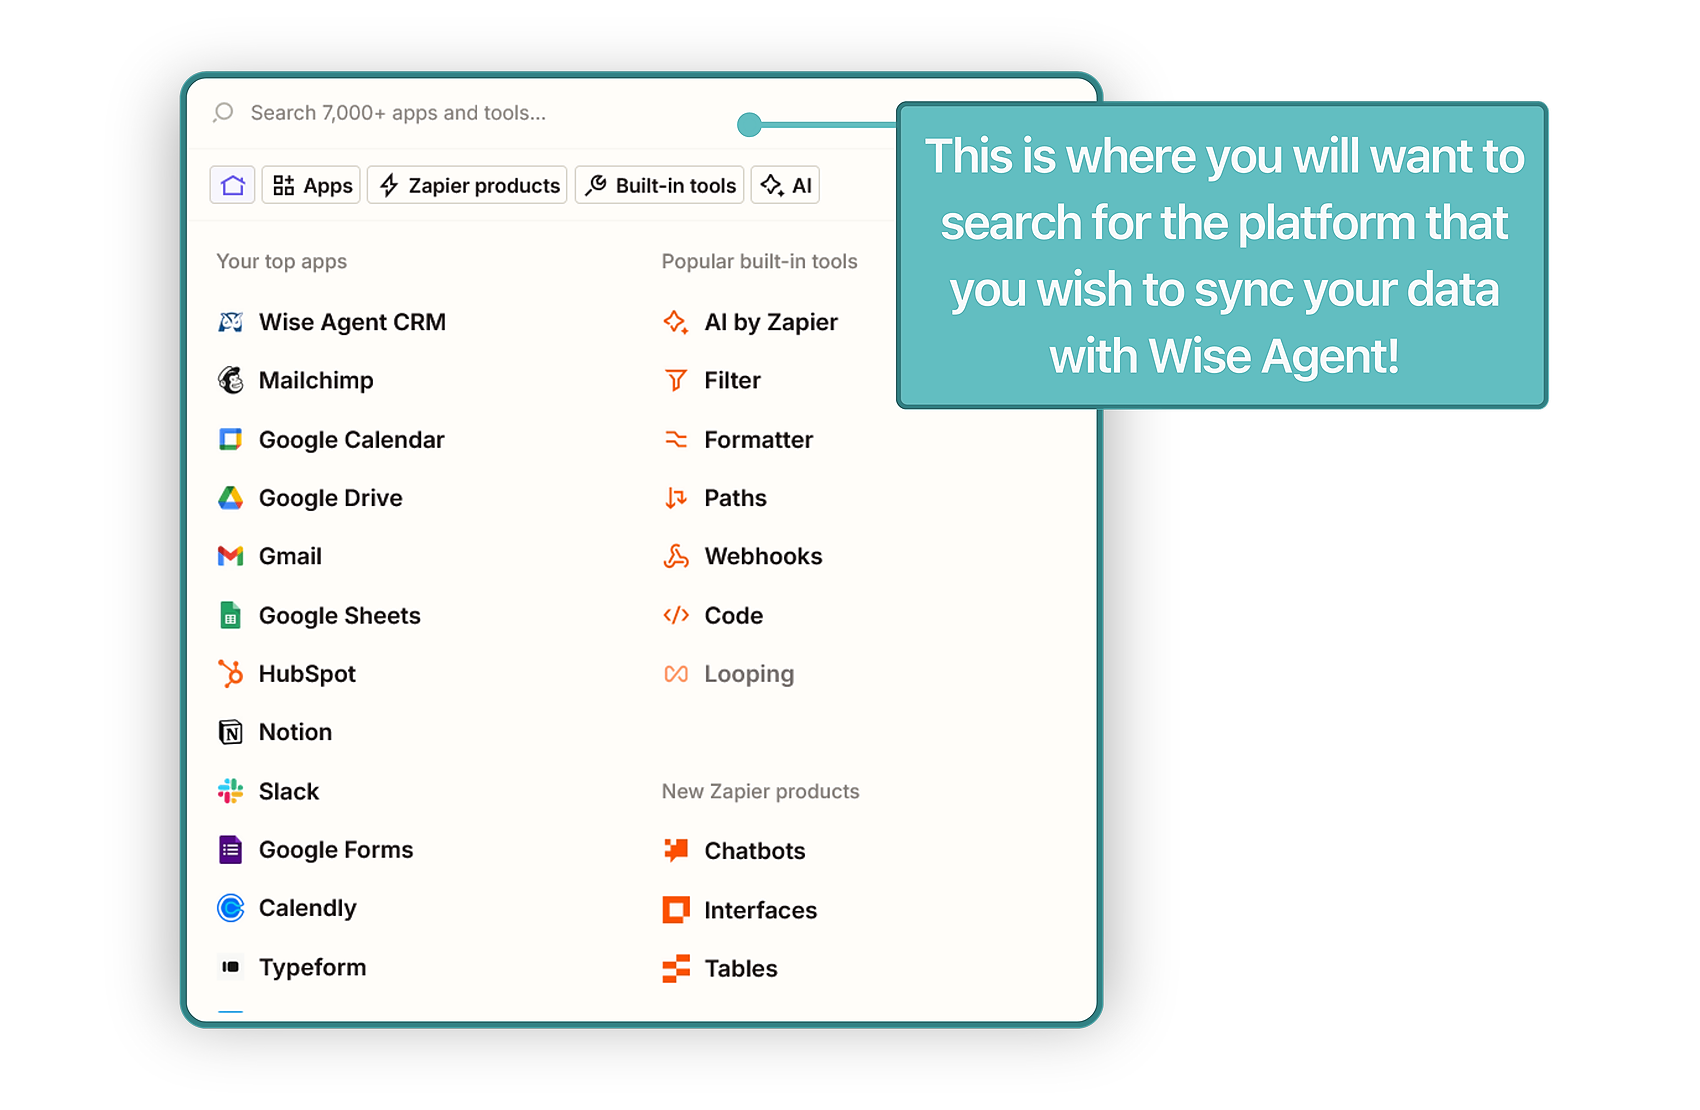
- When you open the Zap editor, you'll be prompted to pick an app as your trigger. You'll see the apps you use most frequently, built-in apps from Zapier, and popular apps. You can select from one of these, or look for the app you want to use in the search bar. Search for and select Wise Agent CRM.
- Click the Trigger Event dropdown menu and select Create Lead/ Contact Webhook by Type.
- Under Account, you'll be prompted to sign in to your Action app account if you haven't connected it before. Here, you will want to enter your Wise Agent API key.
- Click Continue.
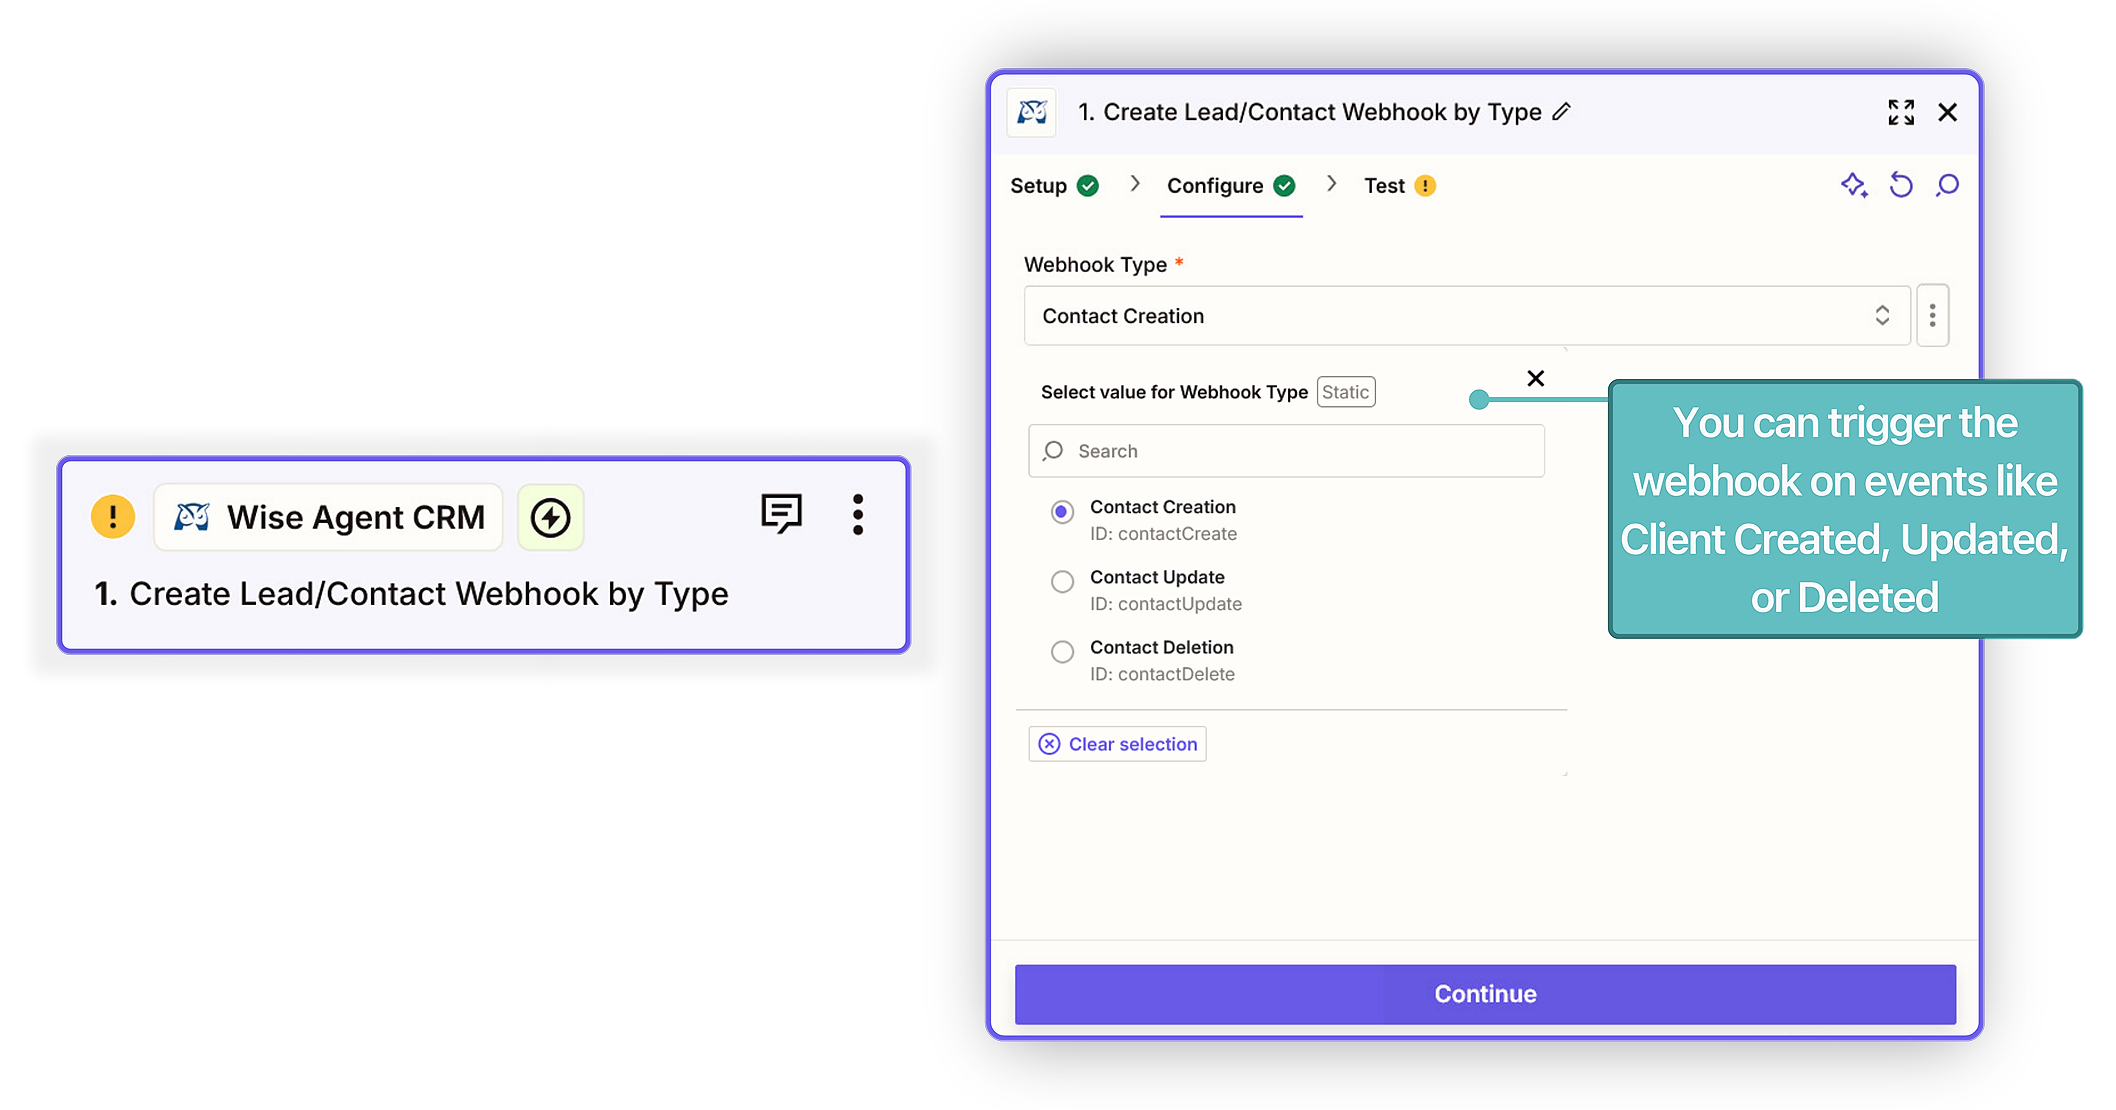
- Under Configure, select a value for the Webhook type. You can trigger the webhook on events like Client Created, Updated, or Deleted.
- Under Test, click Test Trigger, then continue with the test information pulled.
Step 3: Looping Setup
- Beneath your trigger, click the plus + icon to add a step to your Zap.
- Search for and select Looping by Zapier.
- Click the Event dropdown menu and select Create Loop From Line Items.
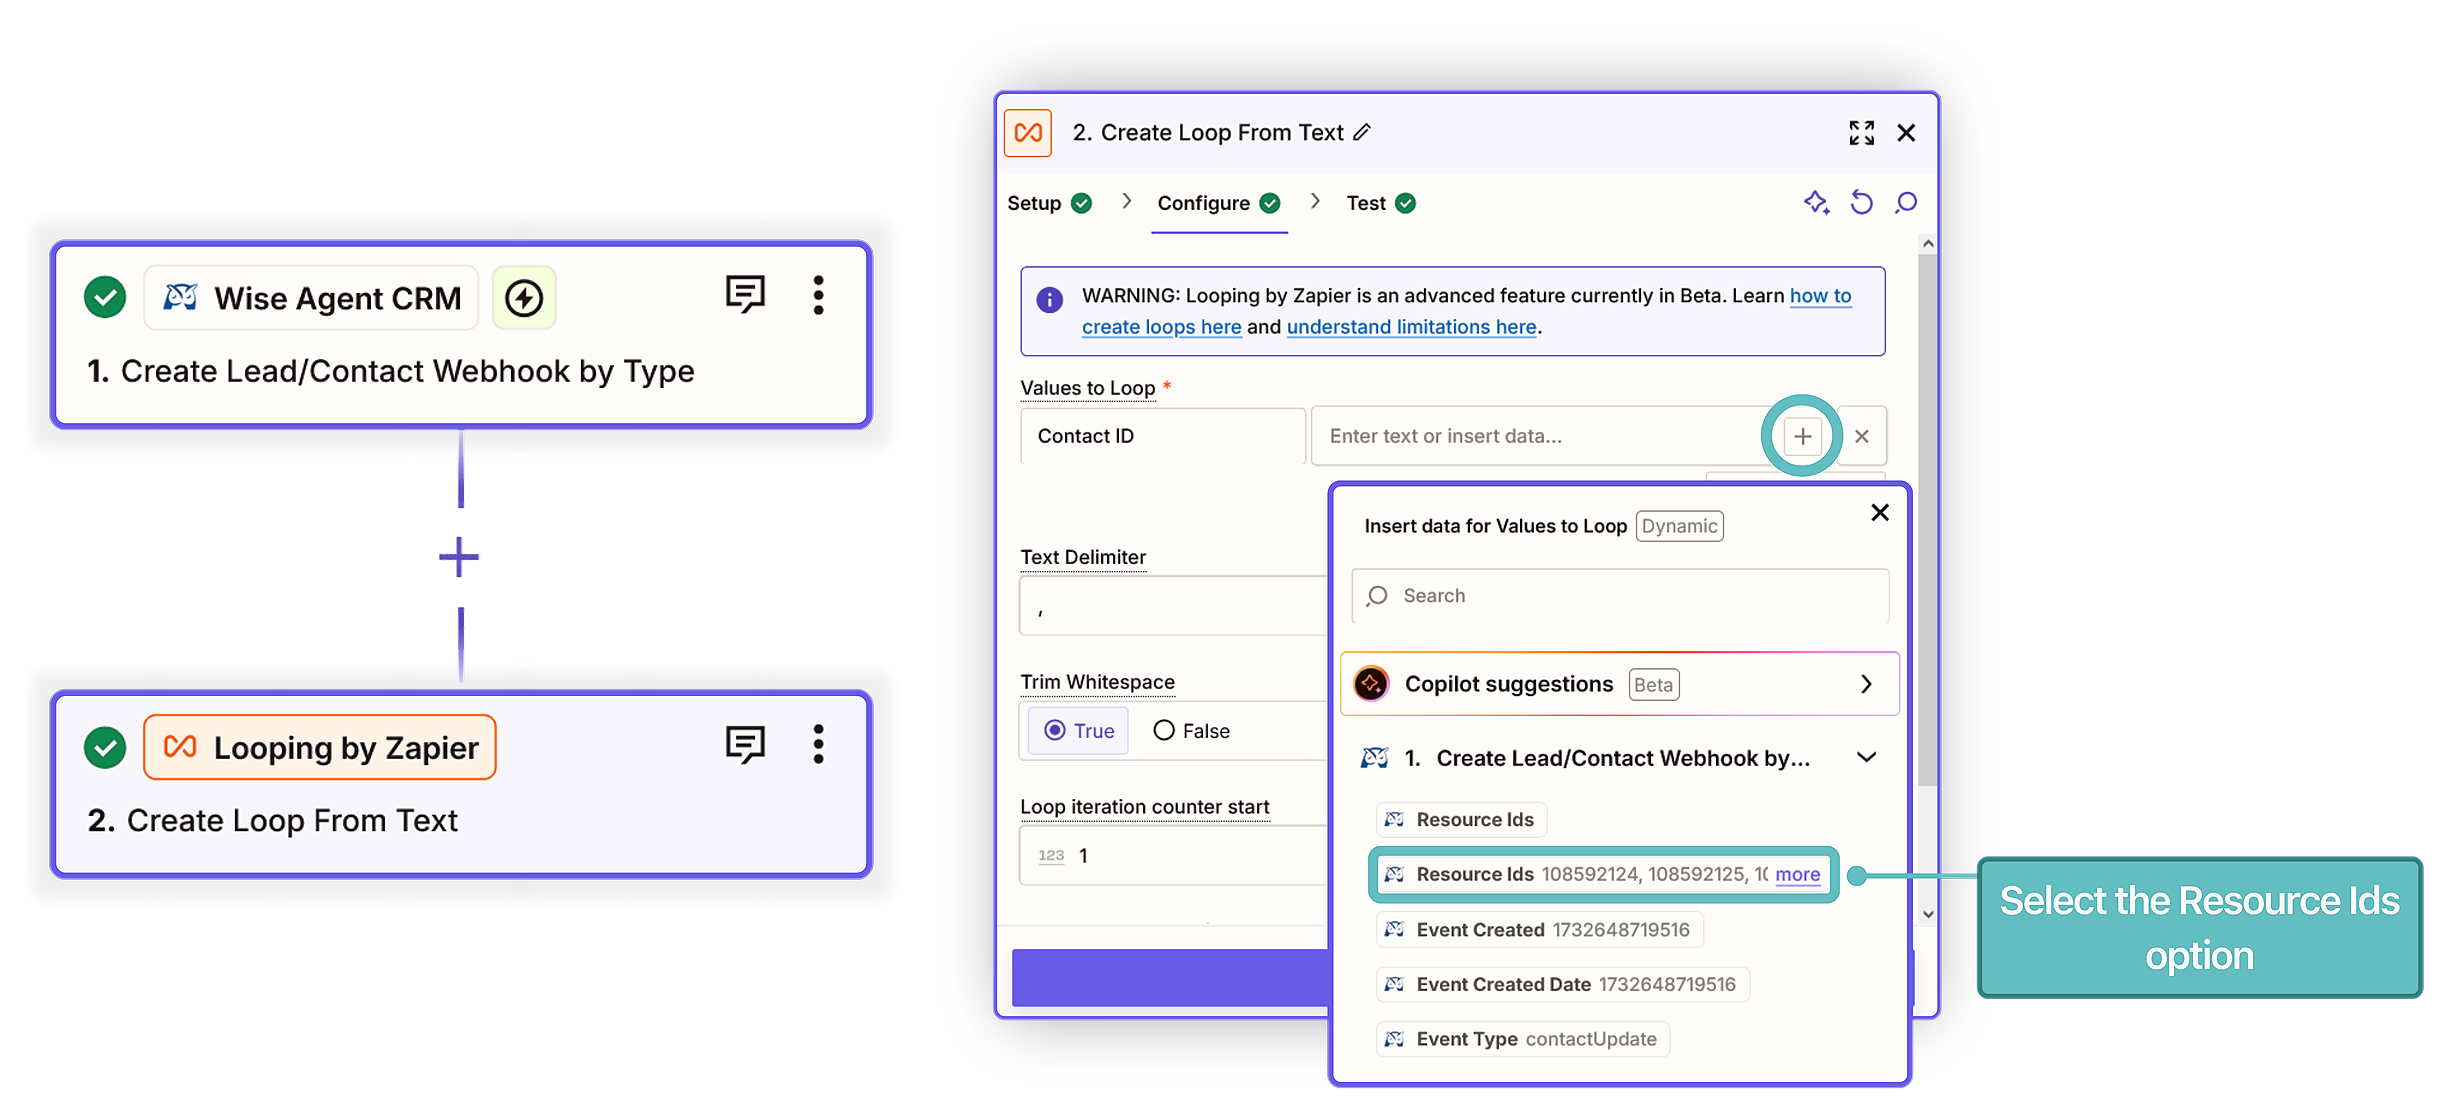
- Under Configure, in the Values to Loop section, add your values to loop:
- In the field on the left, enter the name of the value (e.g., “Client ID List”). This value can be anything, as it does not affect your data.
- In the field on the right, click the plus sign and select the resource IDs received from the webhook. - Do not adjust Trim Whitespace, Loop Iteration Counter Start, & Maximum number of Loop iterations. Limit the number of iterations to ~250 to manage costs effectively since each iteration counts as an action, then click Continue.
- Under Test, click Test Trigger, then continue with the test information pulled.
Step 4: Set Up The Get Lead Action
- Beneath our last action, click the plus + icon to add a step to your Zap.
- Search for and select Wise Agent CRM.
- Click the Action Event dropdown menu and select Get Lead/ Contact By ID.
- Under Account, you'll be prompted to sign in to your Action app account if you haven't connected it before. Here, you will want to enter your Wise Agent API key.
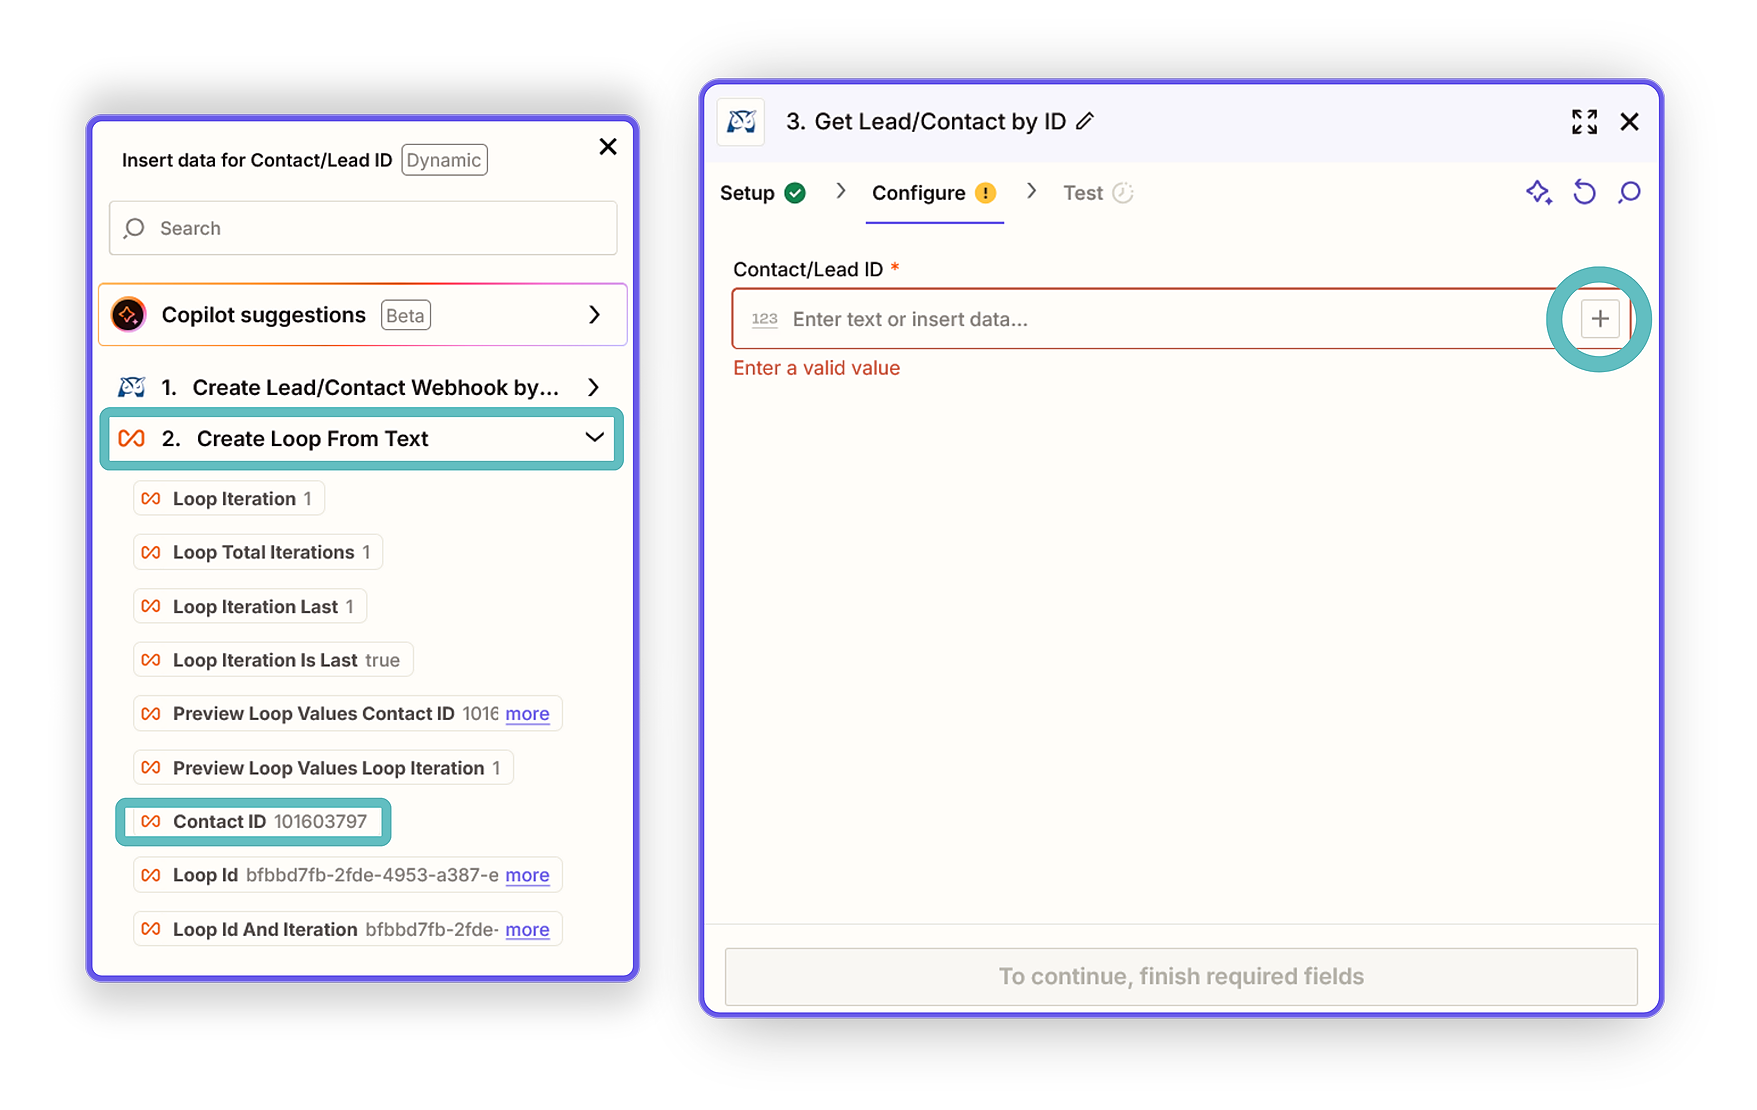
- Under Configure, click on the + plus sign beneath Contact/ Lead ID, select Create Loop From Text, then select the Contact ID option.
- Under Test, click Test Trigger, then continue with the test information pulled.
Step 5: Destination Setup
The final step is open-ended based on your needs. For example, this is the step where you will sync data to another Wise Agent account, a different CRM, or any endpoint capable of receiving the data.
- Beneath your trigger, click the plus + icon to add a step to your Zap.
-
Upon clicking the plus sign, you'll be prompted to pick an app as your Action.
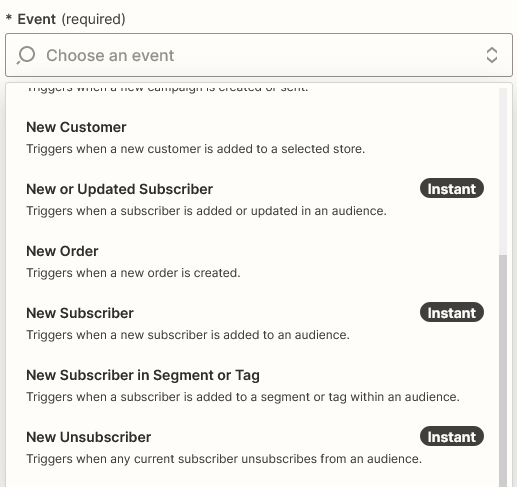
You'll see the apps you use most frequently, built-in apps from Zapier, and popular apps. You can select from one of these, or look for the app you want to use in the search bar. - Next, you'll be asked to choose a trigger event.
This is the event that happens in your trigger app that signals Zapier to start your Zap. In this case, it's when a new form entry comes into our form app. It is advised you select an event that pulls contact information (I.E. new subscriber, new attendee, incoming lead, etc.)
💡 Trigger events vary between different apps and app types. For example, a task management app might have New Task as a trigger, while a spreadsheet app could have Create New Row. - Configure Your Action
Continue setting up your action by selecting what the action should do in the Configure tab.
- Select the Configure tab.
- Set up all required fields and any optional fields that you need for your workflow.
- Required fields have an asterisk after the field name.
There are different field types in Zapier that determine what types of values you can enter in a field. You can enter values in fields by:
- Manually entering values.
- Mapping fields from a previous step.
- Selecting a value from a preset list in the modal.
- Test Your Action
Test your action to verify it is sending the right data to your app.
- Select the Test tab.
- If you want to perform the action live to test the step, click Test step.
- The Data in tab will display the fields and values that you set up in the action step.
- The Data out tab will display the fields and values that your app returns as confirmation.
- If you do not want to test the step live, click Skip test.
When you test an action step, Zapier will perform the action on your behalf. Testing is live and may result in changes made in your app. If you have issues when testing, you can review error messages in the Data out tab or use AI-powered troubleshooting to automatically review errors and suggested solutions.
- Publish Your Zap
Once you finish setting up your Zap, you can turn it on by clicking Publish in the upper right. Zapier will actively monitor your trigger app for new data and run your action steps each time your trigger event occurs. Your Zap will only monitor for and trigger on new data that occurs after it's published.
You can view a log of all your Zap activity, including all the data that goes in and out of each of your Zap steps, in your Zap History.


