Exporting Your Contacts From Outlook
💡 Important: Steps may be different between new and classic Outlook for Windows. Below are the steps for the New Outlook version.
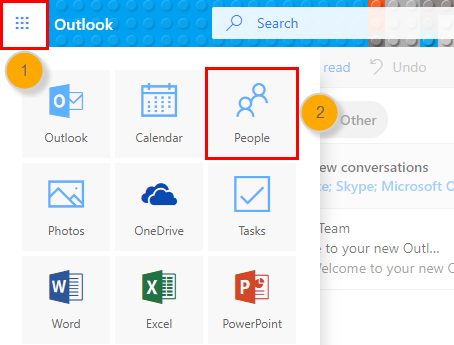
1. Open Outlook 365 and click the Applications icon, then select People. (Note: If you don't have People in the left navigation bar, select More apps, then People to add it. After adding People, right-click and select Pin to keep it in the left navigation bar.)
2. Select Manage, then Export Contacts.

3. Under Contacts from this folder, select All contacts or select a folder of specific contacts, then select Export.

4. The exported .CSV file is saved to your Downloads folder.
Import Your Contacts Into Wise Agent
Once your CSV export has been saved, you can now import your contacts using one of the options on the Import/Export page (steps below), or email the file to help@wiseagent.com and we will format and import them for you! Wise Agent allows you to import more information than several other CRMs as we include categories, birthdays, anniversaries, spouse and child names, and notes. HERE is an example file to use for acceptable column header fields in your CSV file.
To Import Your Contacts:
-
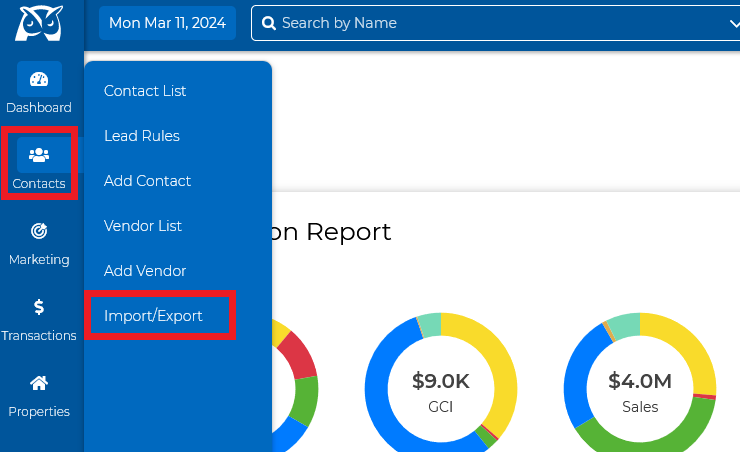
From the sidebar, select Contacts > Import/Export
-
Once on the Import/Export page, under Import, select the Wise Agent option, then click the blue "Upload” button. Select your CSV file from your computer, and click Upload
-
Next, the system will then read the column headers in your file & those accepted will show a green checkmark under Status. If you have a red X under Status for any of your columns, make sure to select an accepted field to import into, using the dropdown menu beneath Accepted Columns.
- Next, you will want to select an Import Method:
-
Only insert new
-
Insert new/update existing - you have contacts in your Wise Agent account. It's recommended to insert new/update existing ones to avoid duplicate contacts.
-
Allow duplicates
-
-
Next, you can assign a contact list to an inside team member and import them under a specific category/source. You can add a new category and source by entering the new title in the appropriate field and then clicking the Green plus sign to add It to your list.
- Lastly, checkbox Format Names and Address to reformat these sections, then click Import & that is it!