

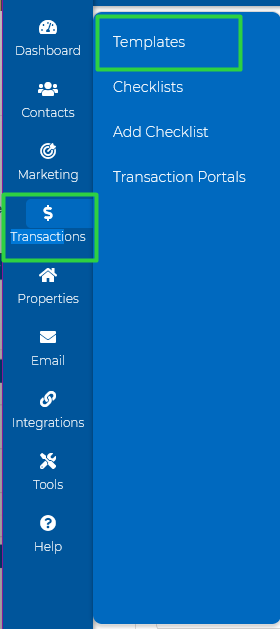
1. On the side navigation bar select Transactions > Templates.
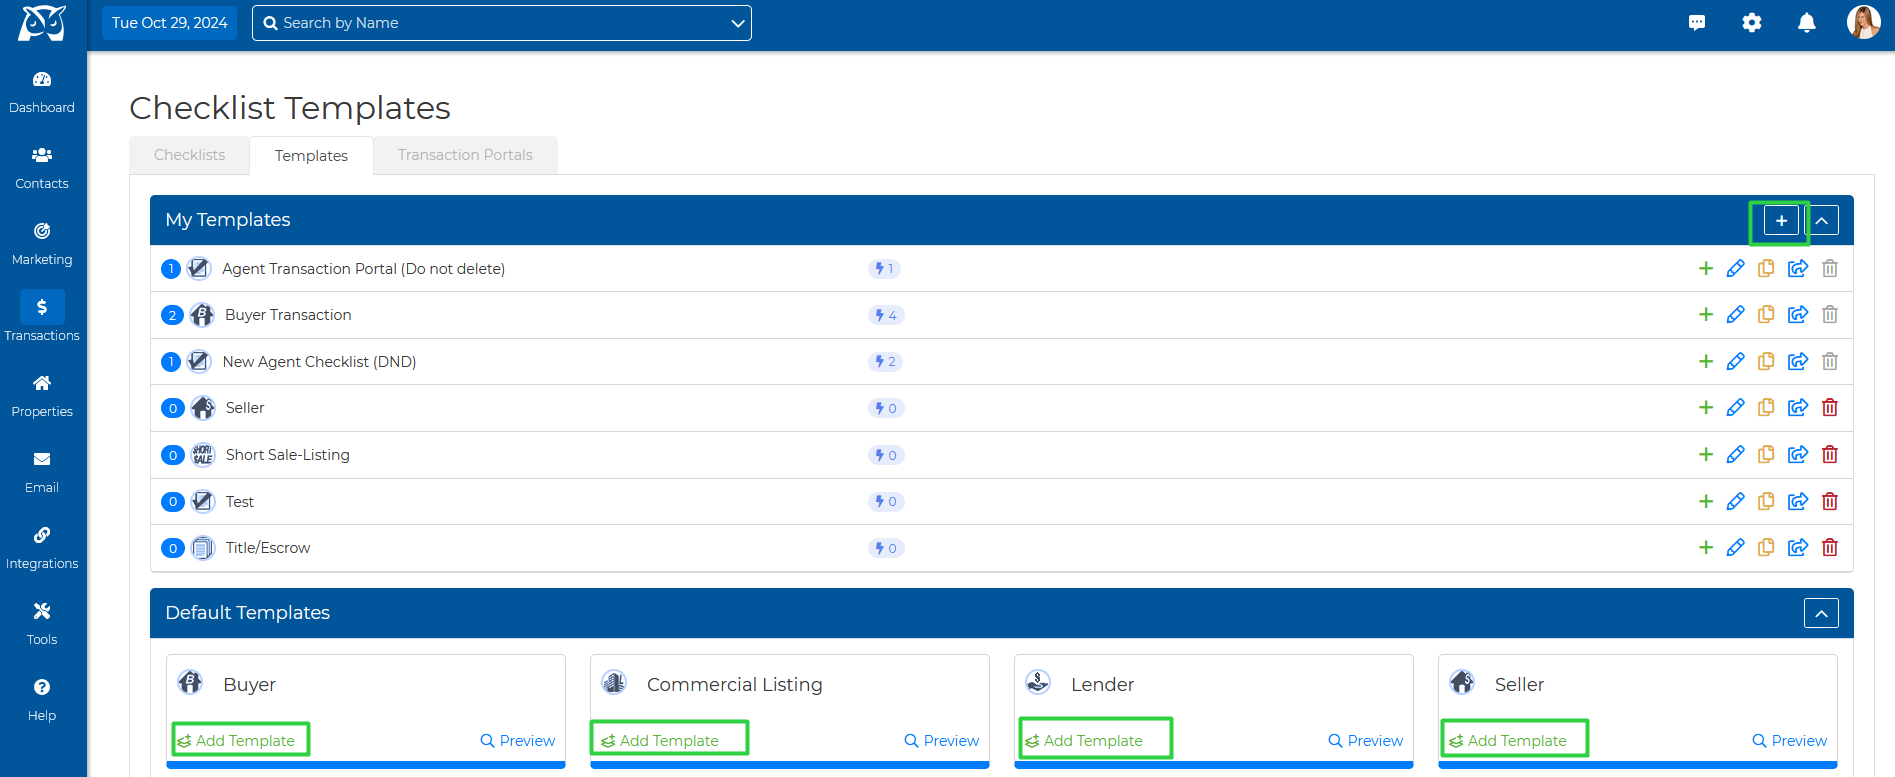
2. Click on the "+" to create a custom template, or use one of our Default Templates by clicking on the Add Template button.
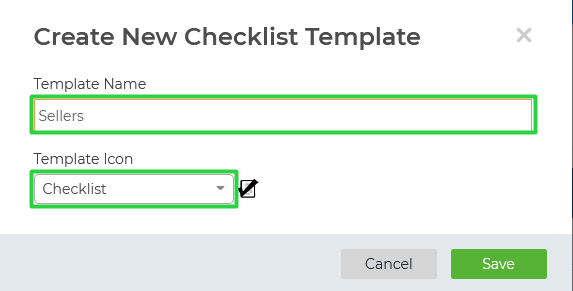
3. Now, you can give your checklist template a name and icon, then hit Save.
4. It will then walk you through selecting your Dates, Form Fields, Checklist Contacts, and Tasks. For further information on how to set up "Checklist Triggers" for your tasks, click HERE!
Once you finish those steps, your template is complete and ready to be used to create your checklists!
