

Creating a Checklist Template
💡 Checklist triggers are created within the "tasks" section of your checklist template. You will first want to create your template using the steps below.
- Log in to your Wise Agent account.
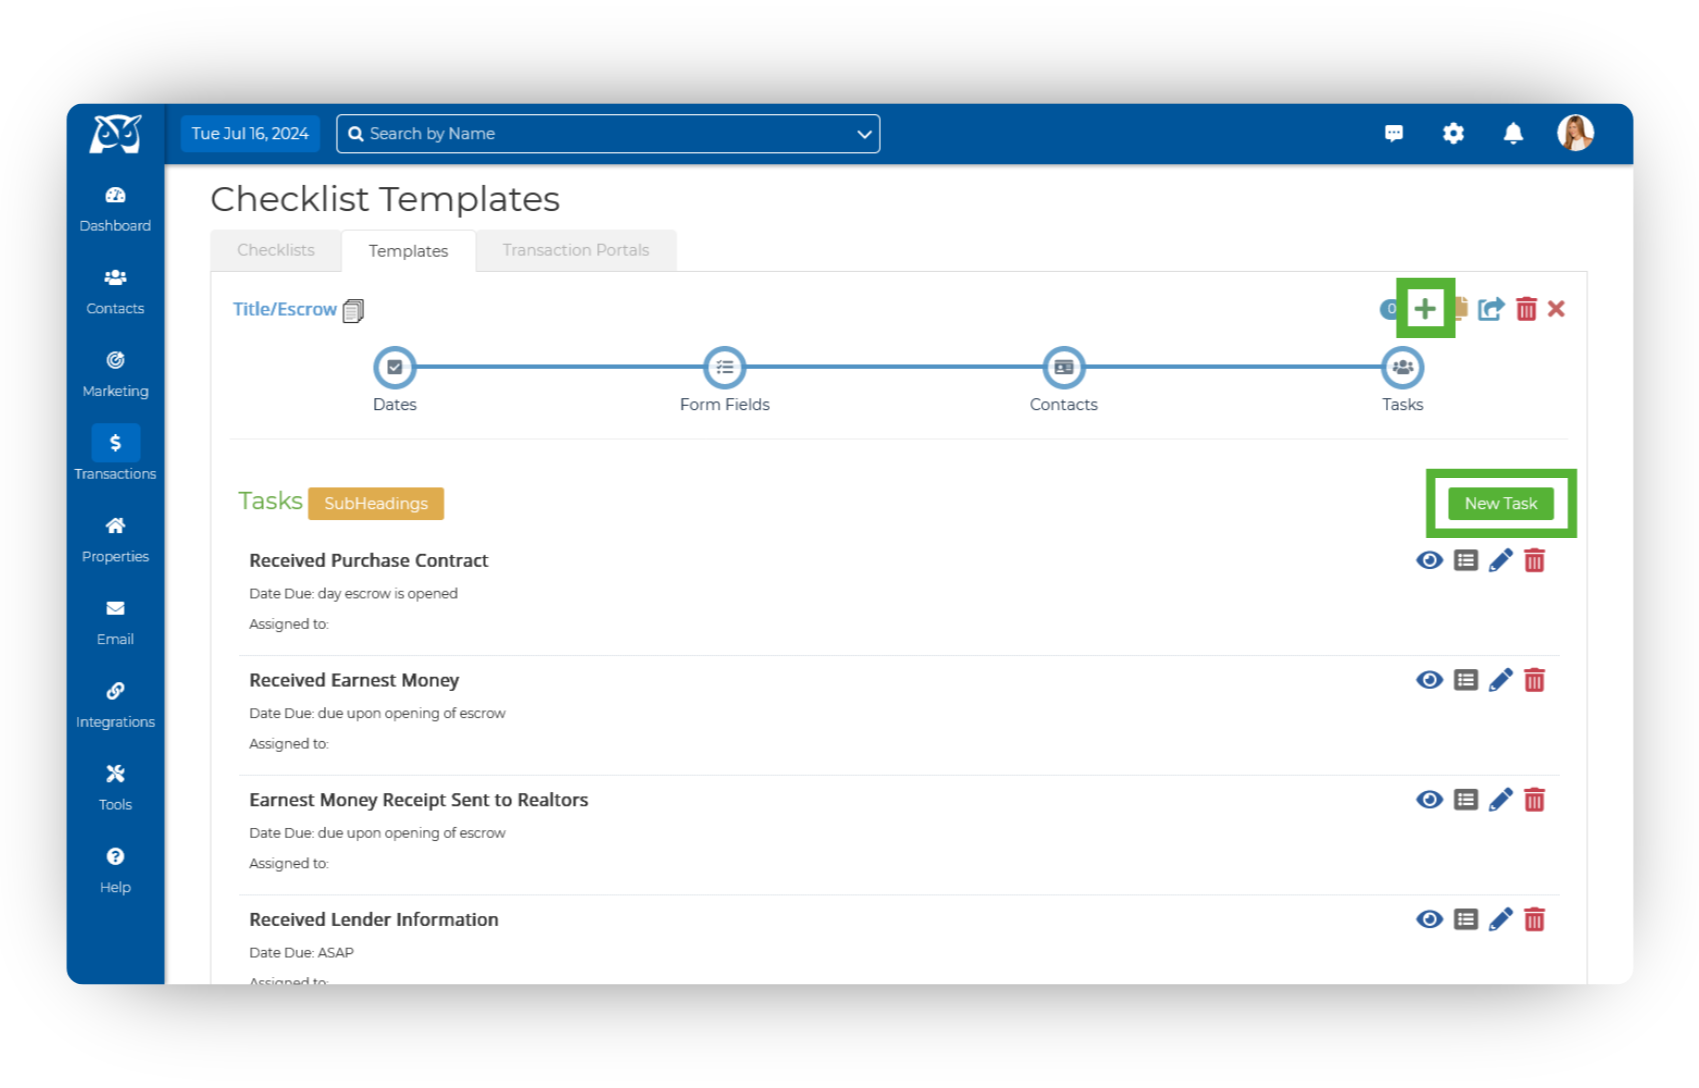
- From the sidebar, select Transactions ➜ Templates
- Click on the "+" to create a custom template, or use one of our Default Templates by clicking on the Add Template button.
- Now, you can give your checklist template a name and icon, then hit Save.
- It will then walk you through selecting your Dates, Form Fields, Checklist Contacts, and Tasks. Once you get to tasks, this is where you will create your checklist triggers!


Setting Up the Checklist Triggers
- Begin by creating a new task by clicking New Task or editing an existing one by selecting the blue pencil icon.
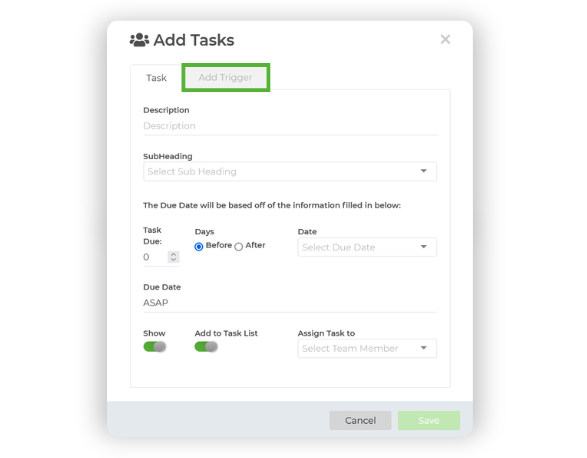
- Enter the task details, then navigate to the Add Trigger tab.
- Choose your preferred method of contact for the trigger (Email, Text, Drip Campaign, or Team Alert). Keep in mind that Text Triggers count towards your Text Messaging Sending Limit. You can create up to 5 total triggers (enabled and disabled) per task & up to 3 triggers enabled at a time per task.
- Select the trigger execution date, based on a specific number of days before or after the task's due or completion date. For example, you can notify your client immediately upon task completion by selecting "0 days after Task Completion."
- Choose the contacts you want to add to the trigger. You can select multiple contacts or opt for "Checklist Contact" to send the trigger to the client connected to your checklist.
- Once your trigger(s) are configured, click Save to apply the changes. You can add more triggers to the task if needed.


Monitoring the Triggers for a Specific Checklist
- Open your transaction checklist and navigate to the Checklist Summary section.
- Under the "Tasks" header, find and click on Checklist Triggers.
- A window will appear displaying the triggers set for the specific checklist. You can manually activate triggers by clicking the green play icon or disabling them using the Red Eye icon. Filter triggers by status (Pending, Scheduled, Completed, Error, and Disabled) using the Status options.
To Track Executed Triggers and Receive Error Notifications:
- Go to your settings by clicking on the gear icon in the upper right-hand corner, then select Settings.
- Locate Checklist Settings on the right-hand side.
- Toggle the settings for Receive Trigger Error Notifications and Add Transaction Note on Trigger Completion according to your preferences.