

To create an email signature for your Inside Team Member
1. On the left-hand side, select the "Email" drop-down, then select "Email Signature."
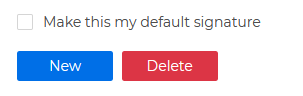
2. Click on New to create a new signature.
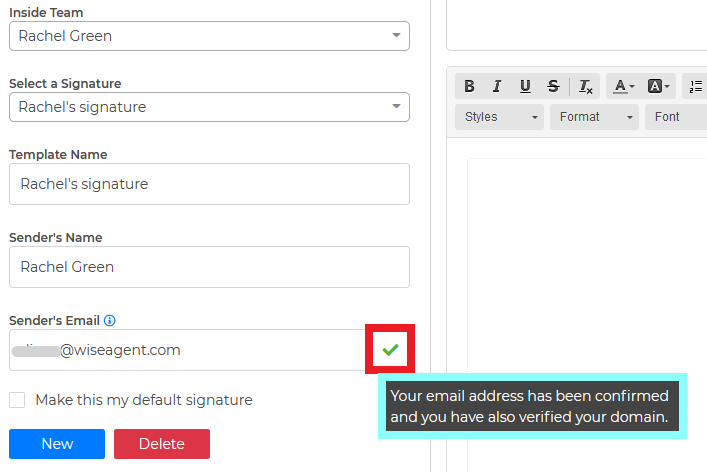
3. Select the Inside Team Member from the Inside Team drop-down, and give the Template a name.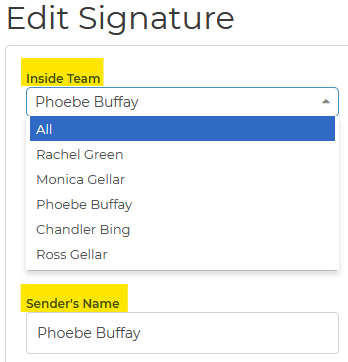
NOTE: If you would like the team member's photo to appear on the email signature, please add their photo to their profile.
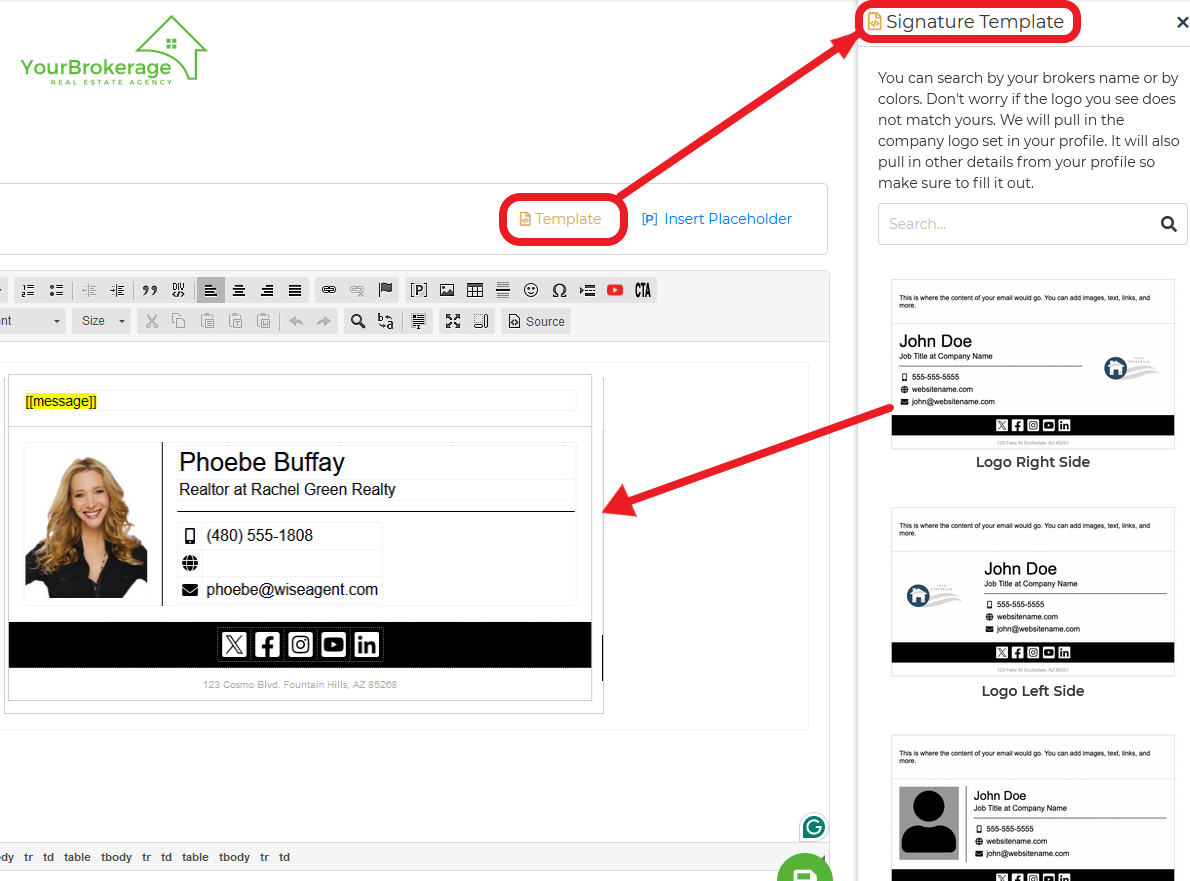
5. If they have their email signature created outside Wise Agent, they can upload their signature into Wise Agent by clicking on the "Image" icon on the toolbar.


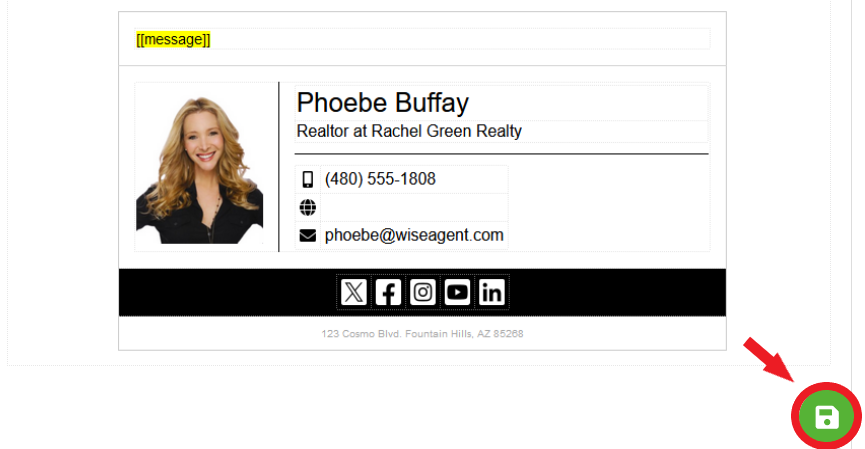
6. Make sure to hit the green "Save" button once they are done.
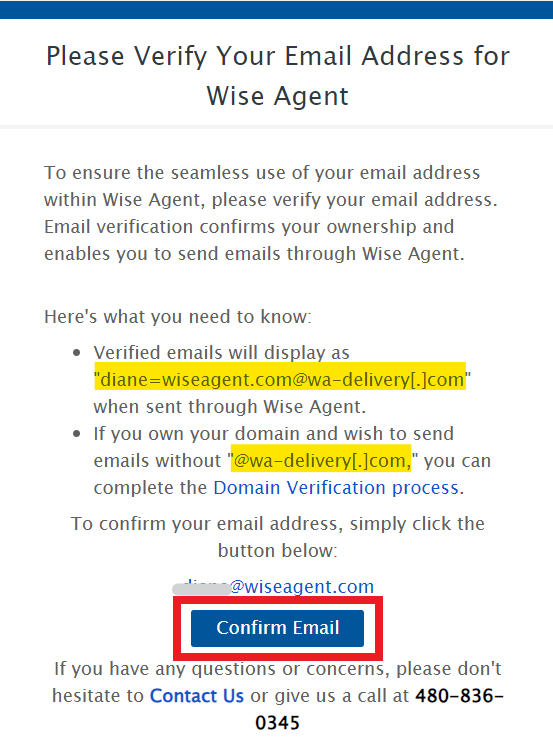
7. Once they click the save button, an email will be sent to their inbox to verify their email address. To confirm, click on the "Confirm Email" button. See our sample email verification below:
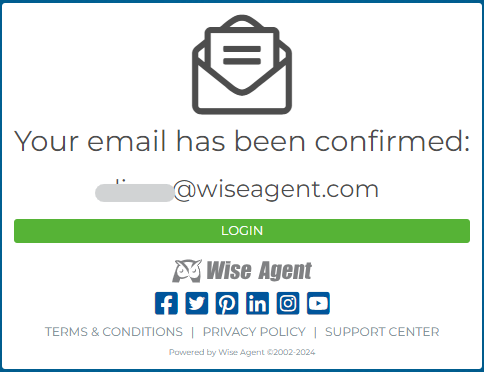
8. After they click on the "Confirm Email," they will receive a message that their email has been confirmed.
9. Refresh your Email Signature page, and it will then show that their email address has been verified and it is sending with the "wa-delivery.com" extension.
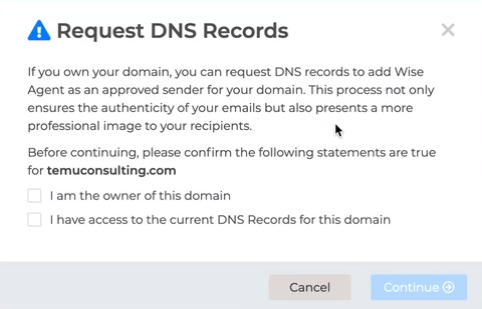
10. If your team members want to send emails with their domain without the "wa-delivery.com" extension, they can request DNS records to update the sender's email address. 
12. Our support team will receive the request, and we will send their DNS records with the instructions.
13. Once they set up their DNS records, they can check the status of their domain on the email signature page. If the verification failed, they would see the message "DNS Verification Failed"


14. Once it is approved, they will see a message that they have verified their domain.
You may also watch our video tutorial here.