Step 1: Obtaining Your Wise Agent API Key
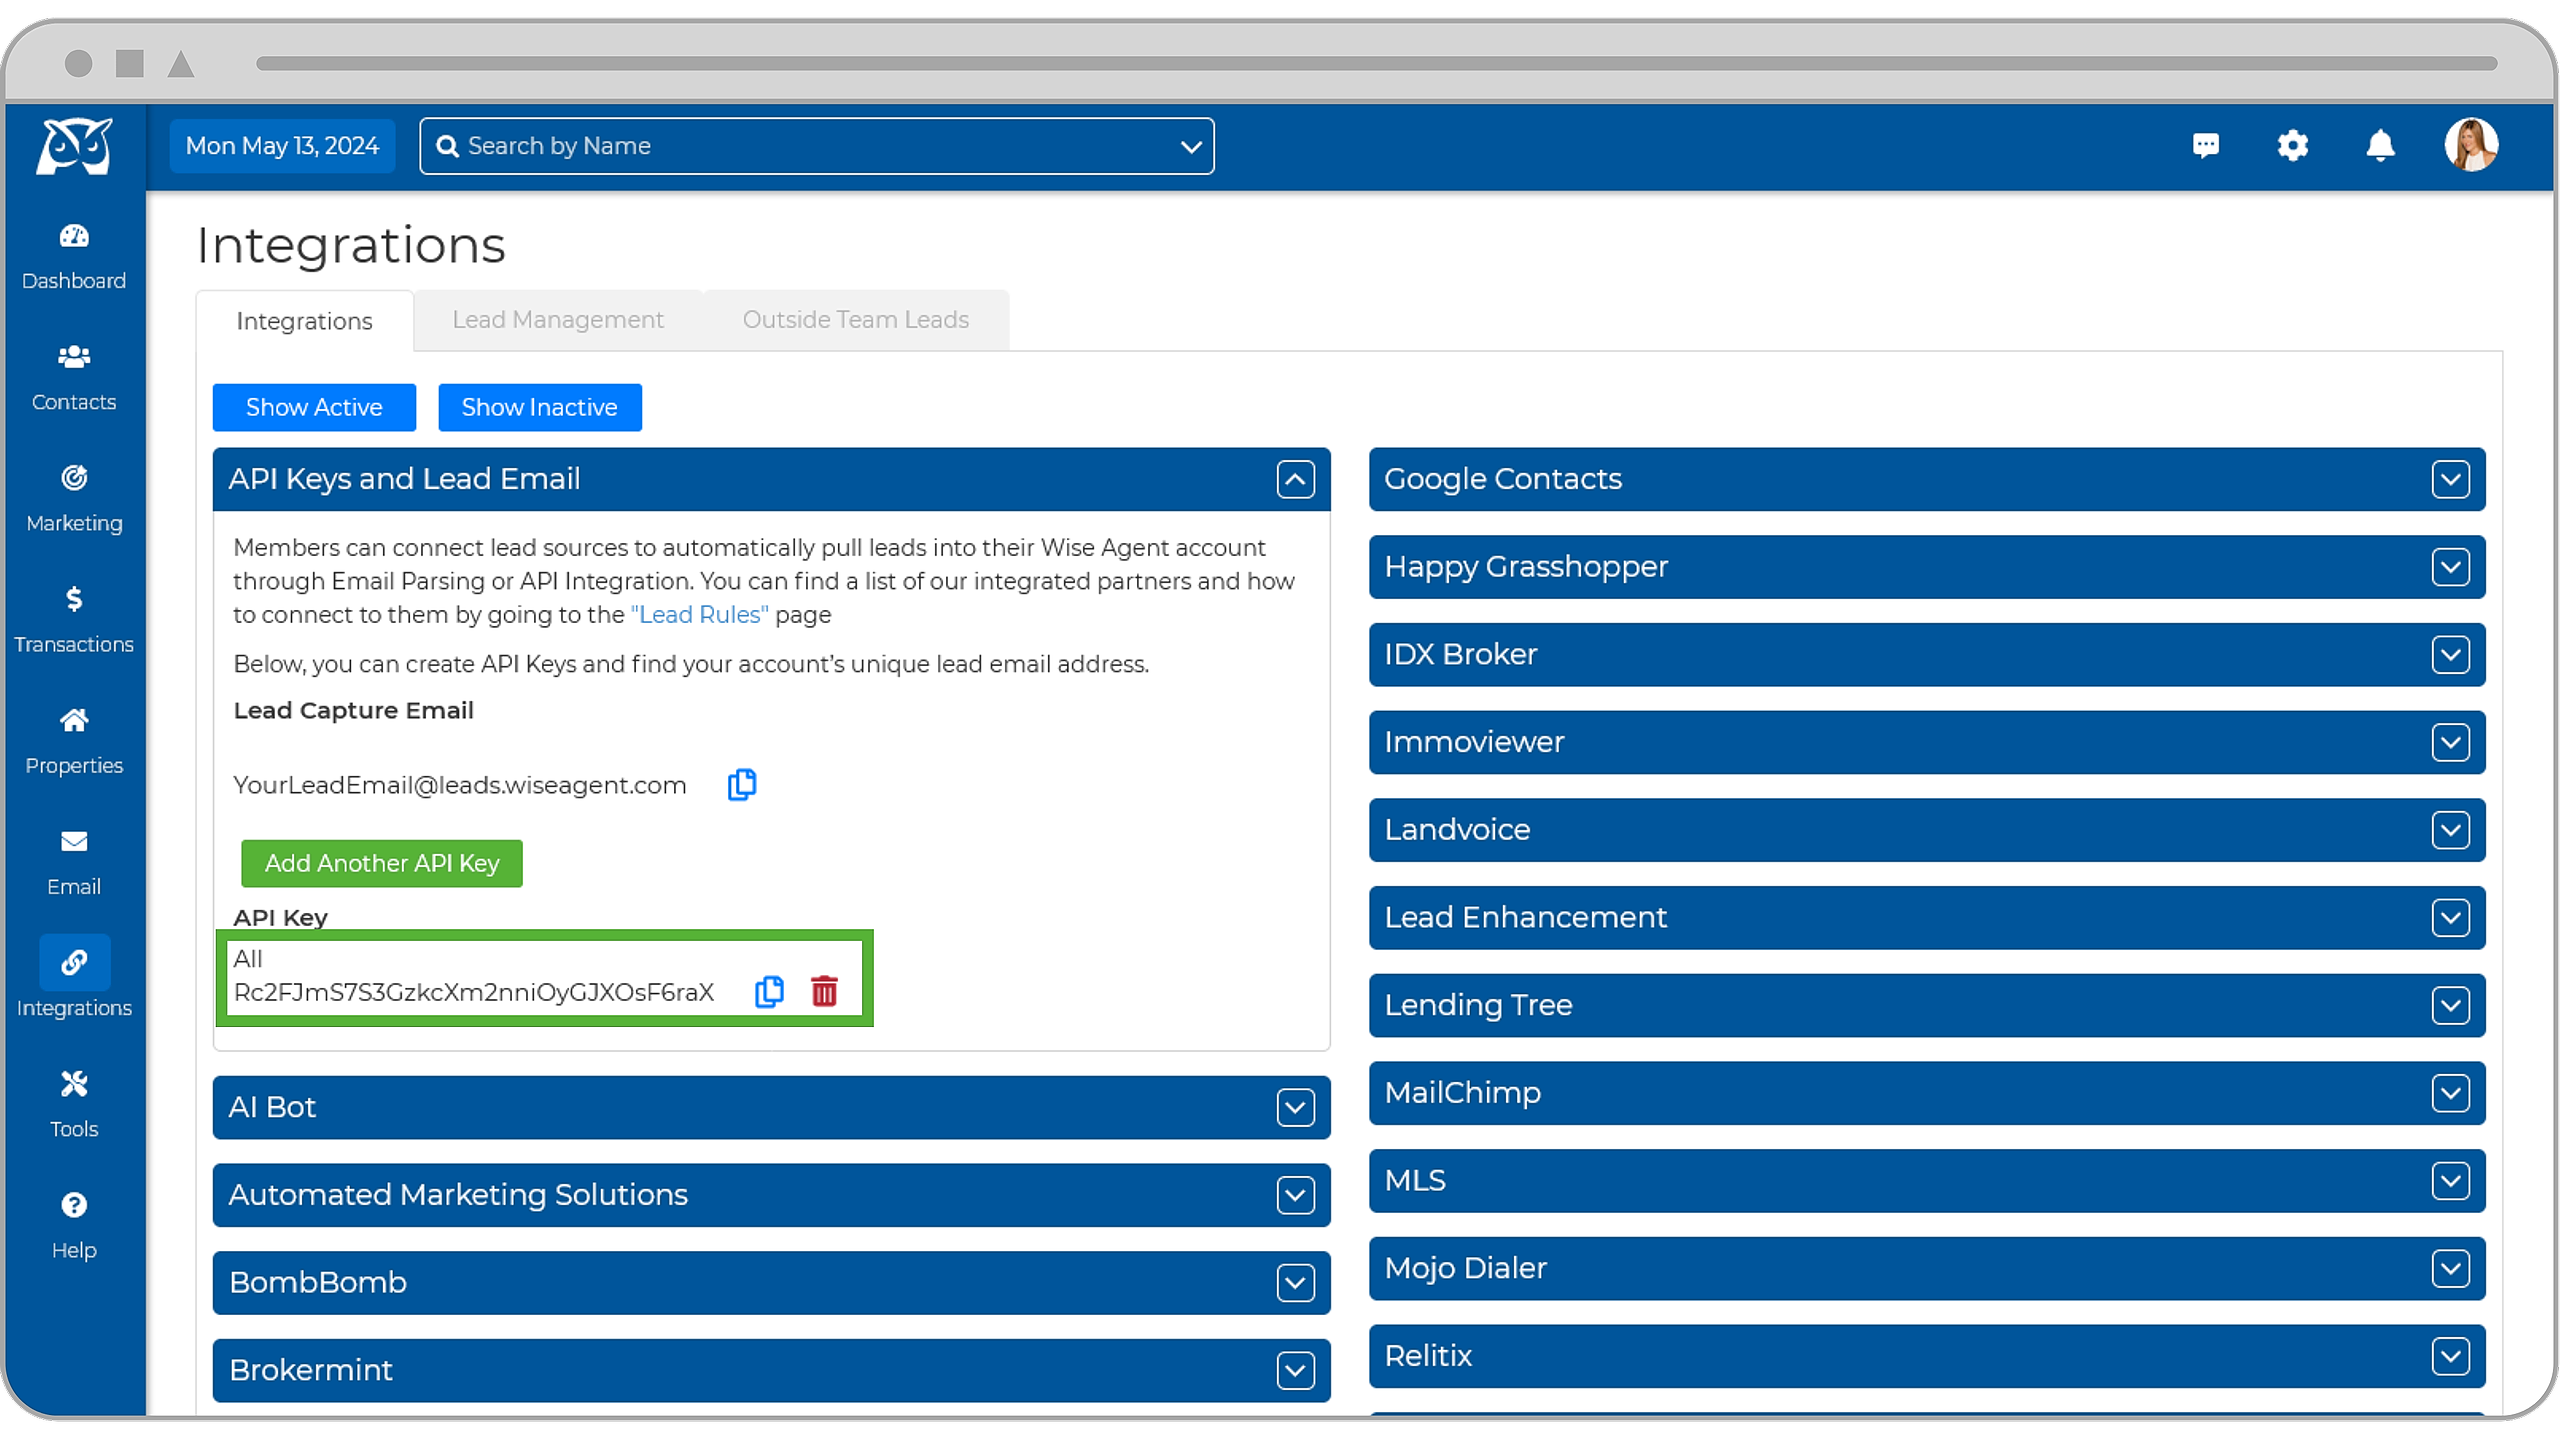
- First, you will need to copy your Wise Agent API key. To find the API key associated with your Wise Agent account, please follow the instructions below:
- Login to your Wise Agent account.
- From the sidebar, select Integrations, then click Settings from the menu.
- On the Integrations Settings page, locate and click on the API Keys and Lead Email tab and click to expand.
- From this section, locate and copy your API Key.
Step 2: Connecting The Integration In Zenlist
- Log in to your Zenlist account.
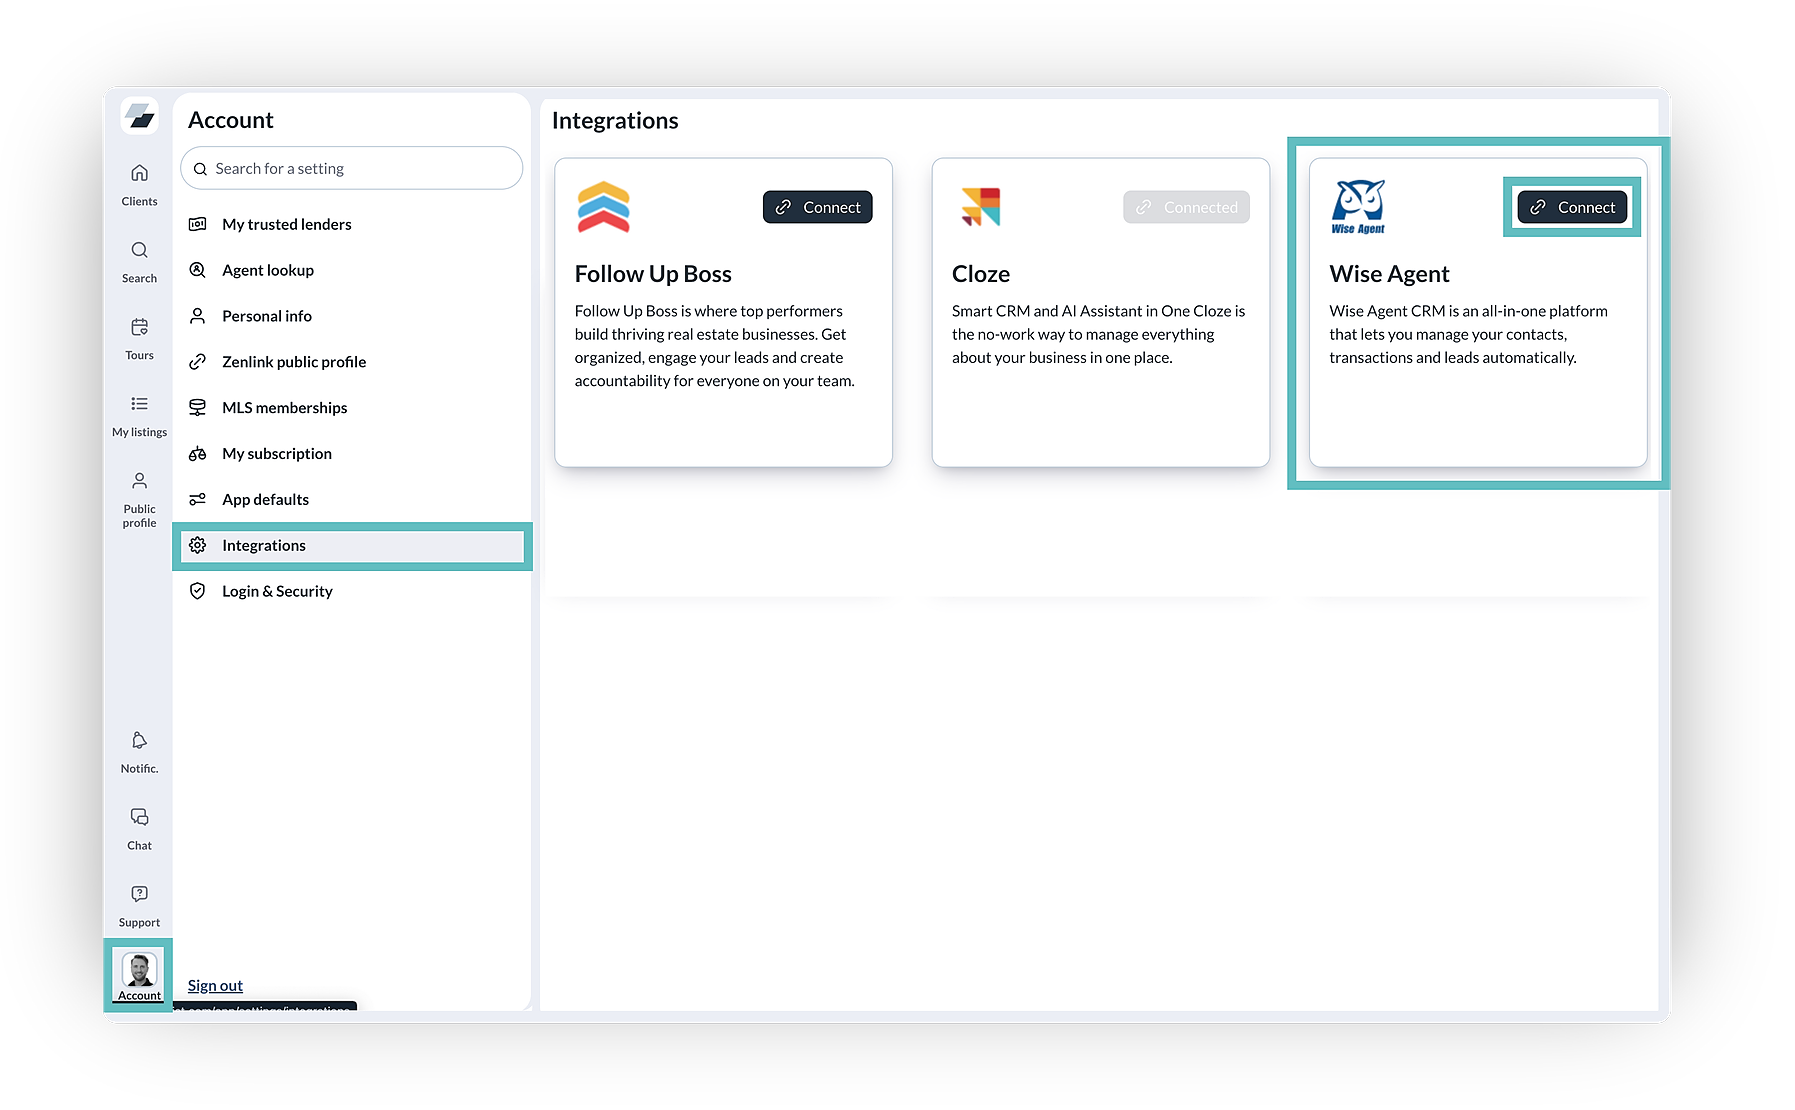
- Navigate to your Account Page in the lower left corner of your Dashboard.
- On the left-hand side, you will see Integrations. Click that, then locate Wise Agent.
- Click Connect, then paste your API key in the designated area.
- All set! Any new clients you invite to Zenlist will be automatically synced into Wise Agent
Frequently Asked Questions
After the connection between Wise Agent and Zenlist is established, will this add my current client list from Zenlist to Wise Agent?
Yes! Once the connection is established, Zenlist will sync all existing clients, including newly invited clients, into Wise Agent. If you don’t see a contact synced, ensure they were invited in Zenlist before checking Wise Agent.
If I add a new client to Wise Agent, will they also appear in Zenlist?
No. The connection between Wise Agent and Zenlist is one-way, and client sync only happens when the client is invited to Zenlist first. If you add a client to Wise Agent before inviting them to Zenlist, you will still need to create an invite for that client in Zenlist.
What additional client activity is synced to Wise Agent from Zenlist?
Zenlist now syncs activities, such as:
• Chats
• Notes
• When listings are saved, liked, or a tour is requested
Additionally, for property-related activities, the integration will include the address of the saved or liked listing on the contact record in Wise Agent.


