Adding A Class and Class Details
- From the sidebar, select Tools, then click Education Tracking from the menu.
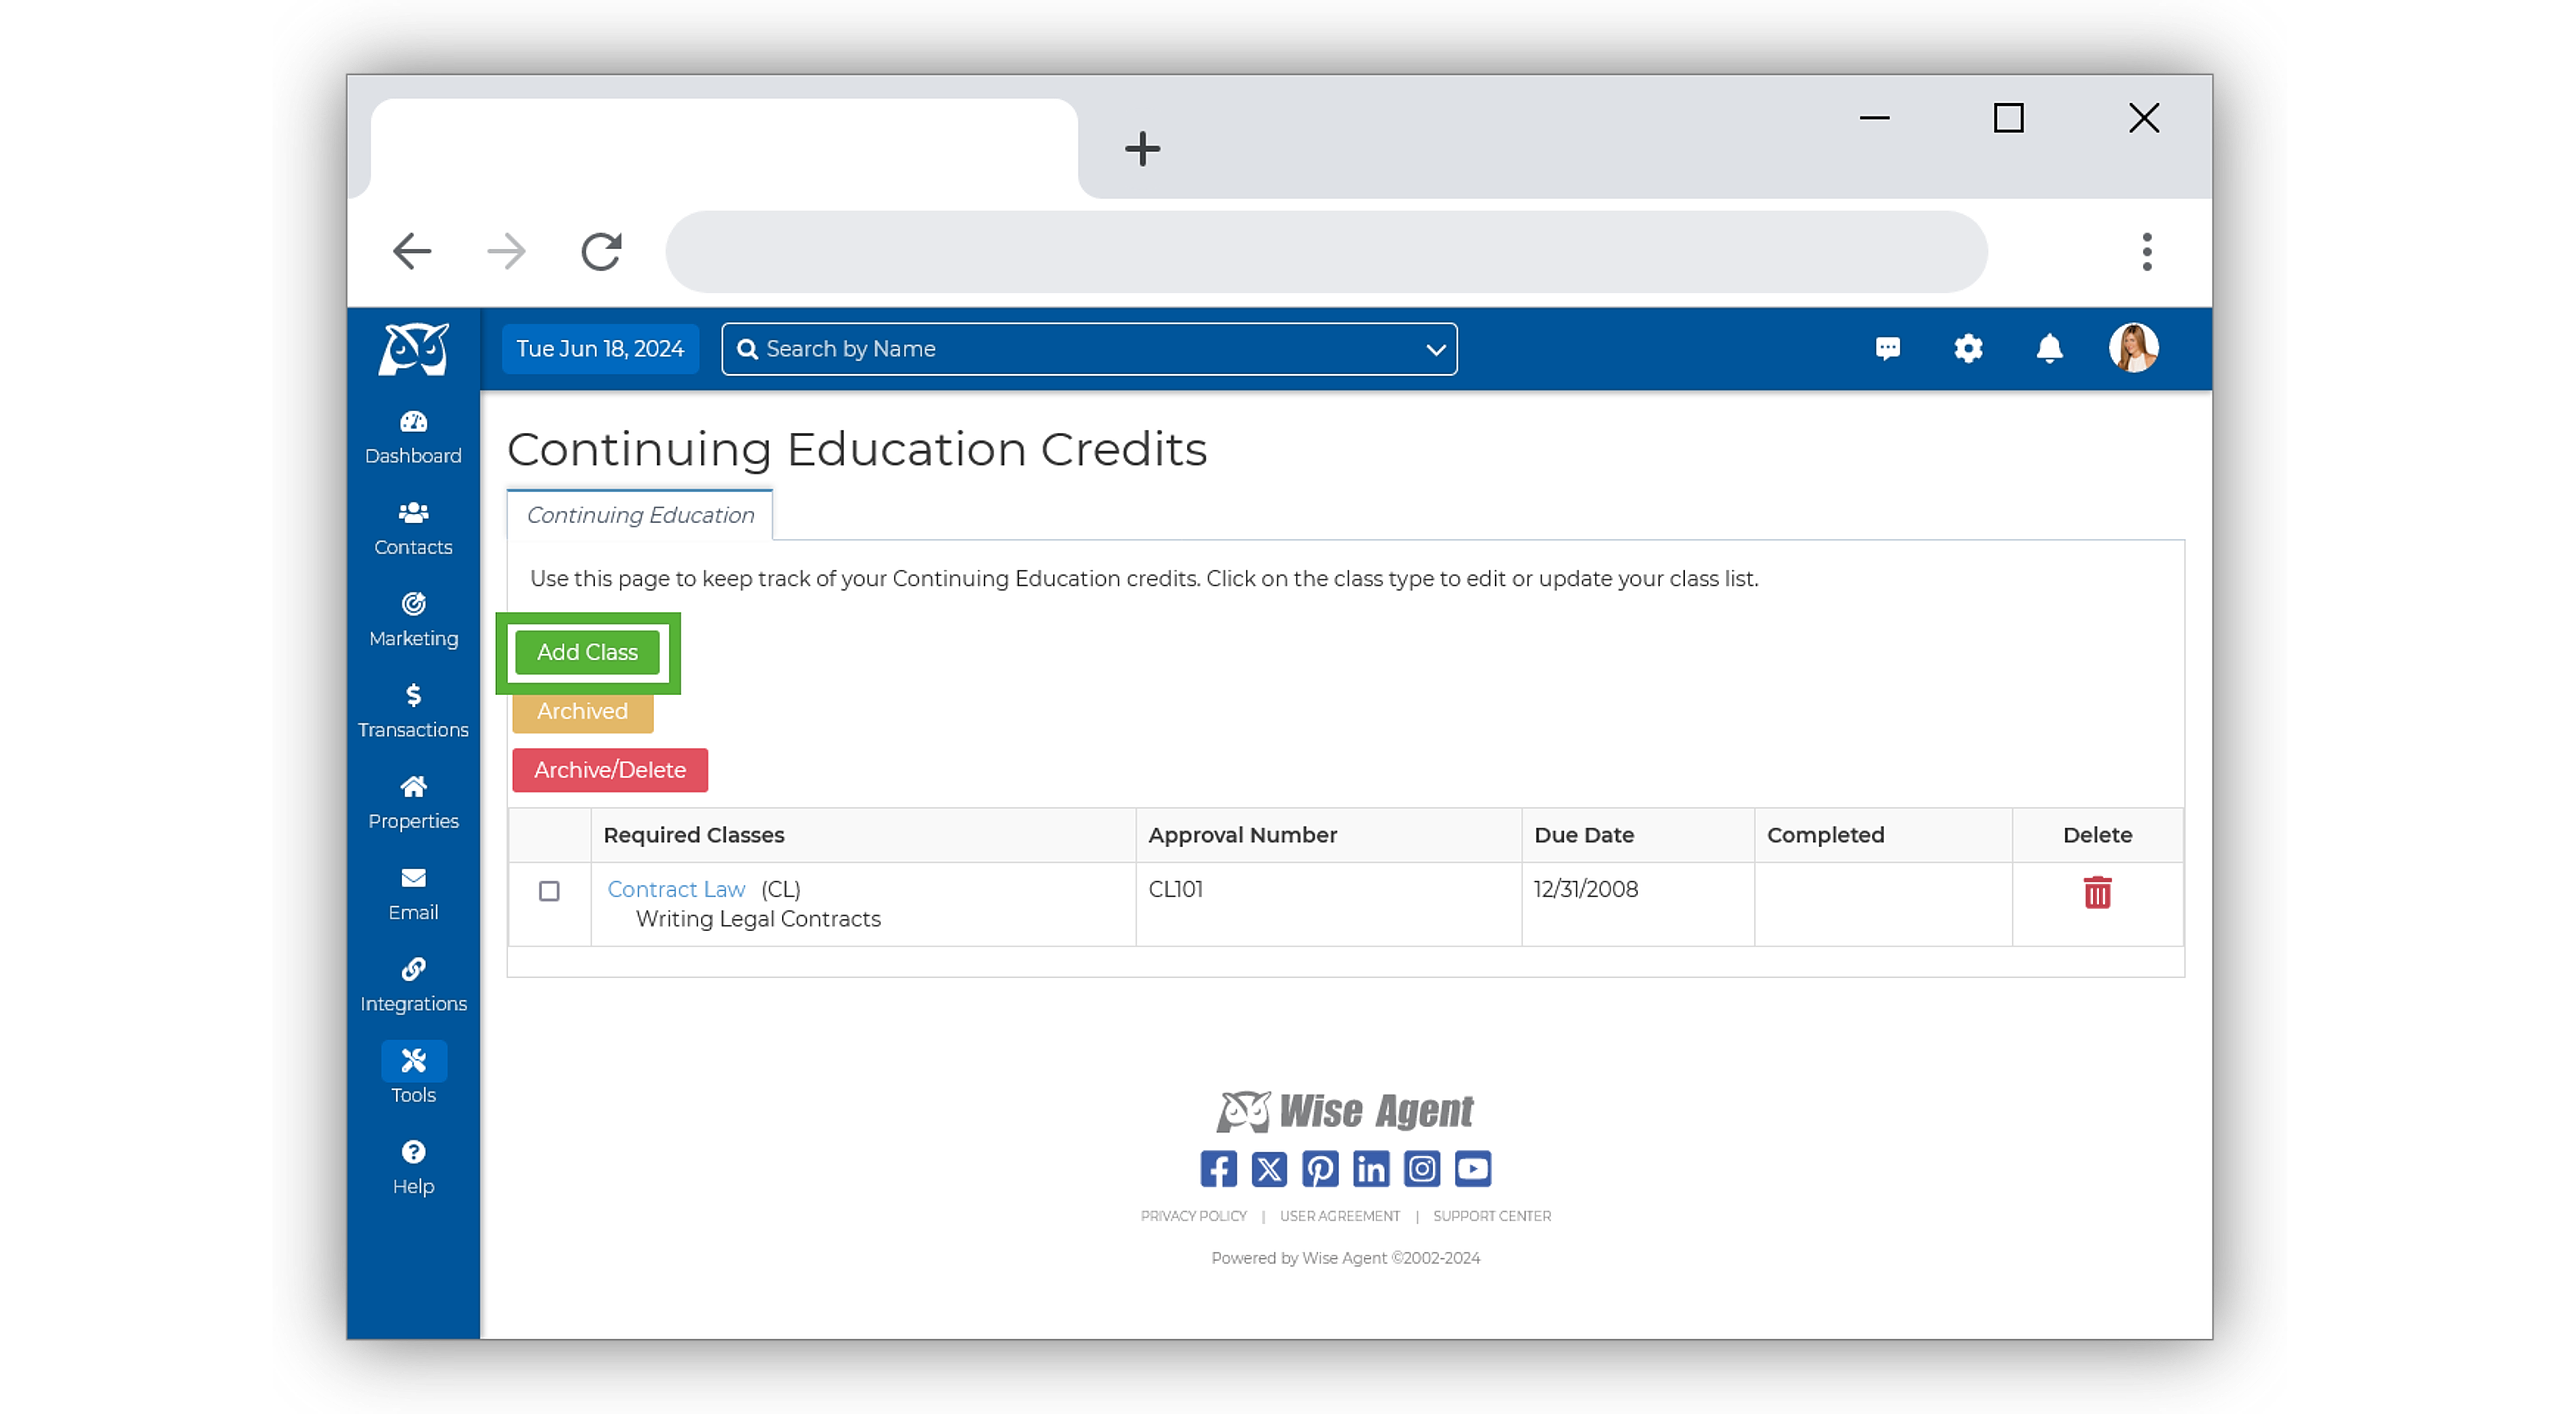
- On the Education Tracking page, select Add Class.
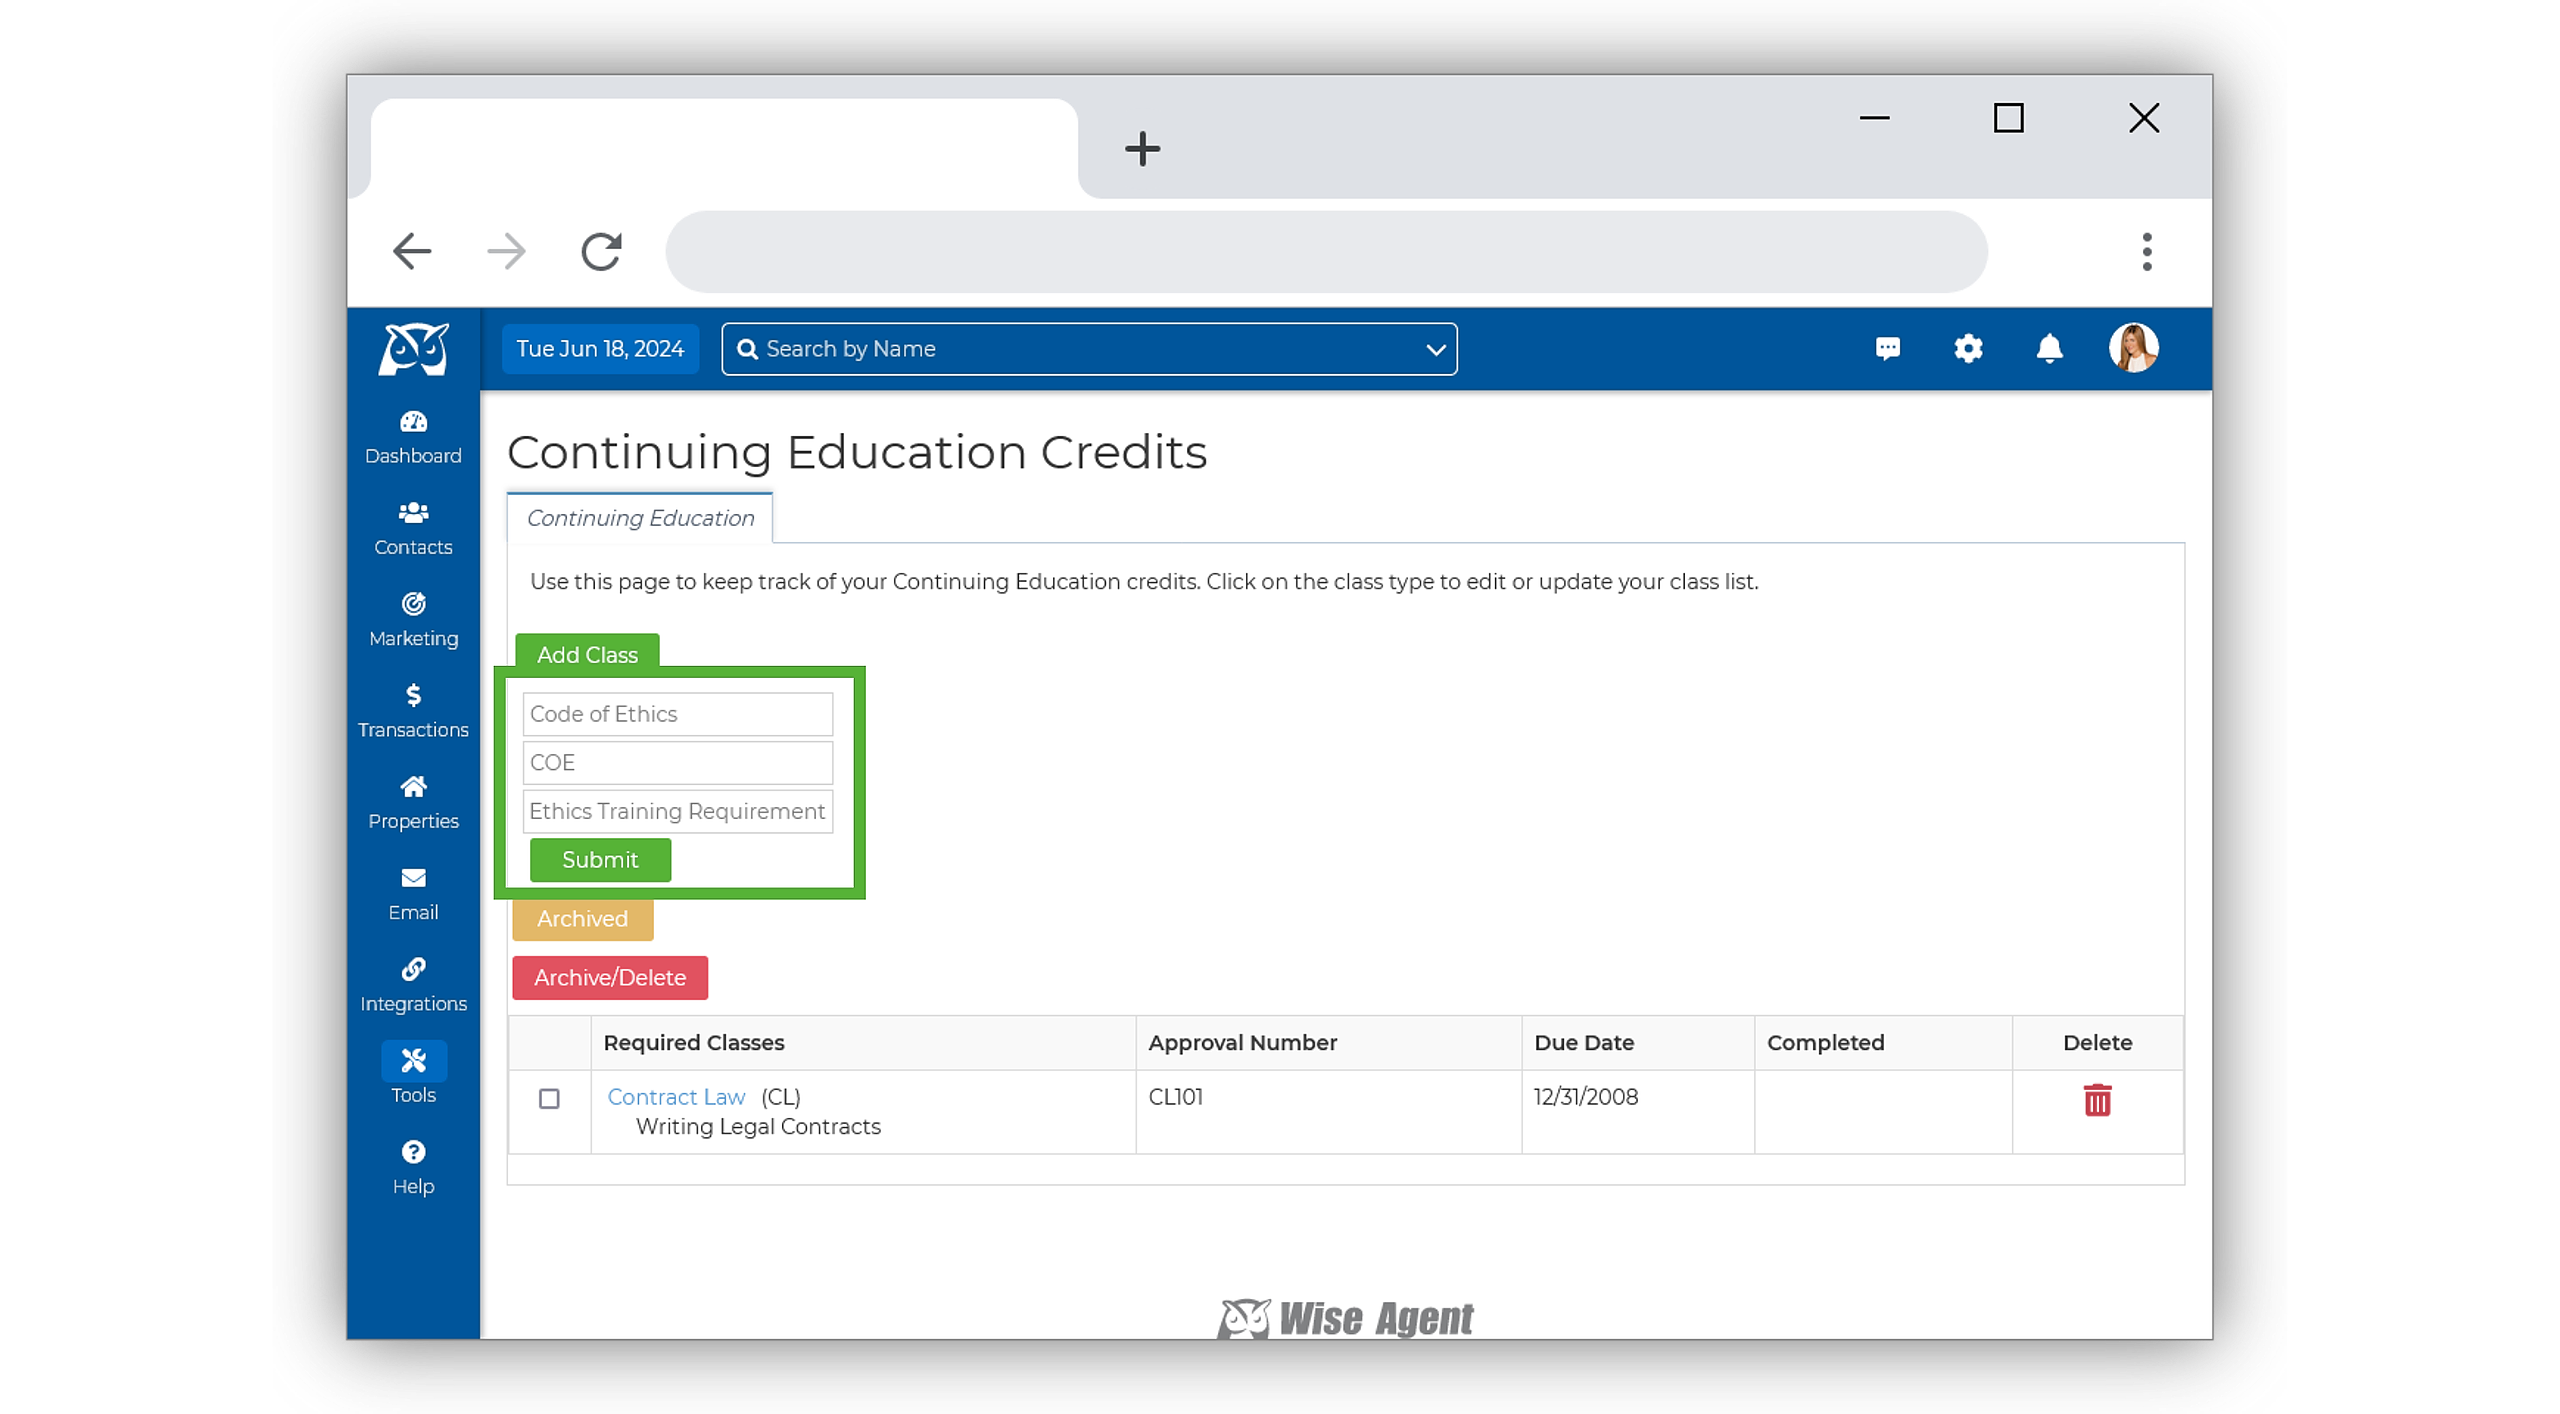
- Fill in the Class Name, Abbreviation, and Class Type, then click Submit.
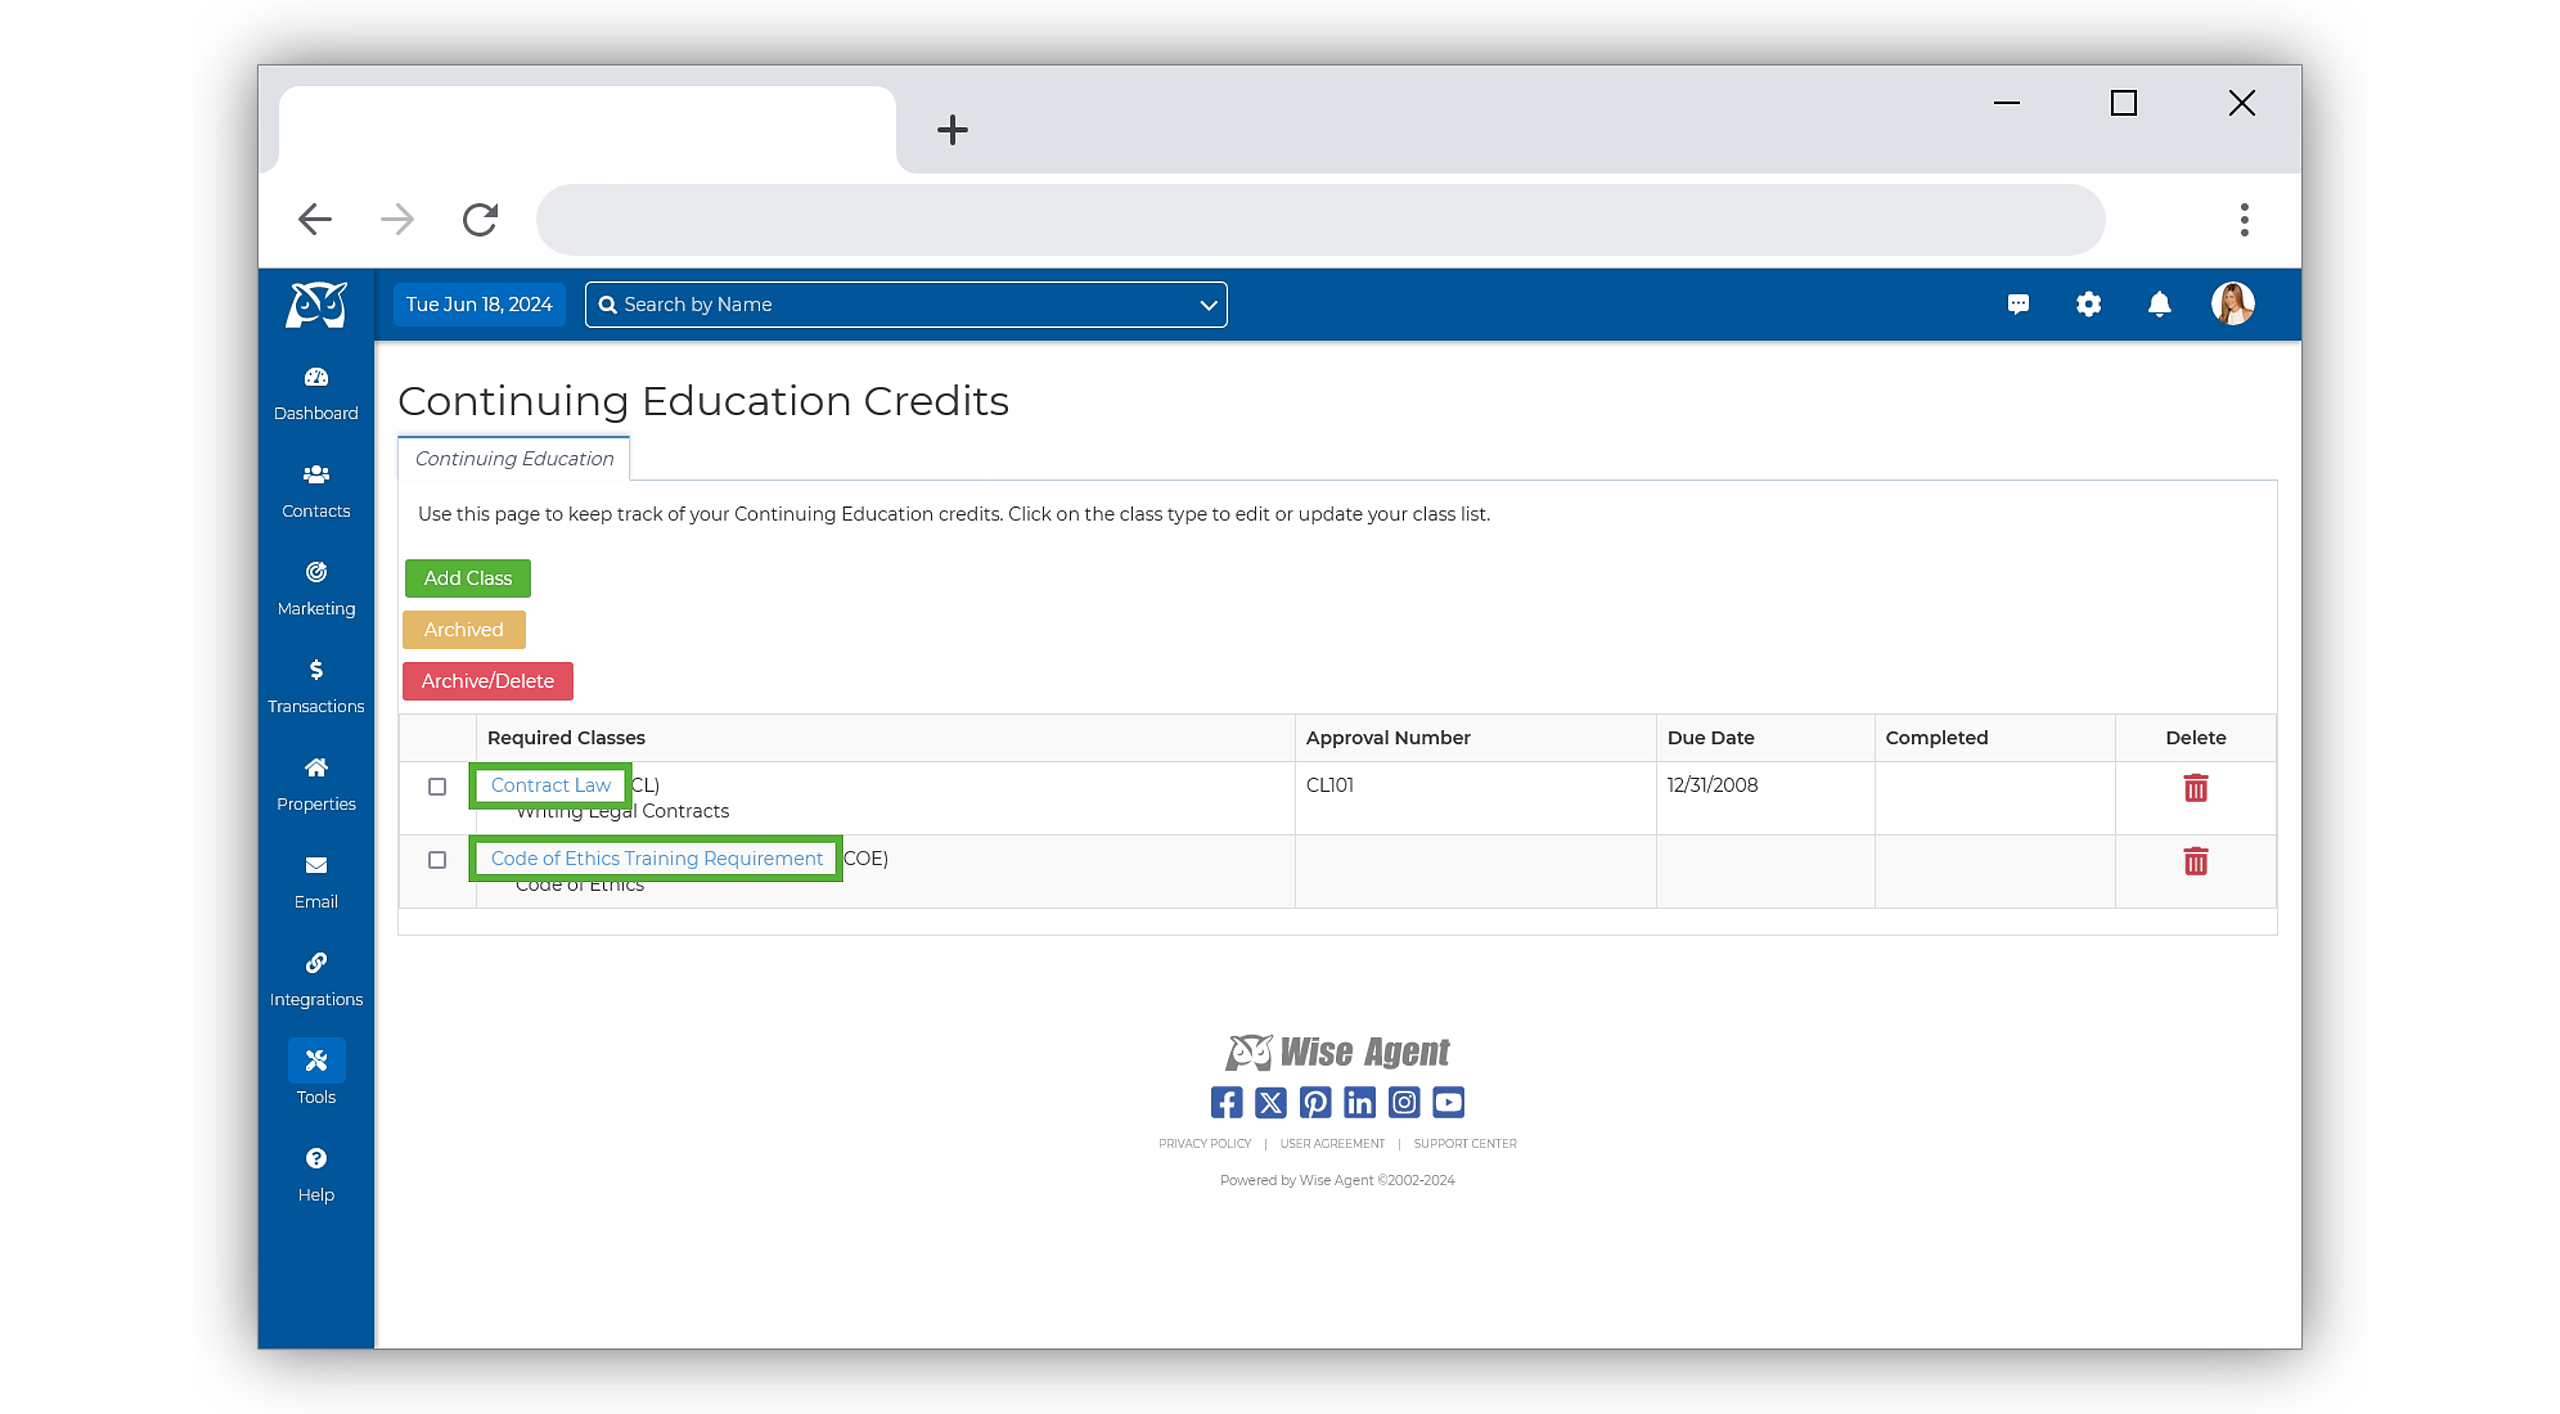
- Once submitted, your class will show in the Required Classes list. To begin adding additional details, select the class name in blue.
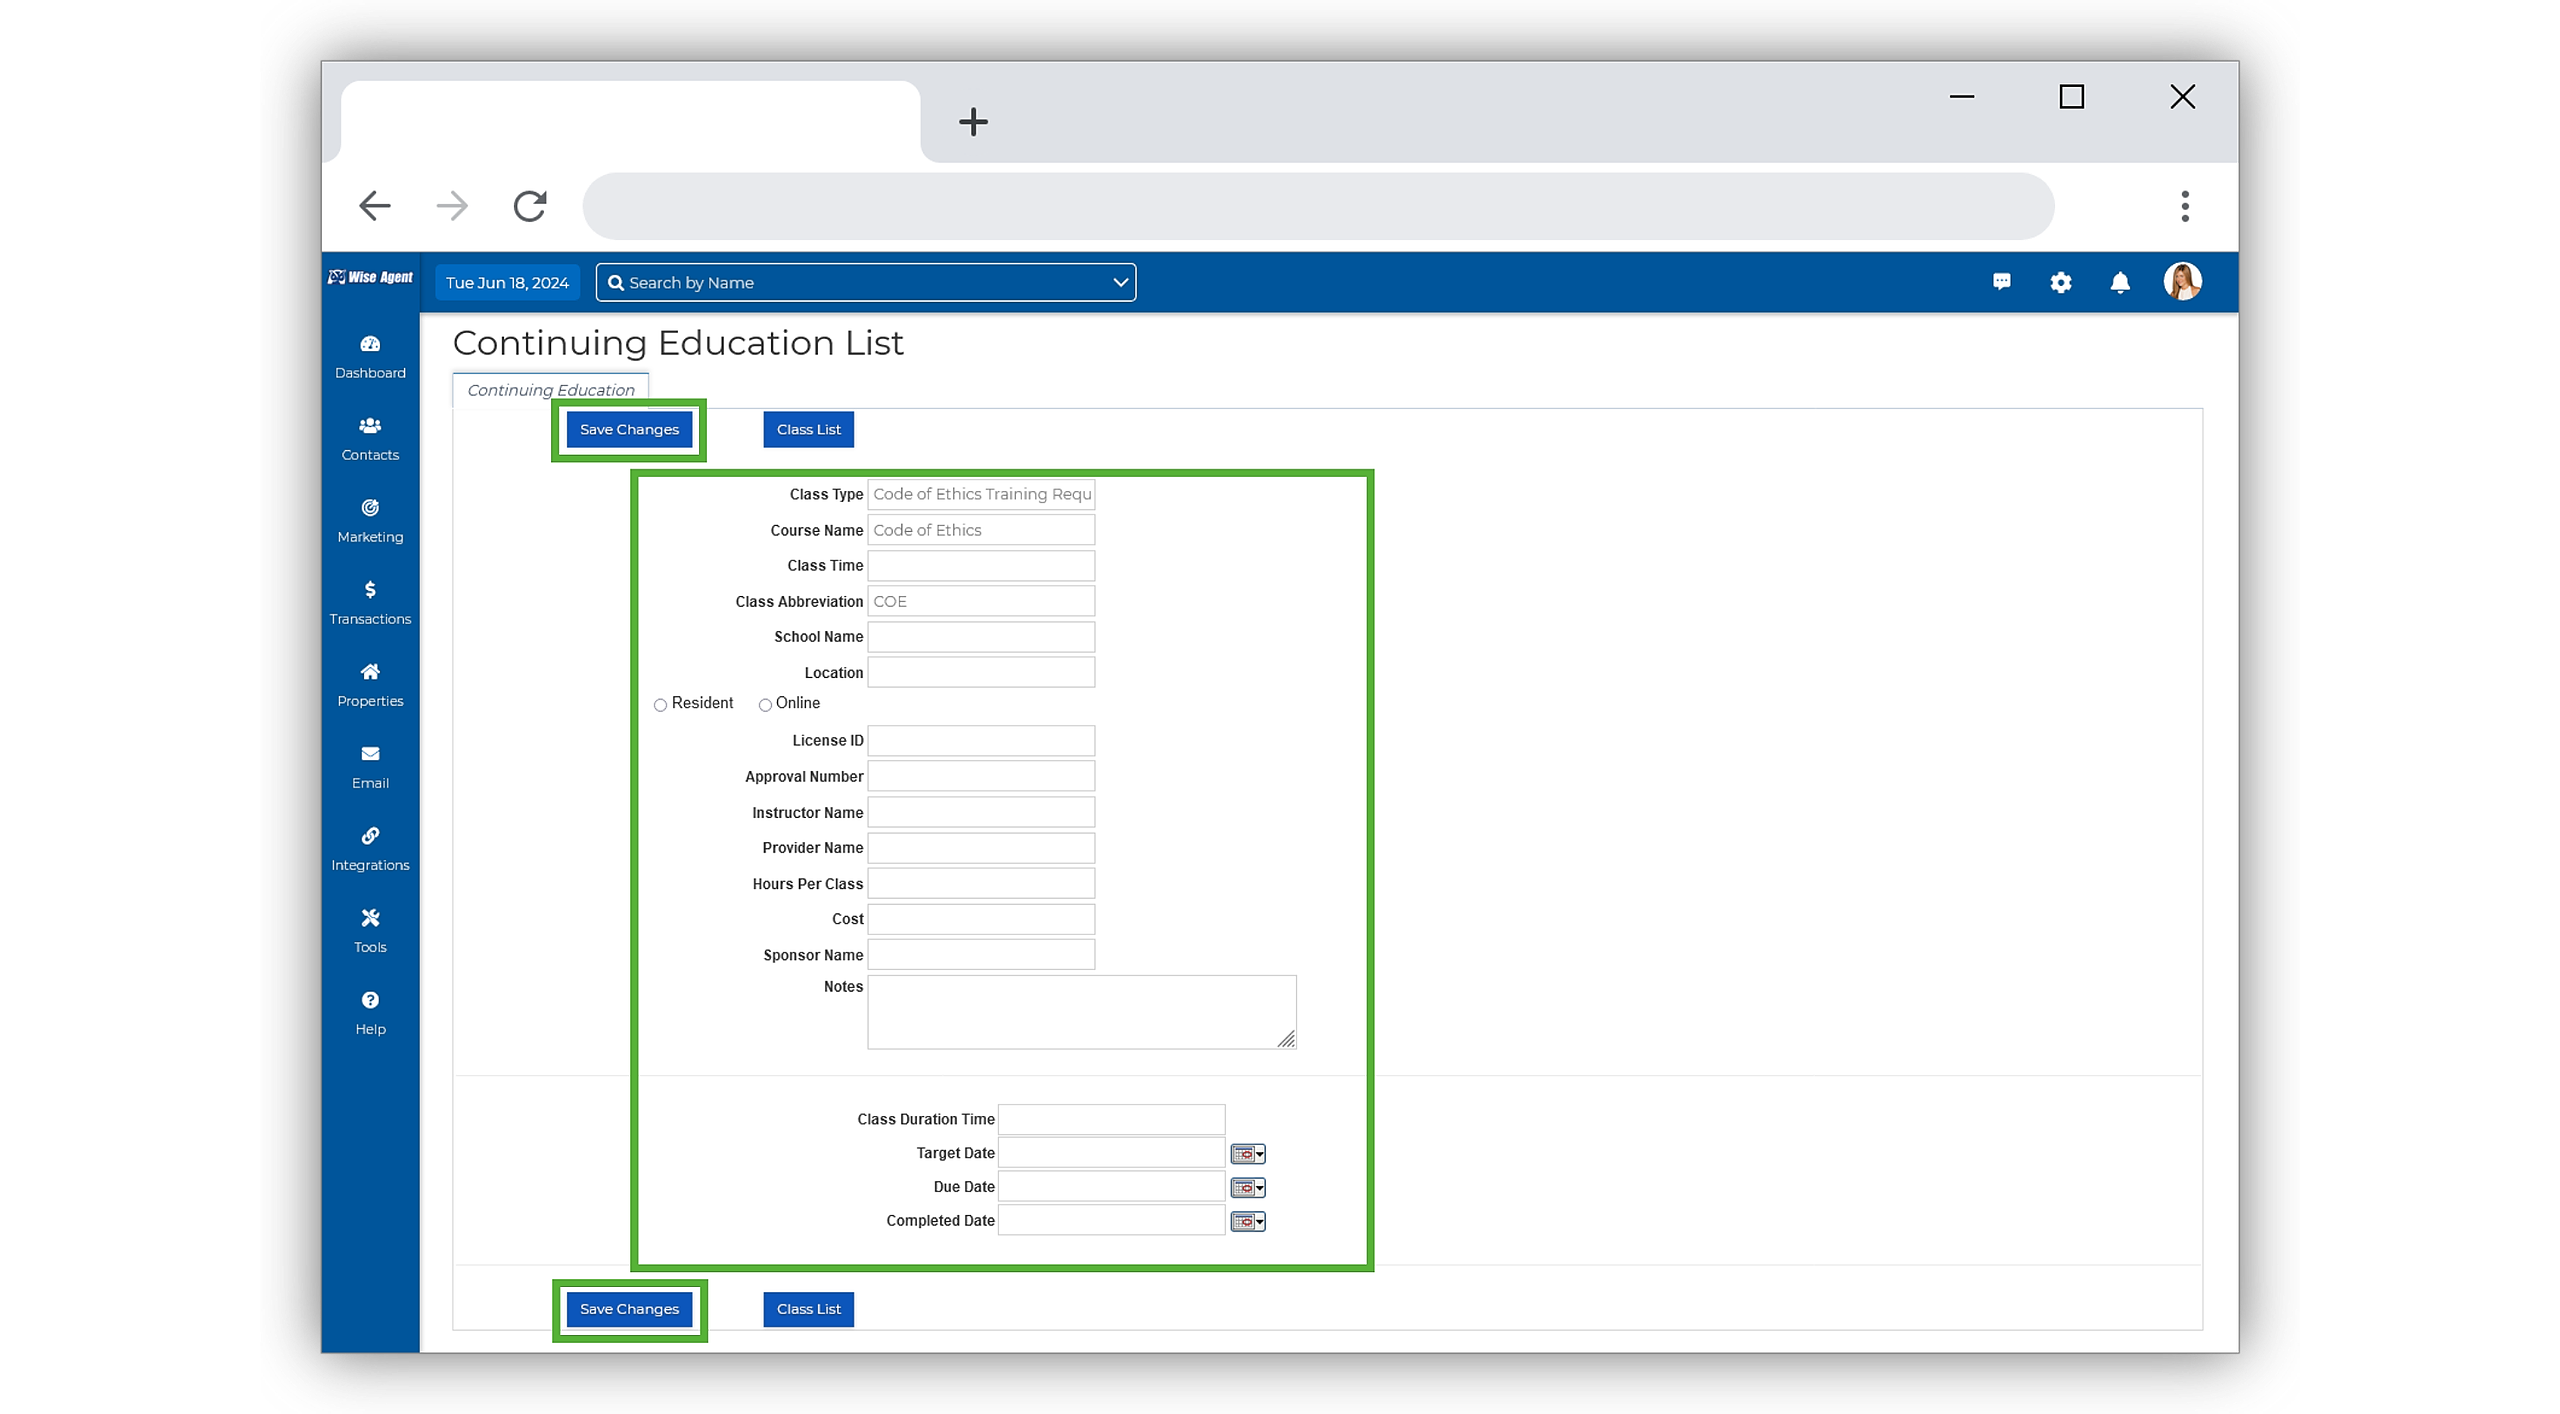
- Enter relevant details such as Class Time, License ID, Hours, Due Date, and Class Duration.
-
Click Save Changes to finalize, and you're done!
Archiving and Deleting Multiple Classes
- From the sidebar, select Tools, then click Education Tracking from the menu.
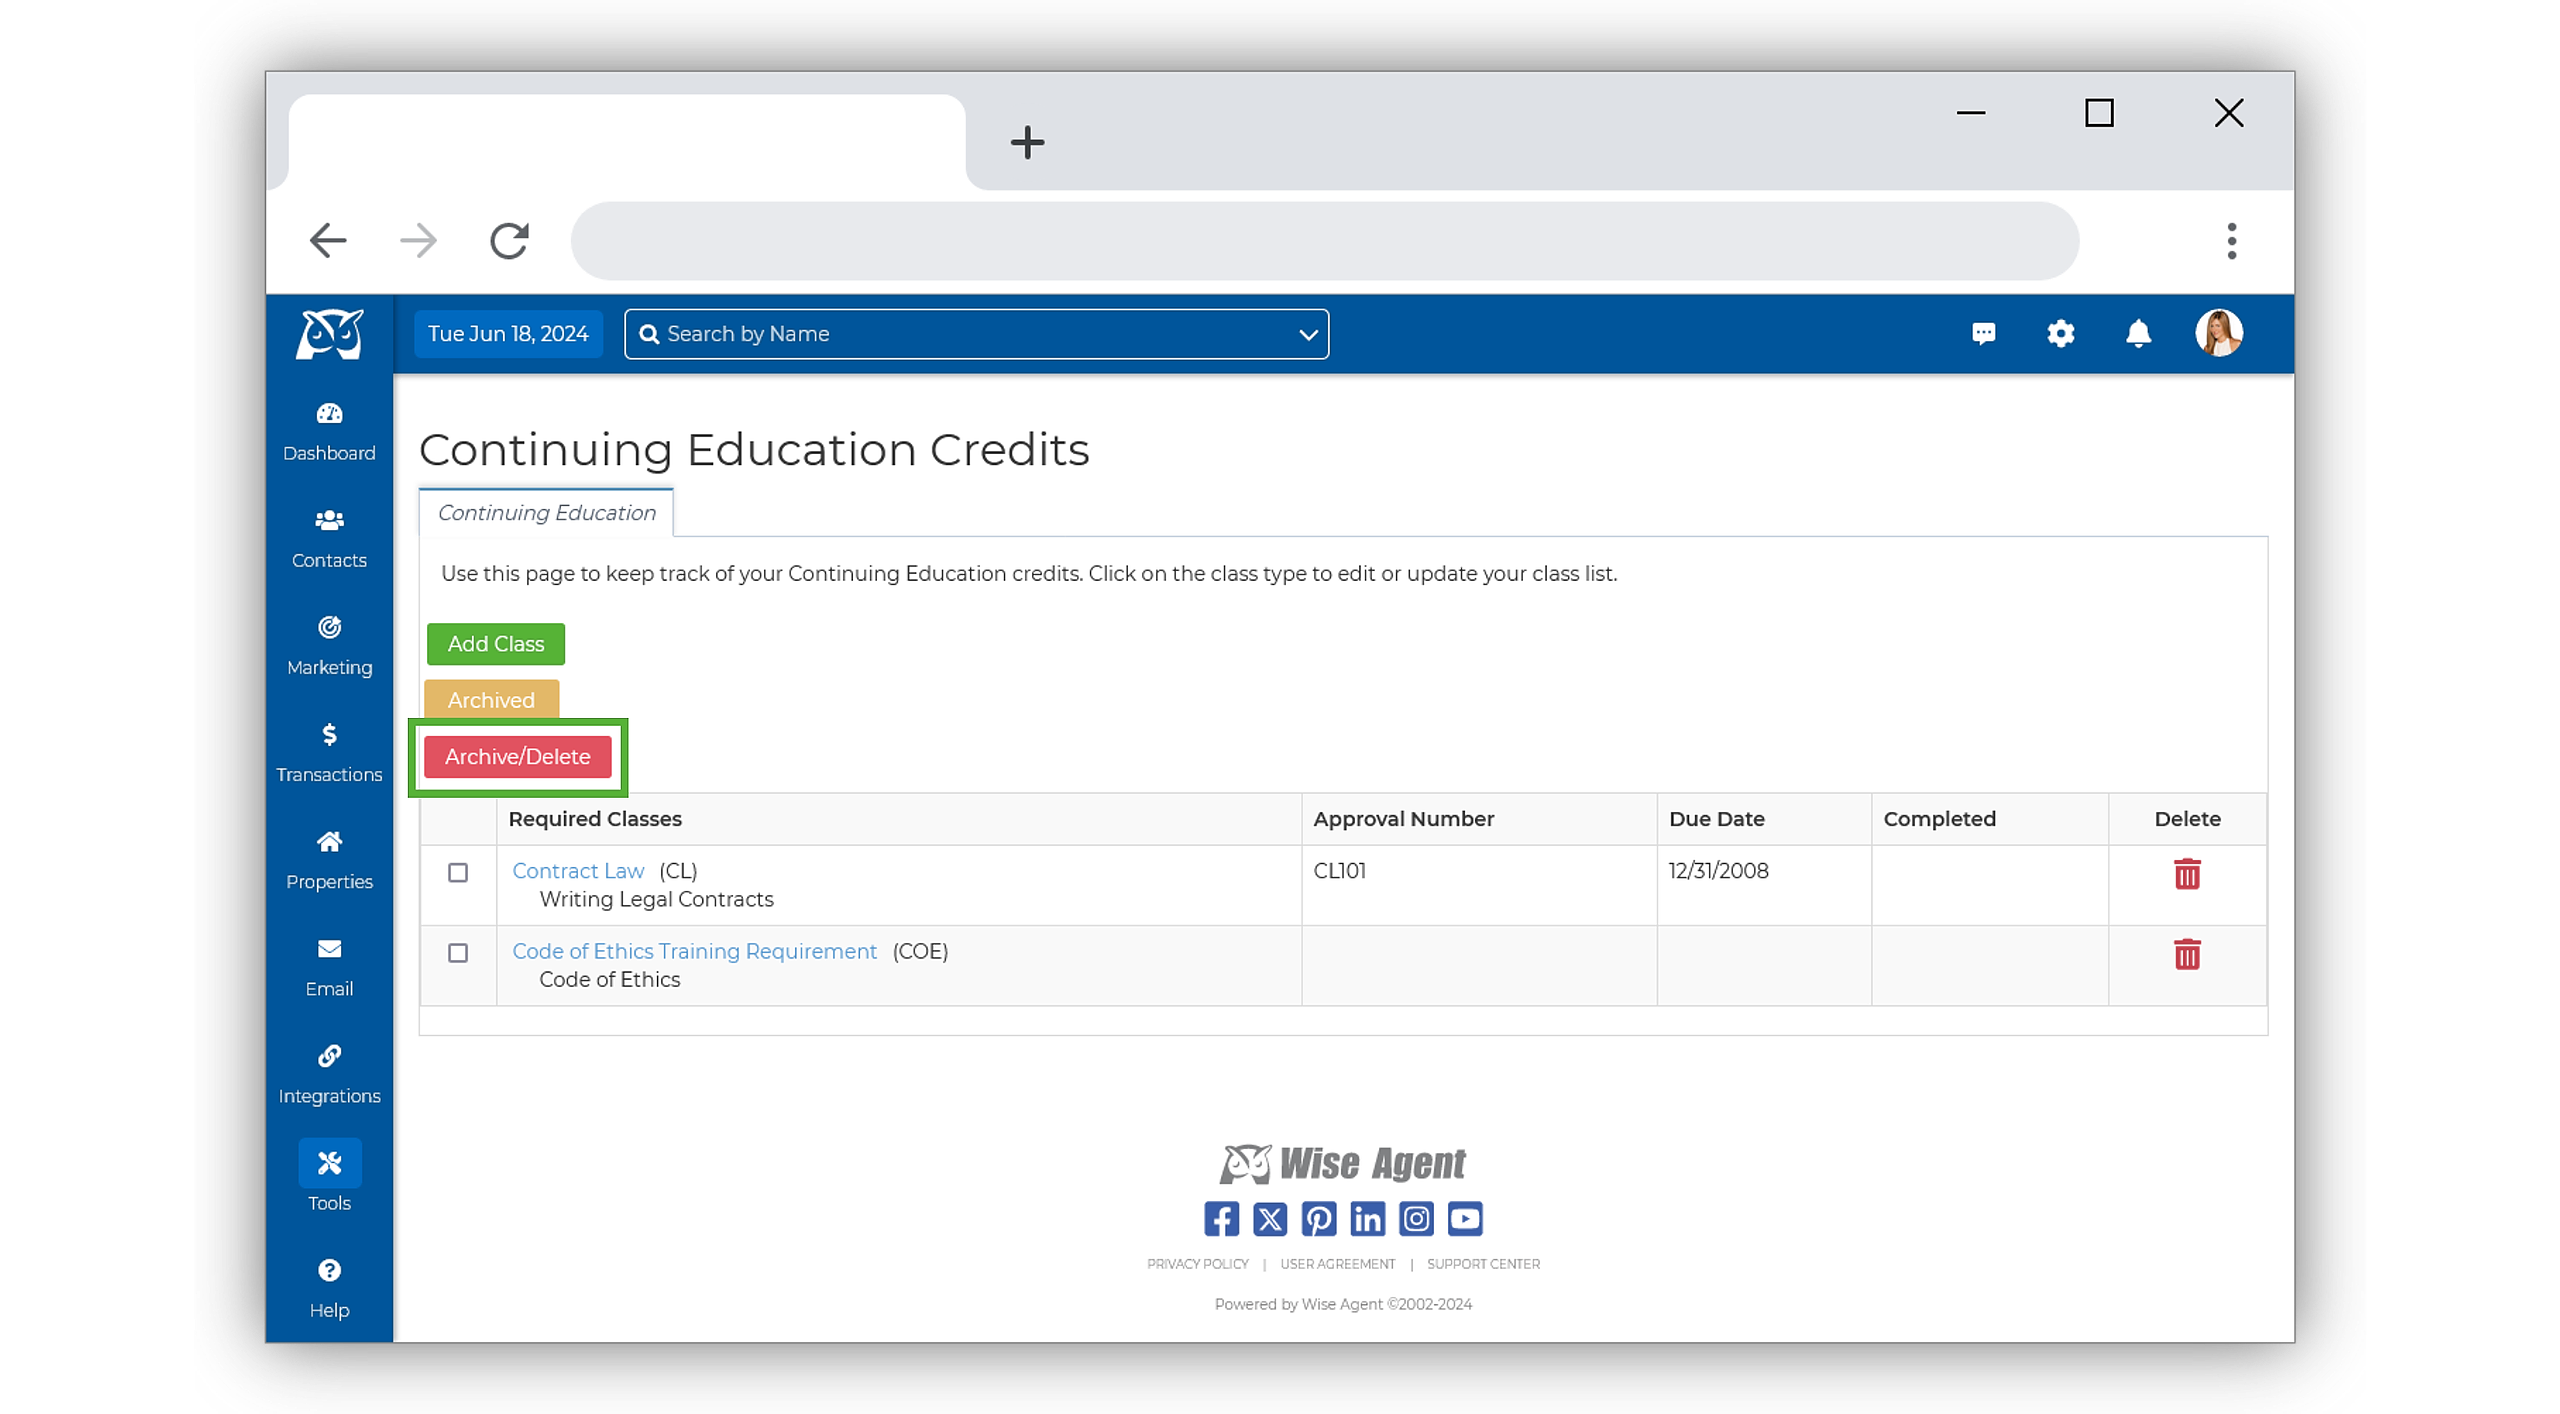
- On the Education Tracking page, select Archive/ Delete.
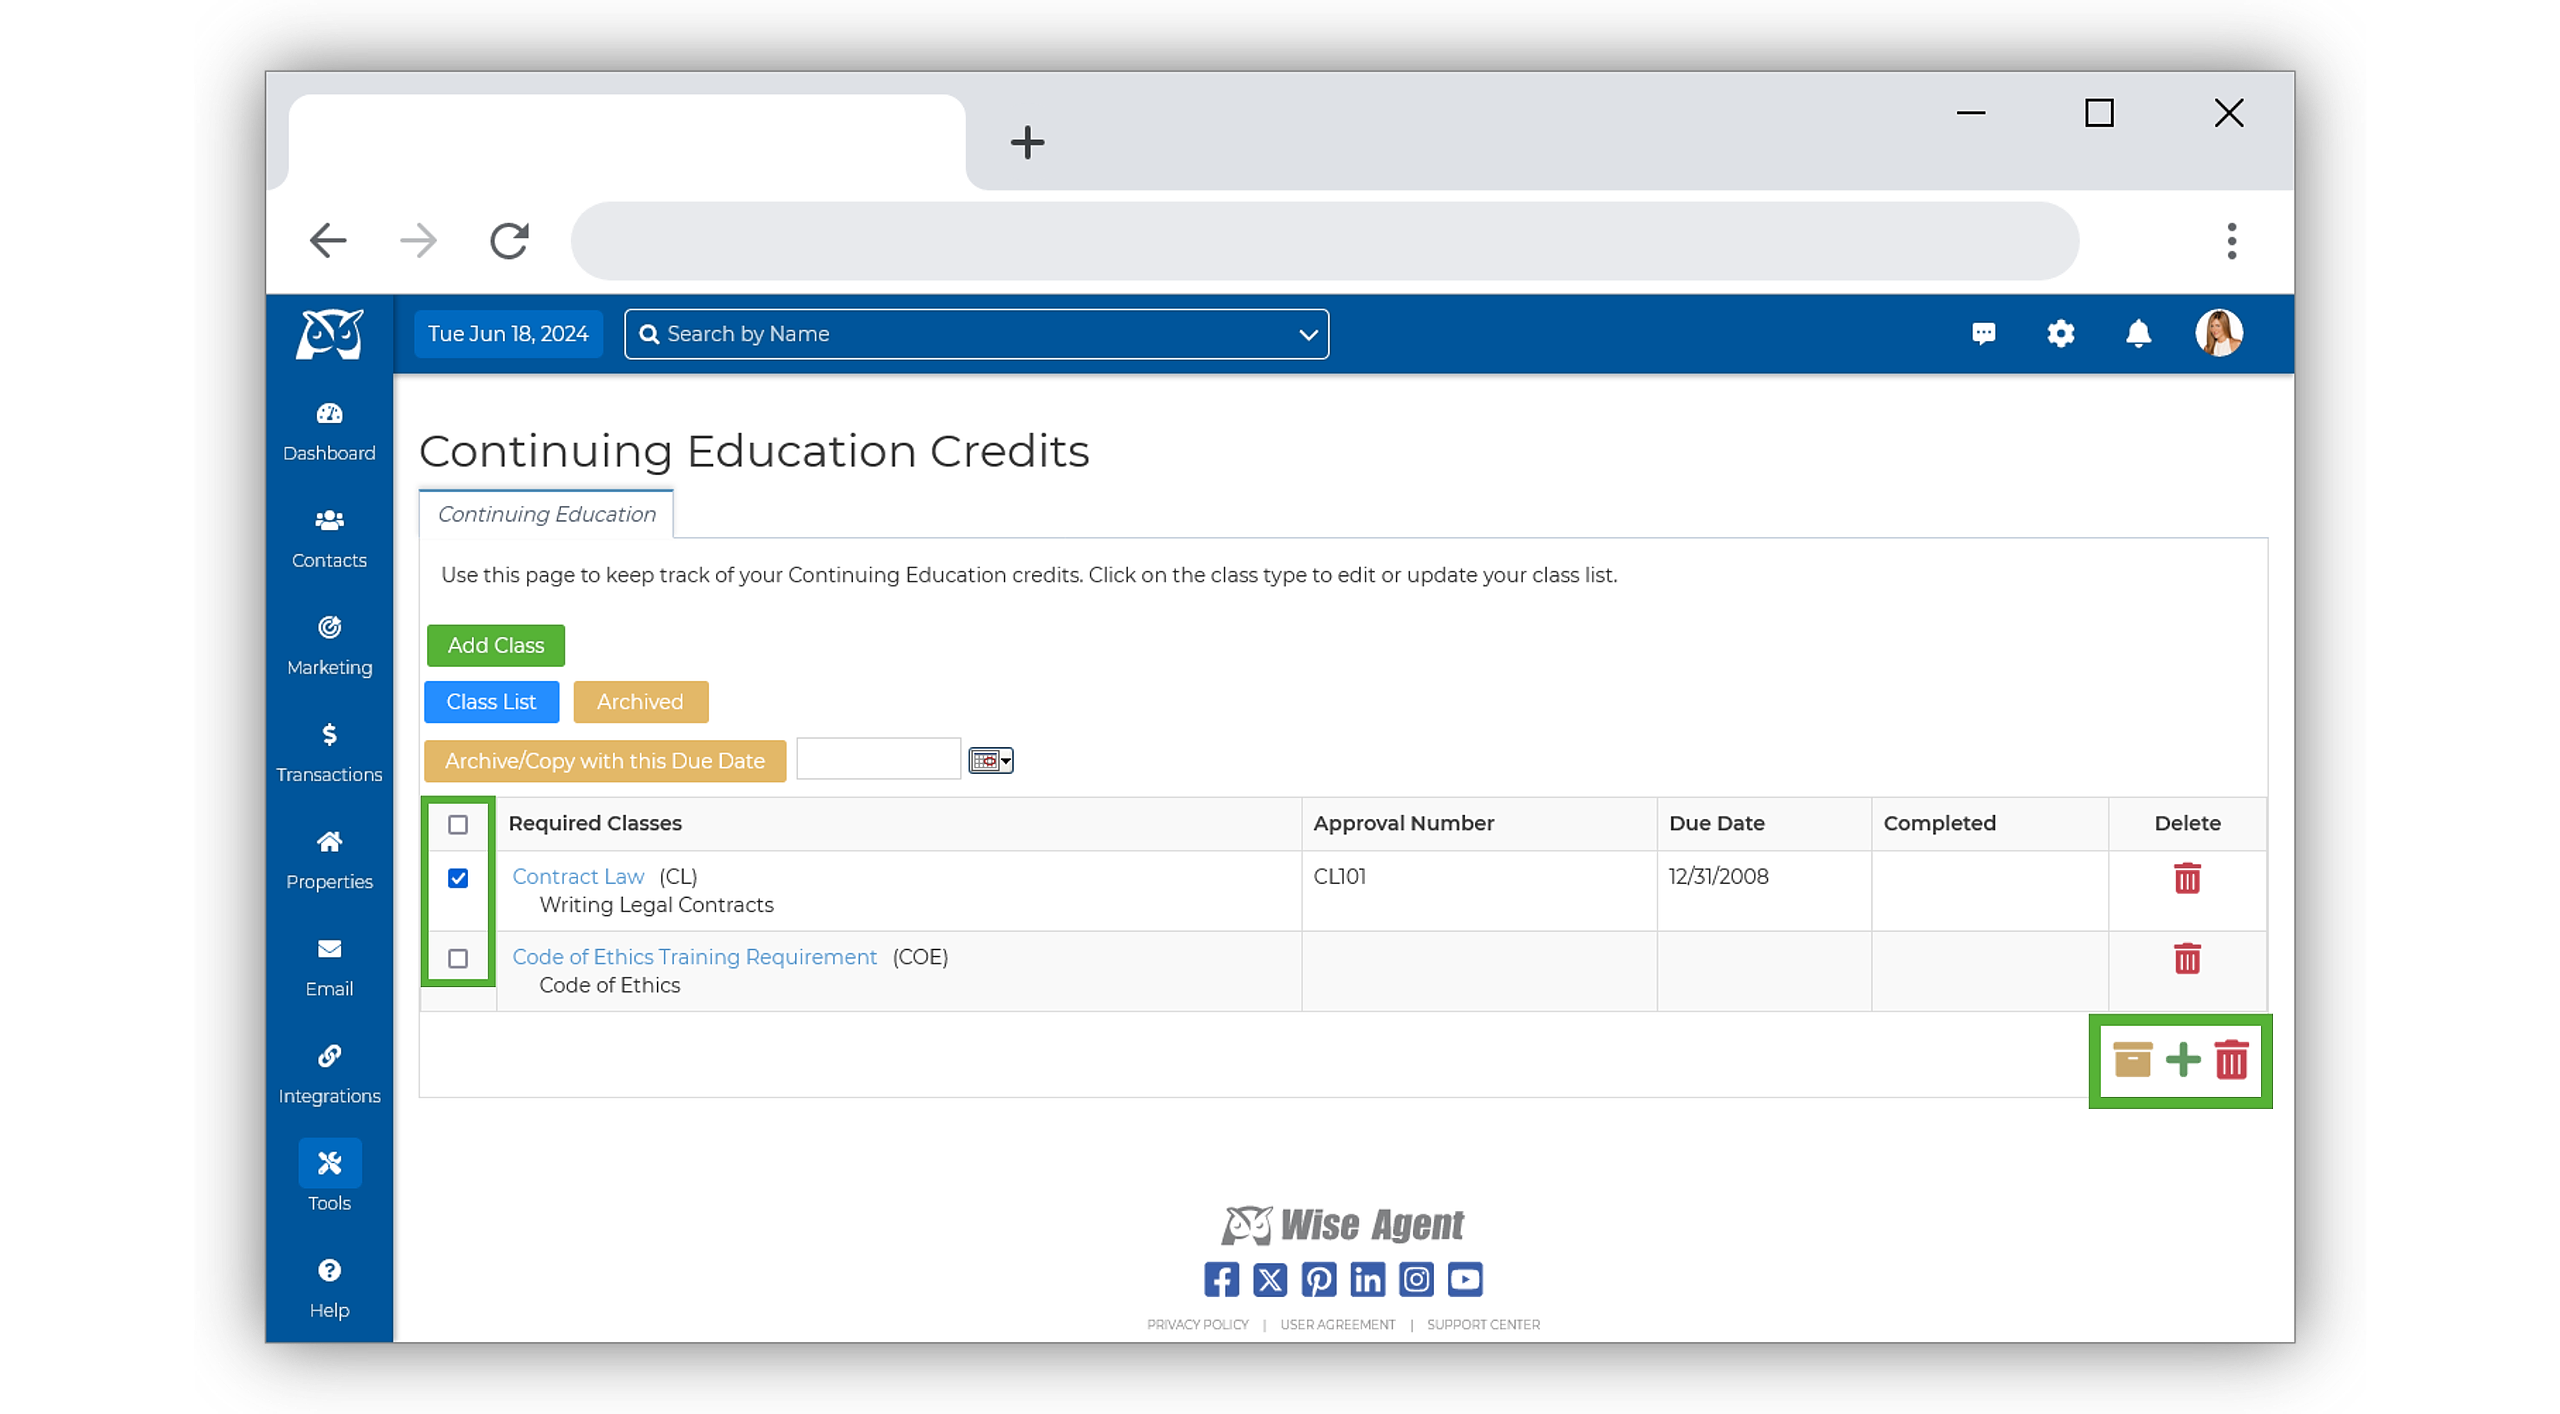
- Once selected, you will be redirected to the Archive/ Deletion page. Here, check the classes you wish to archive or delete.
- Once selected, navigate to the action icons on the bottom right-hand side of the page and select the yellow Archive icon to Archive your class, hiding it from the primary view, or the red Trash Can icon to delete the class permanently.
Deleting A Single Class
- From the sidebar, select Tools, then click Education Tracking from the menu.
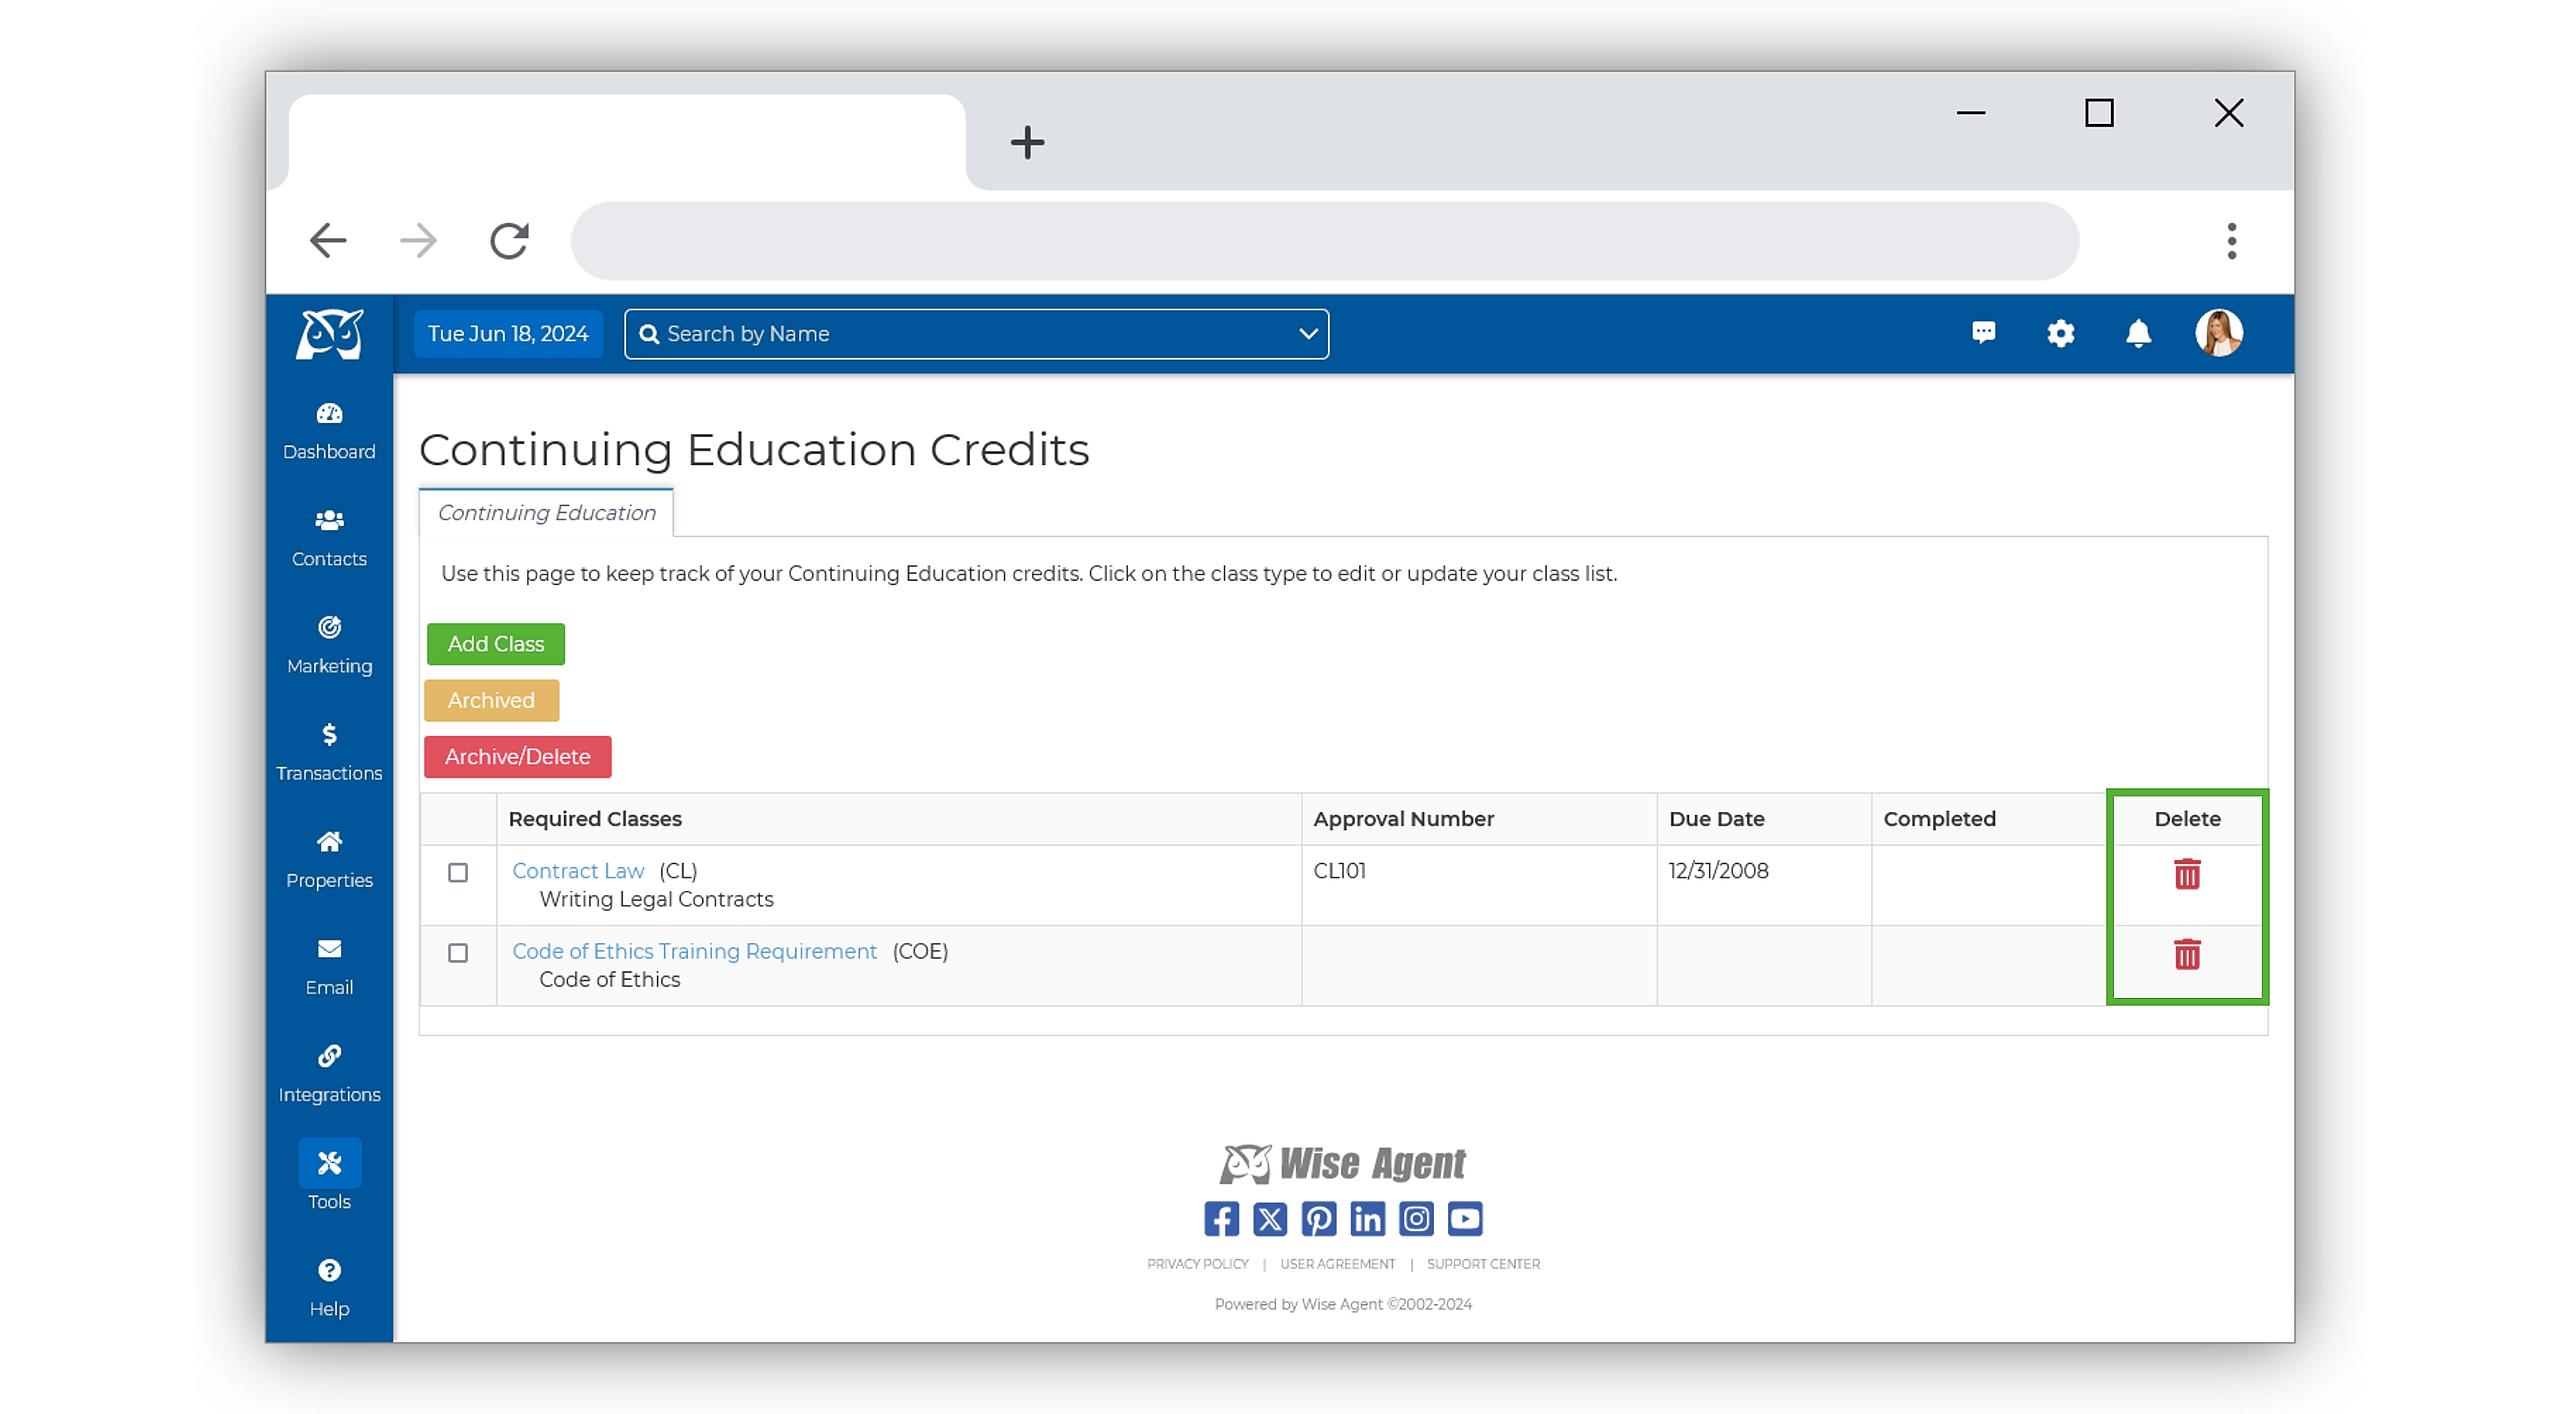
- To the far right of the class you wish to delete, click on the red trashcan icon.
- Once selected, confirm the deletion, and that's it!


