Step 1: Obtain Your Unique Wise Agent Lead Capture Email
- From the sidebar, select Integrations, then click Settings from the menu.
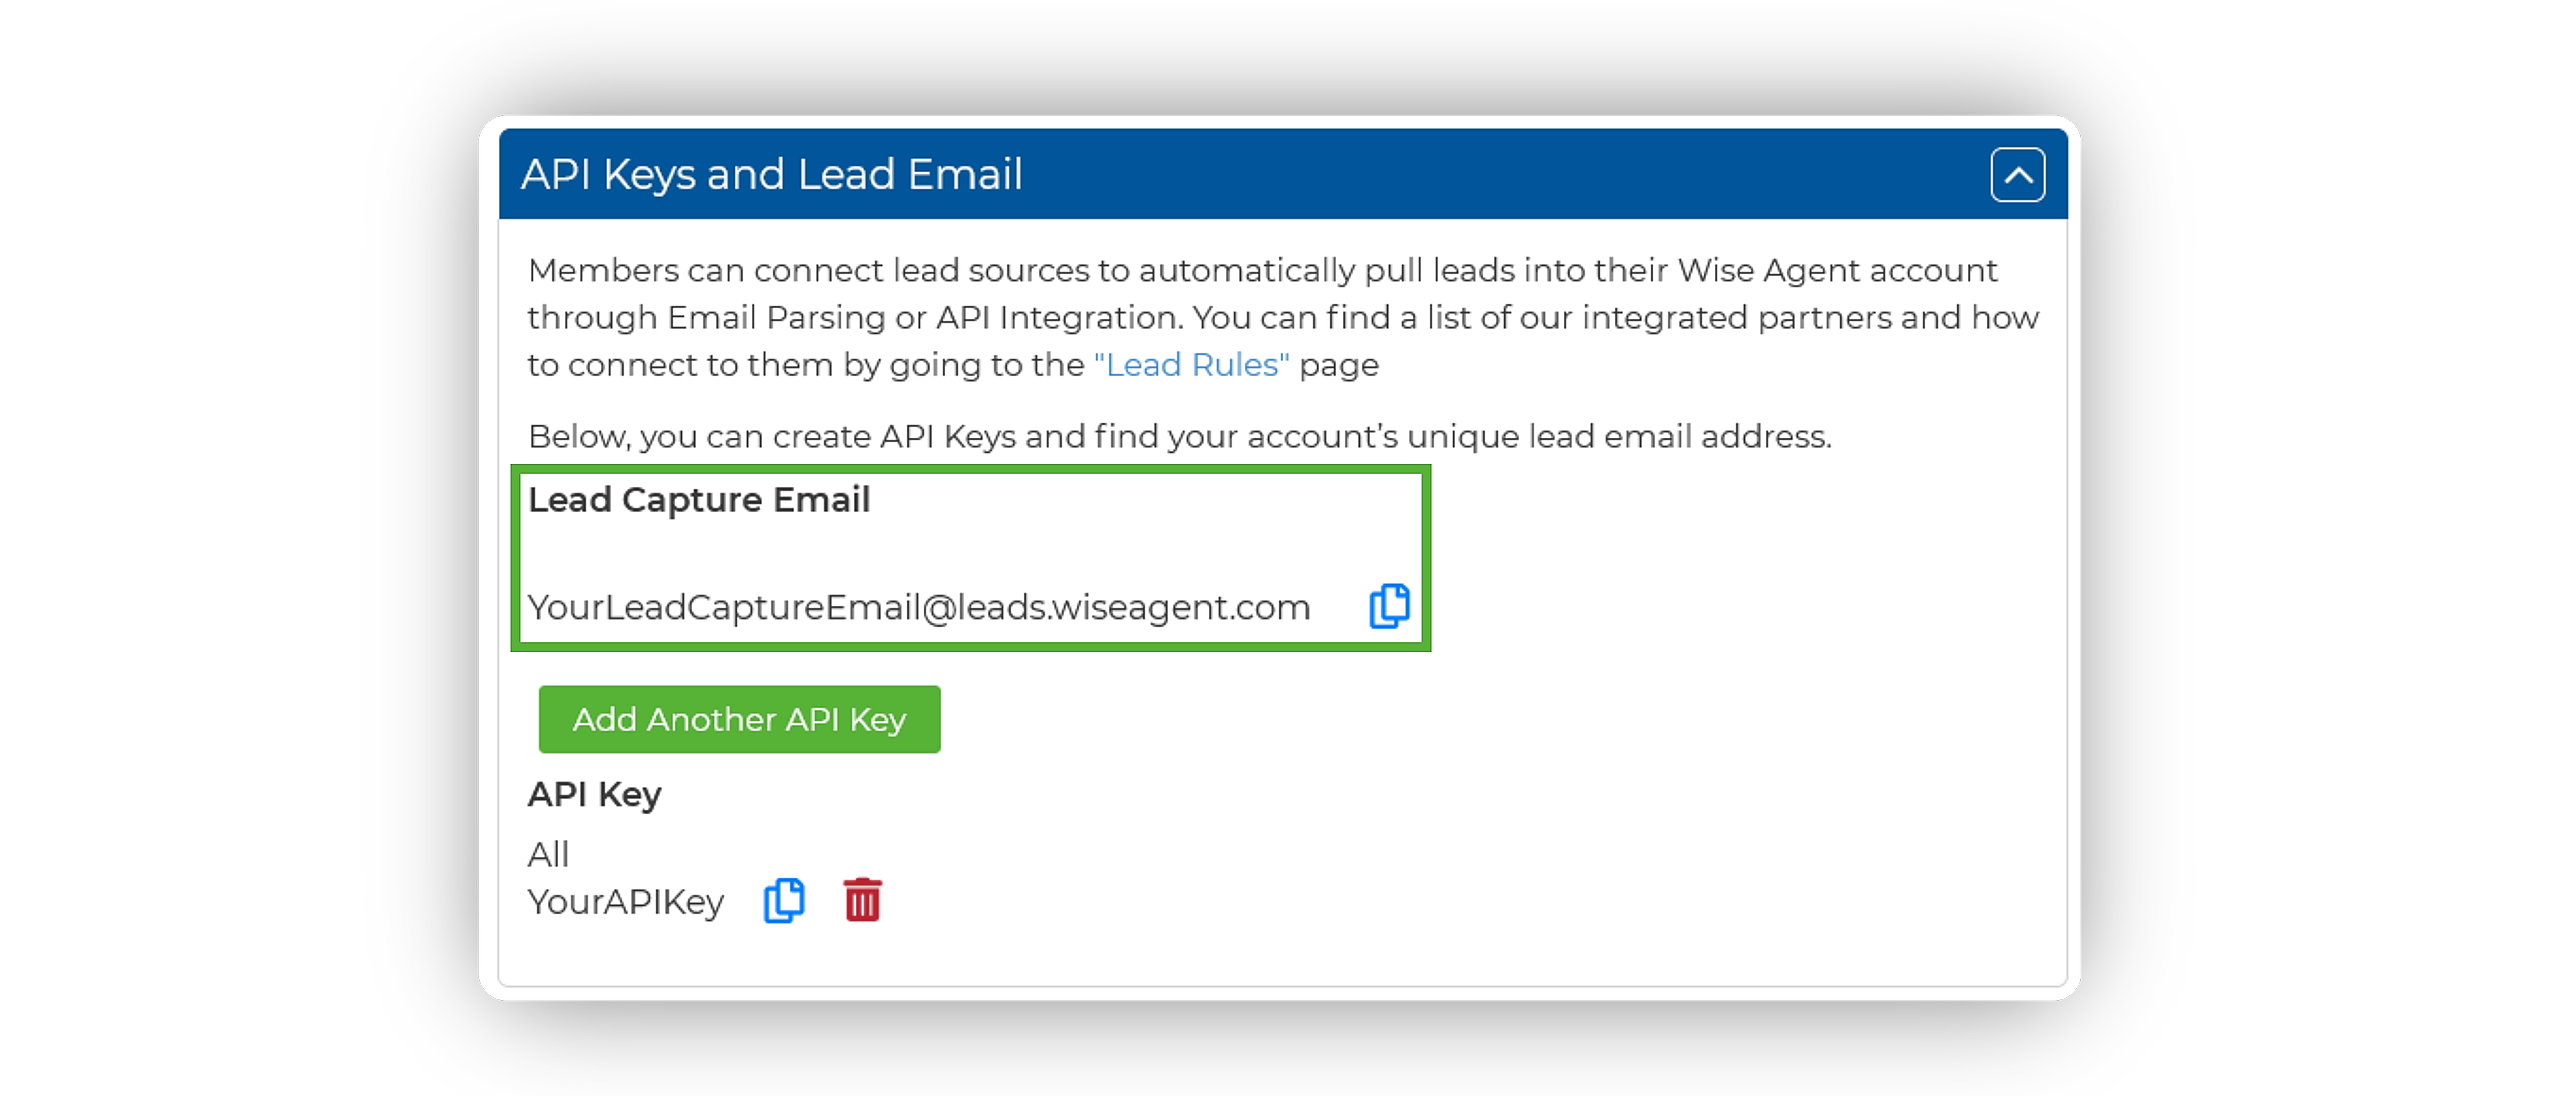
- On the Integrations Settings page, locate and click on the API Keys and Lead Email tab and click to expand.
- From this section, locate and copy your Lead Capture Email. This email address is specific to your Wise Agent account and is used to capture leads from various sources.
Step 2: Set Up Email Forwarding
- Sign in to your Outlook email account online at www.Outlook.com.
-
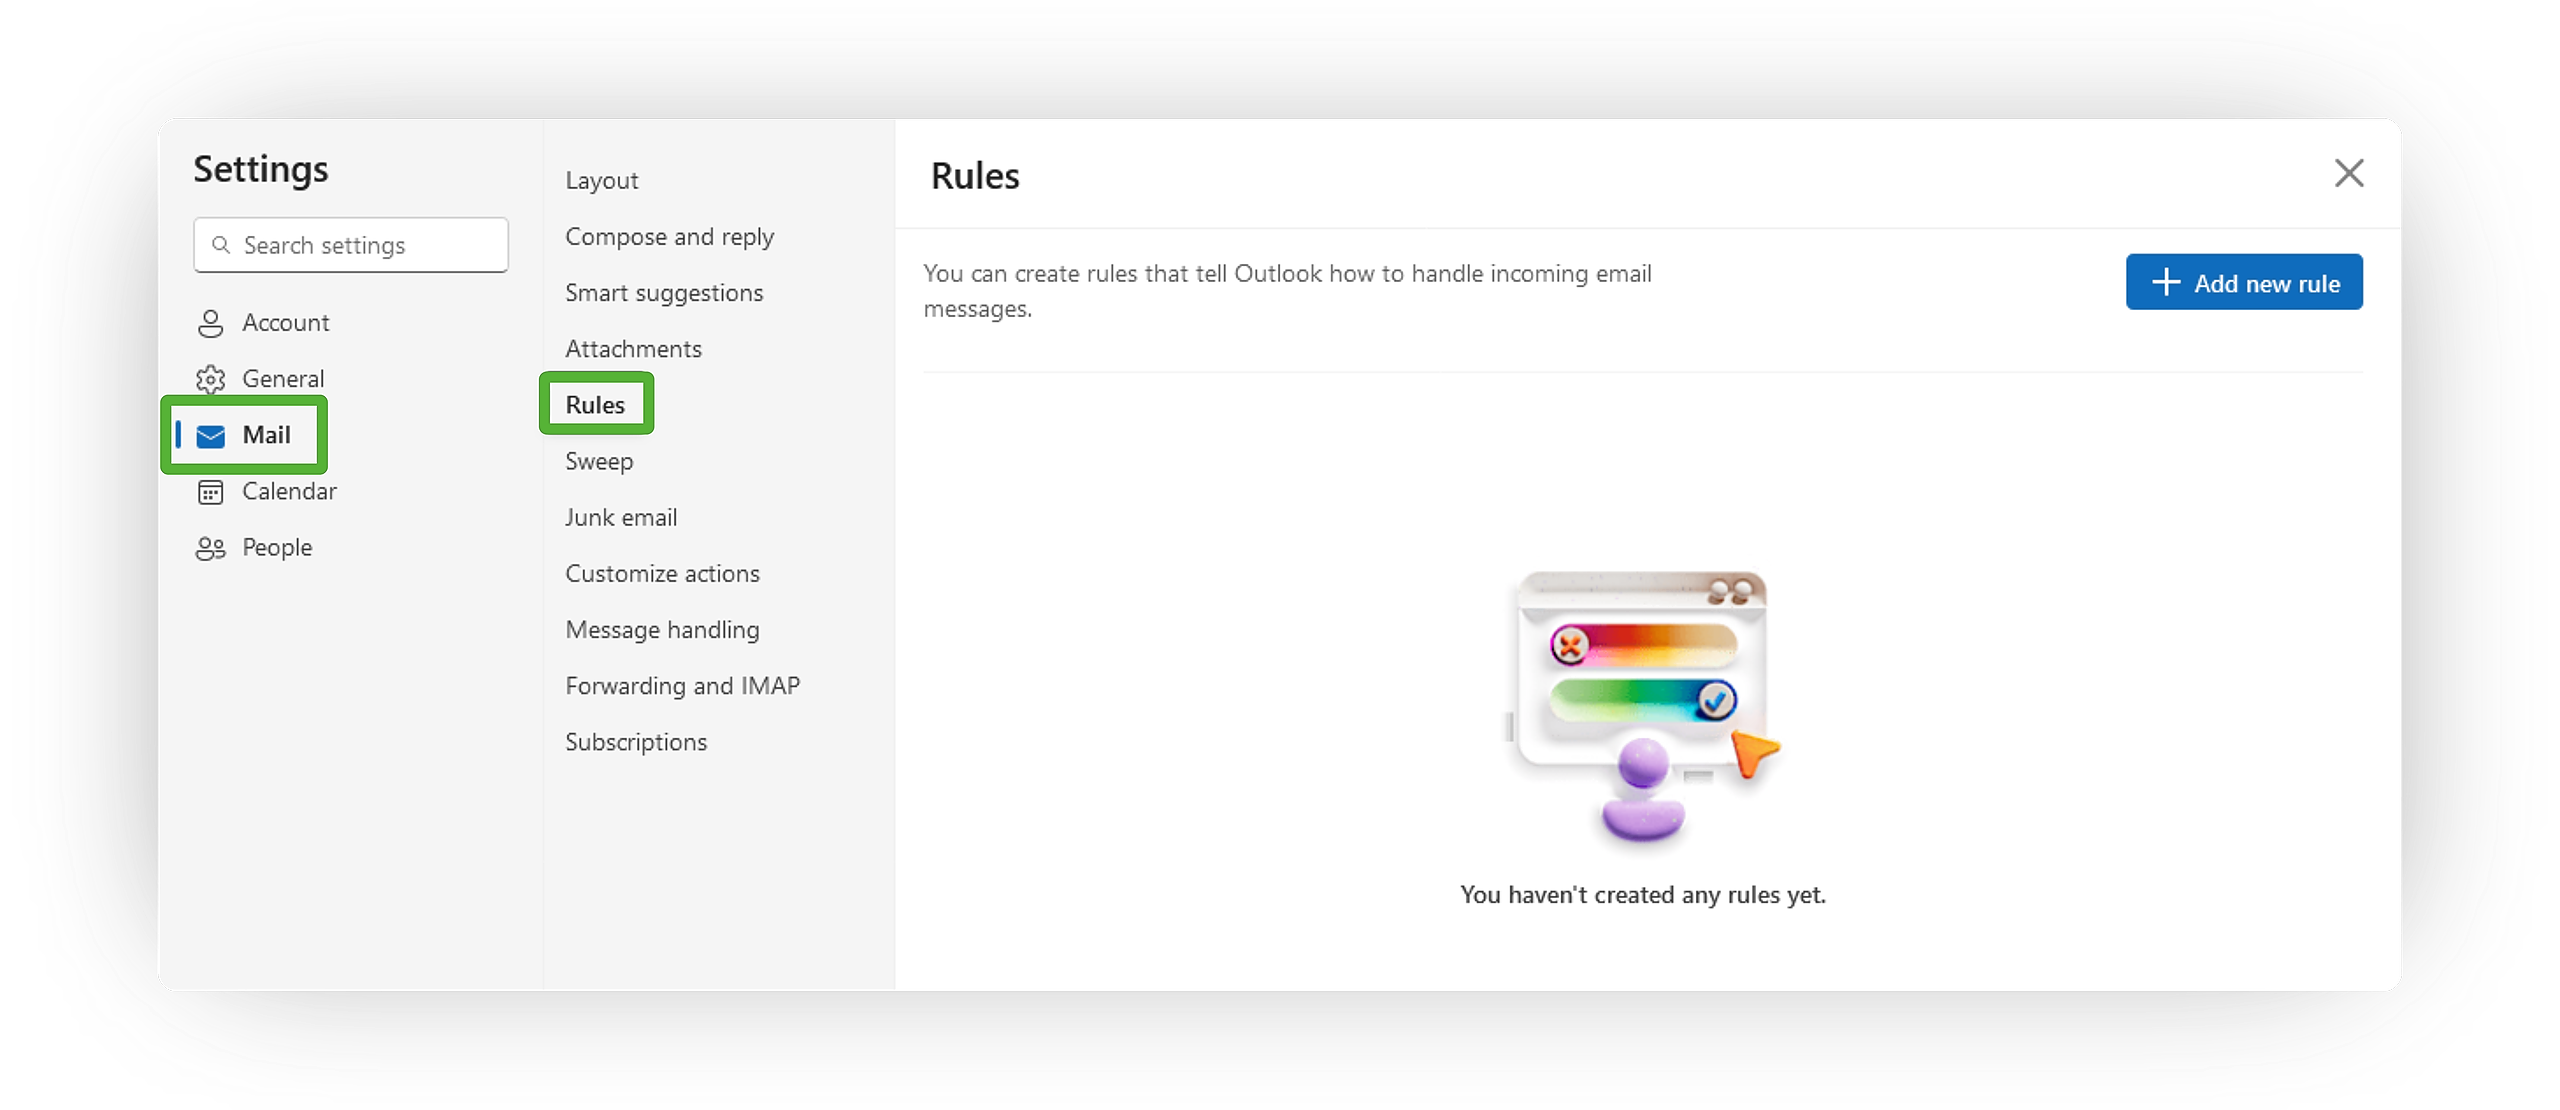
In the upper right-hand corner, select Settings (gear icon).
-
Select Mail ➜ Rules.
-
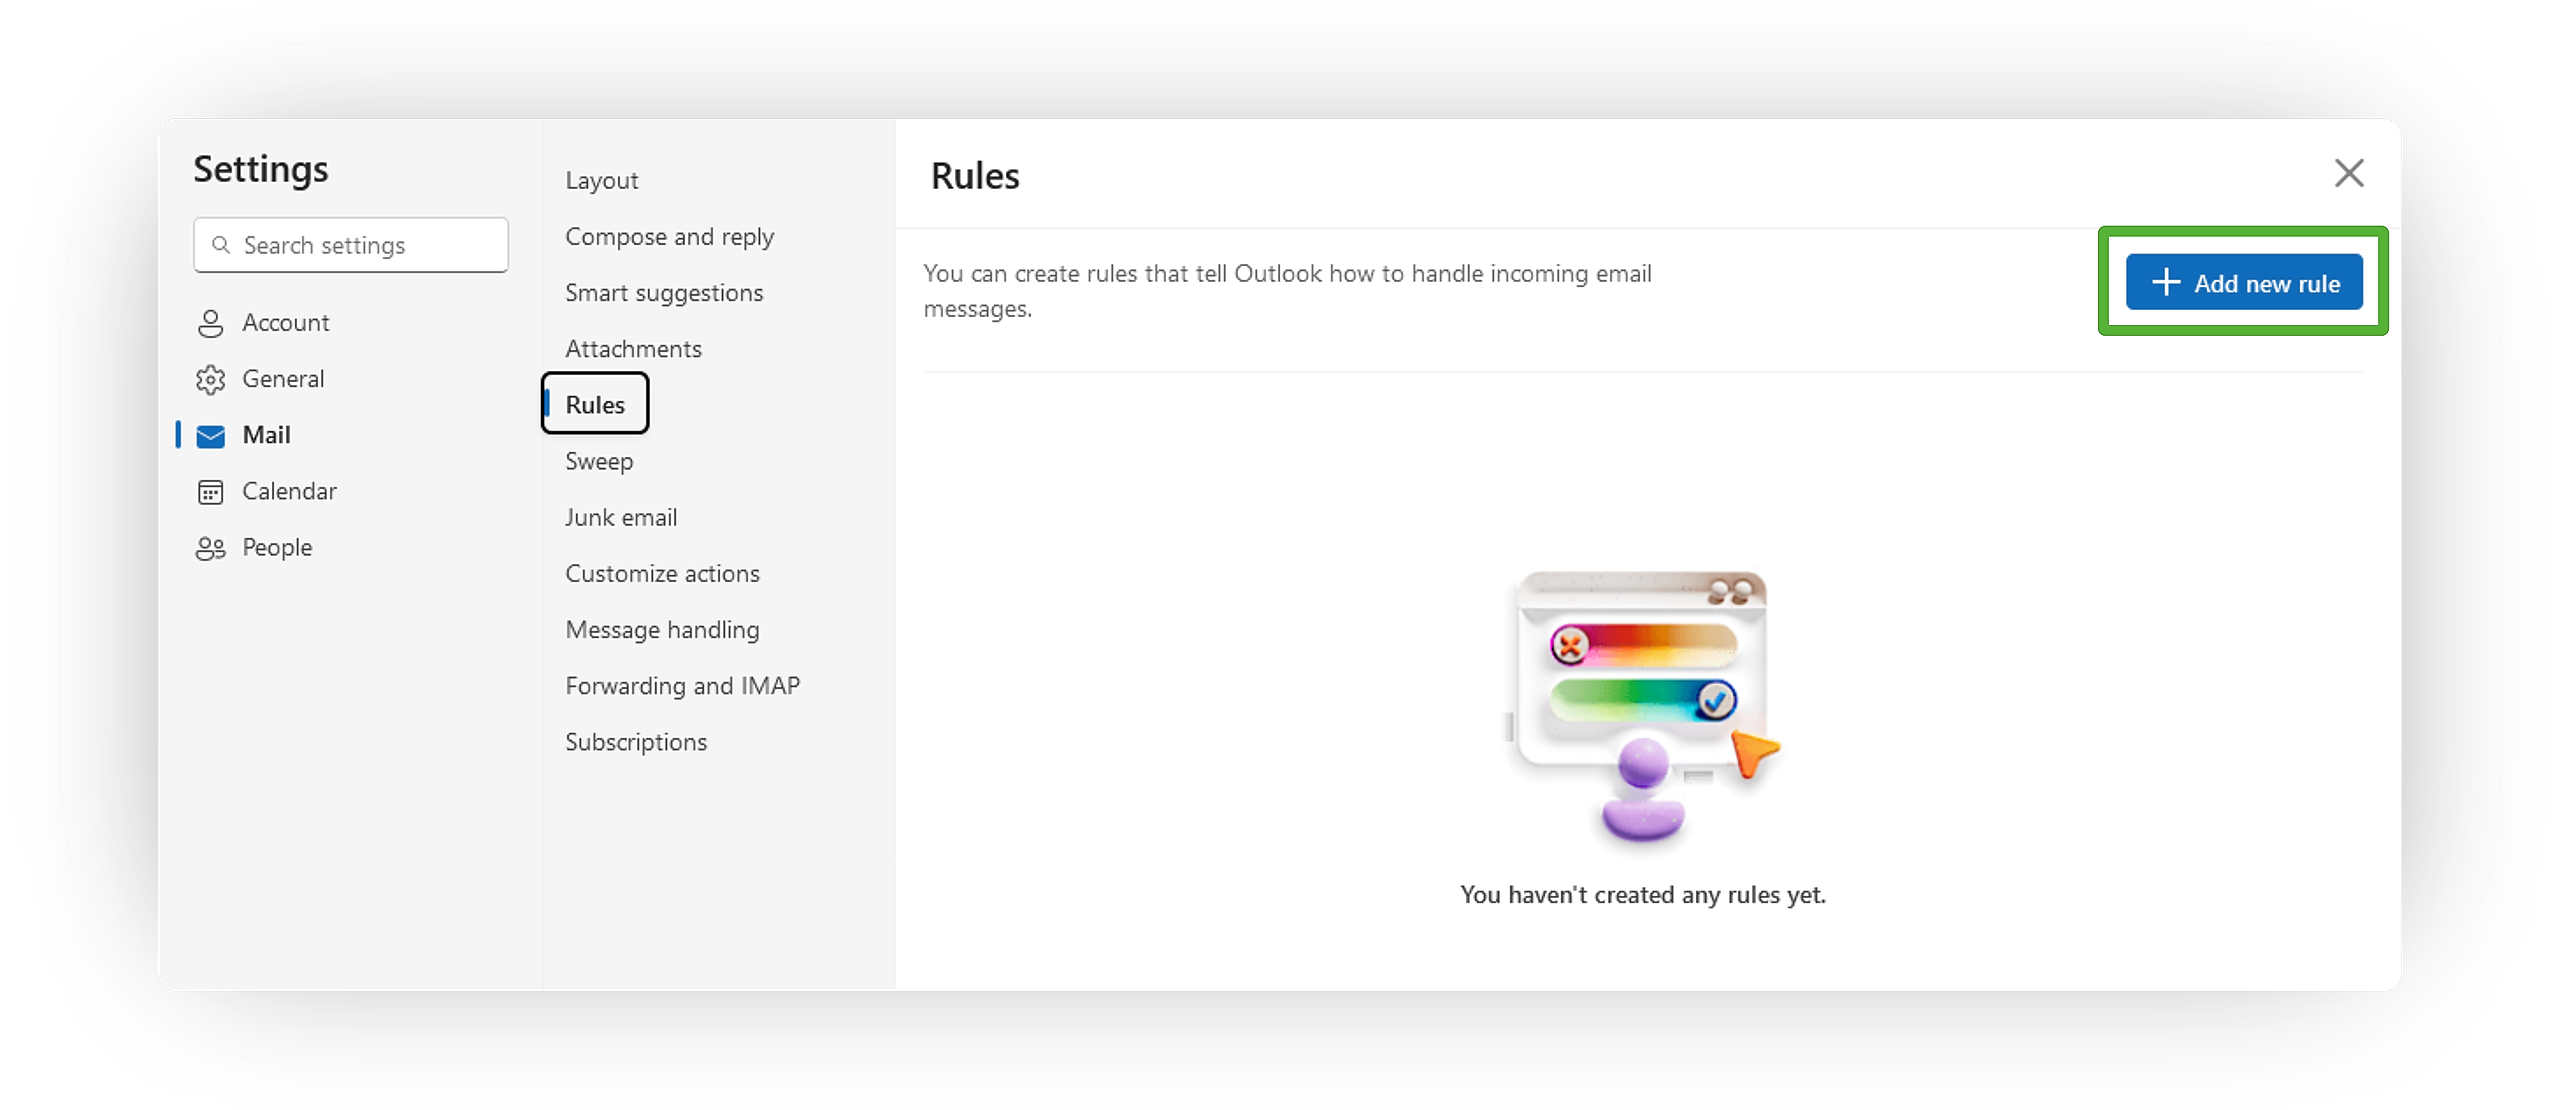
Select Add New Rule.
-
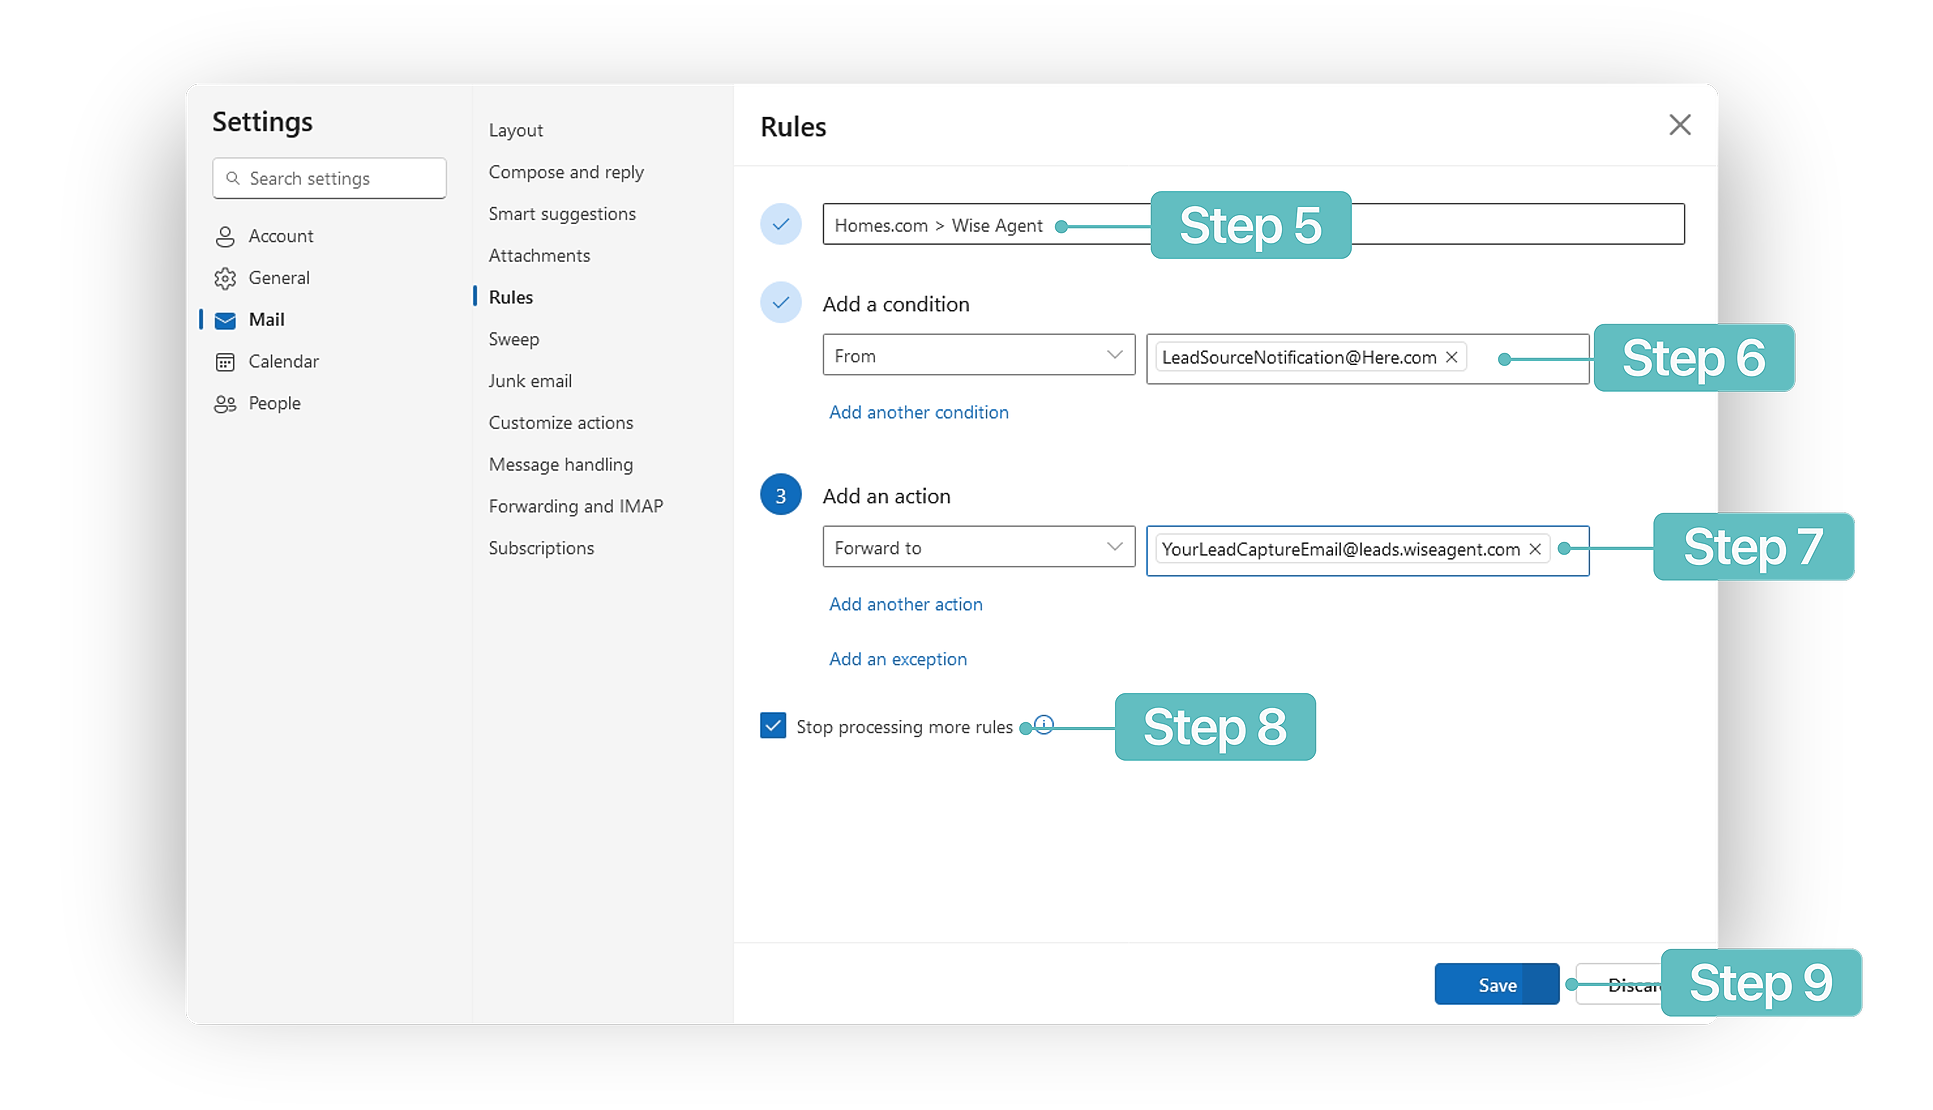
Enter a name for your rule.
-
Add a condition:
Under People, choose From, then, to the right, insert the email address of the lead source notifications you receive. -
Add an action:
choose Forward to, and then paste your Wise Agent lead capture email address. - Checkmark Stop Processing More Rules.
-
When you're done, select Save.
Step 3: Test The Connection
- Submit a test inquiry or lead from your lead source.
- Wait for the email notification to arrive in your email inbox.
- Check your Wise Agent contact list to ensure that the lead has successfully entered your Wise Agent account.
If you receive the email notification, but the lead does not enter your Wise Agent account, please forward the email notification to help@wiseagent.com. In your forwarded email, mention that you are trying to set up Email Forwarding, in addition to providing the name of the lead source/ platform you are configuring, and our team will assist you in troubleshooting the issue.


