Uploading Your Images
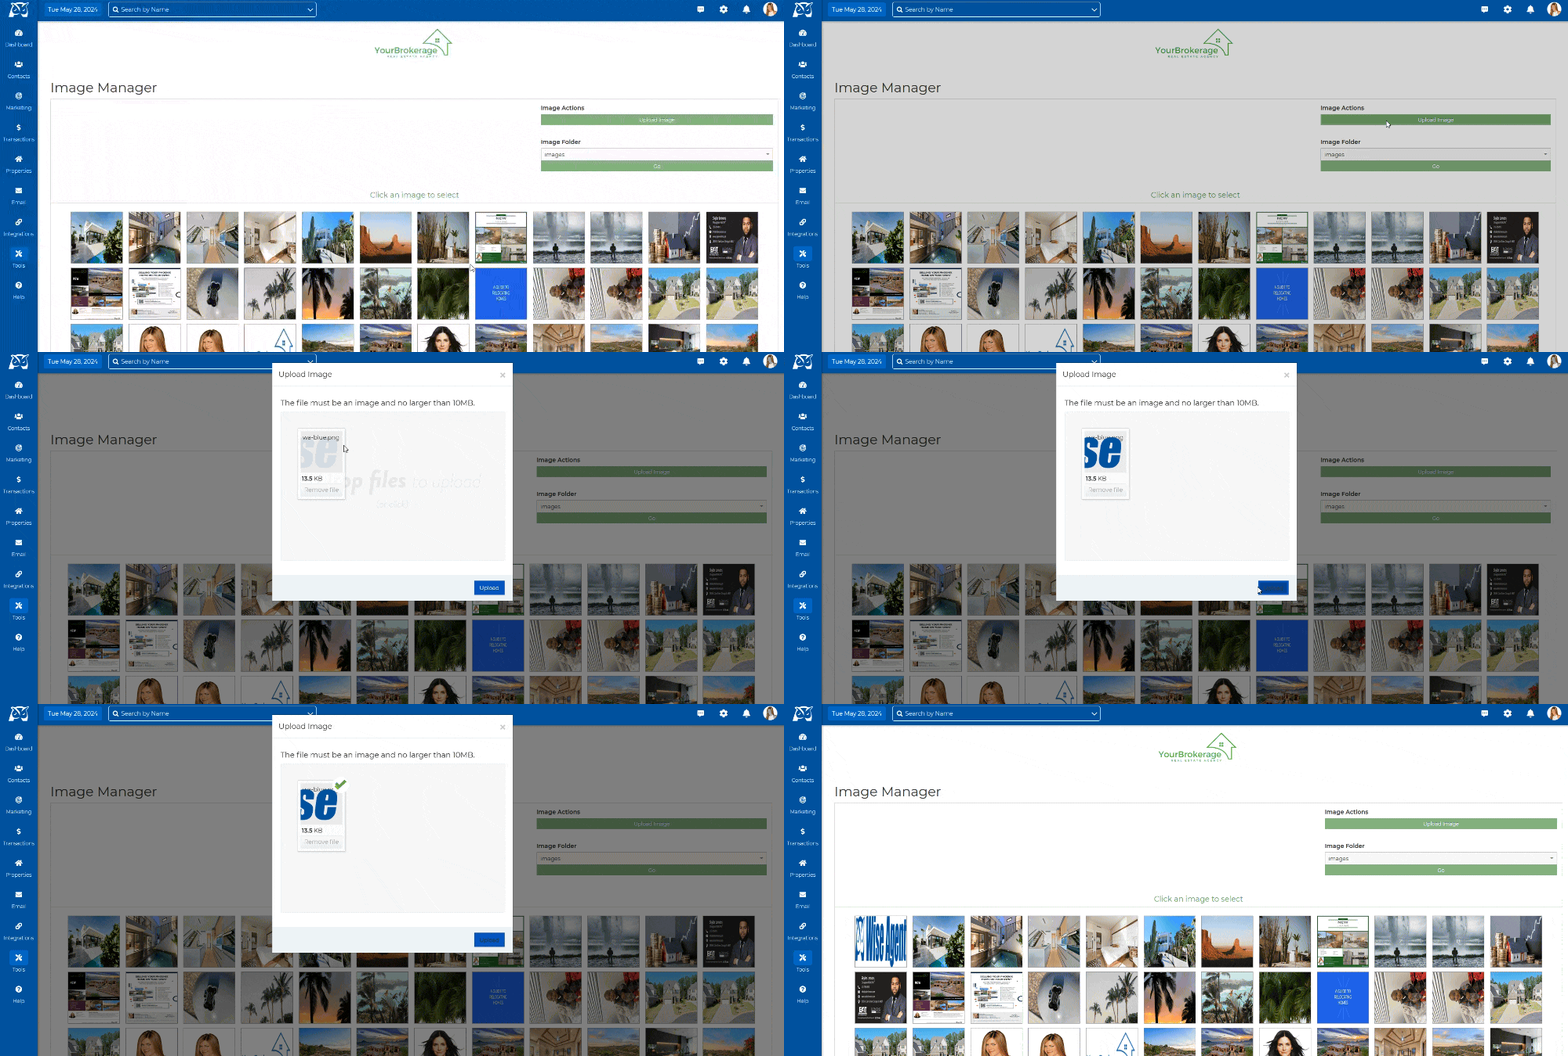
- Navigate to your image gallery by clicking on Tools from the sidebar, then selecting Images.
- Within the image gallery interface, locate and click on the Upload button. Once selected, the Upload Image window should appear.
- Drop your files into the designated spot or click to select images from your computer.
- Once added, click on Upload and that's it!
Adding Images To Your Content Within The Content Library
Your Content Library can be found under your Marketing drop-down alongside your other real estate marketing tools in Wise Agent. You can manage, edit, and share your saved real estate content from this page in your CRM.
-
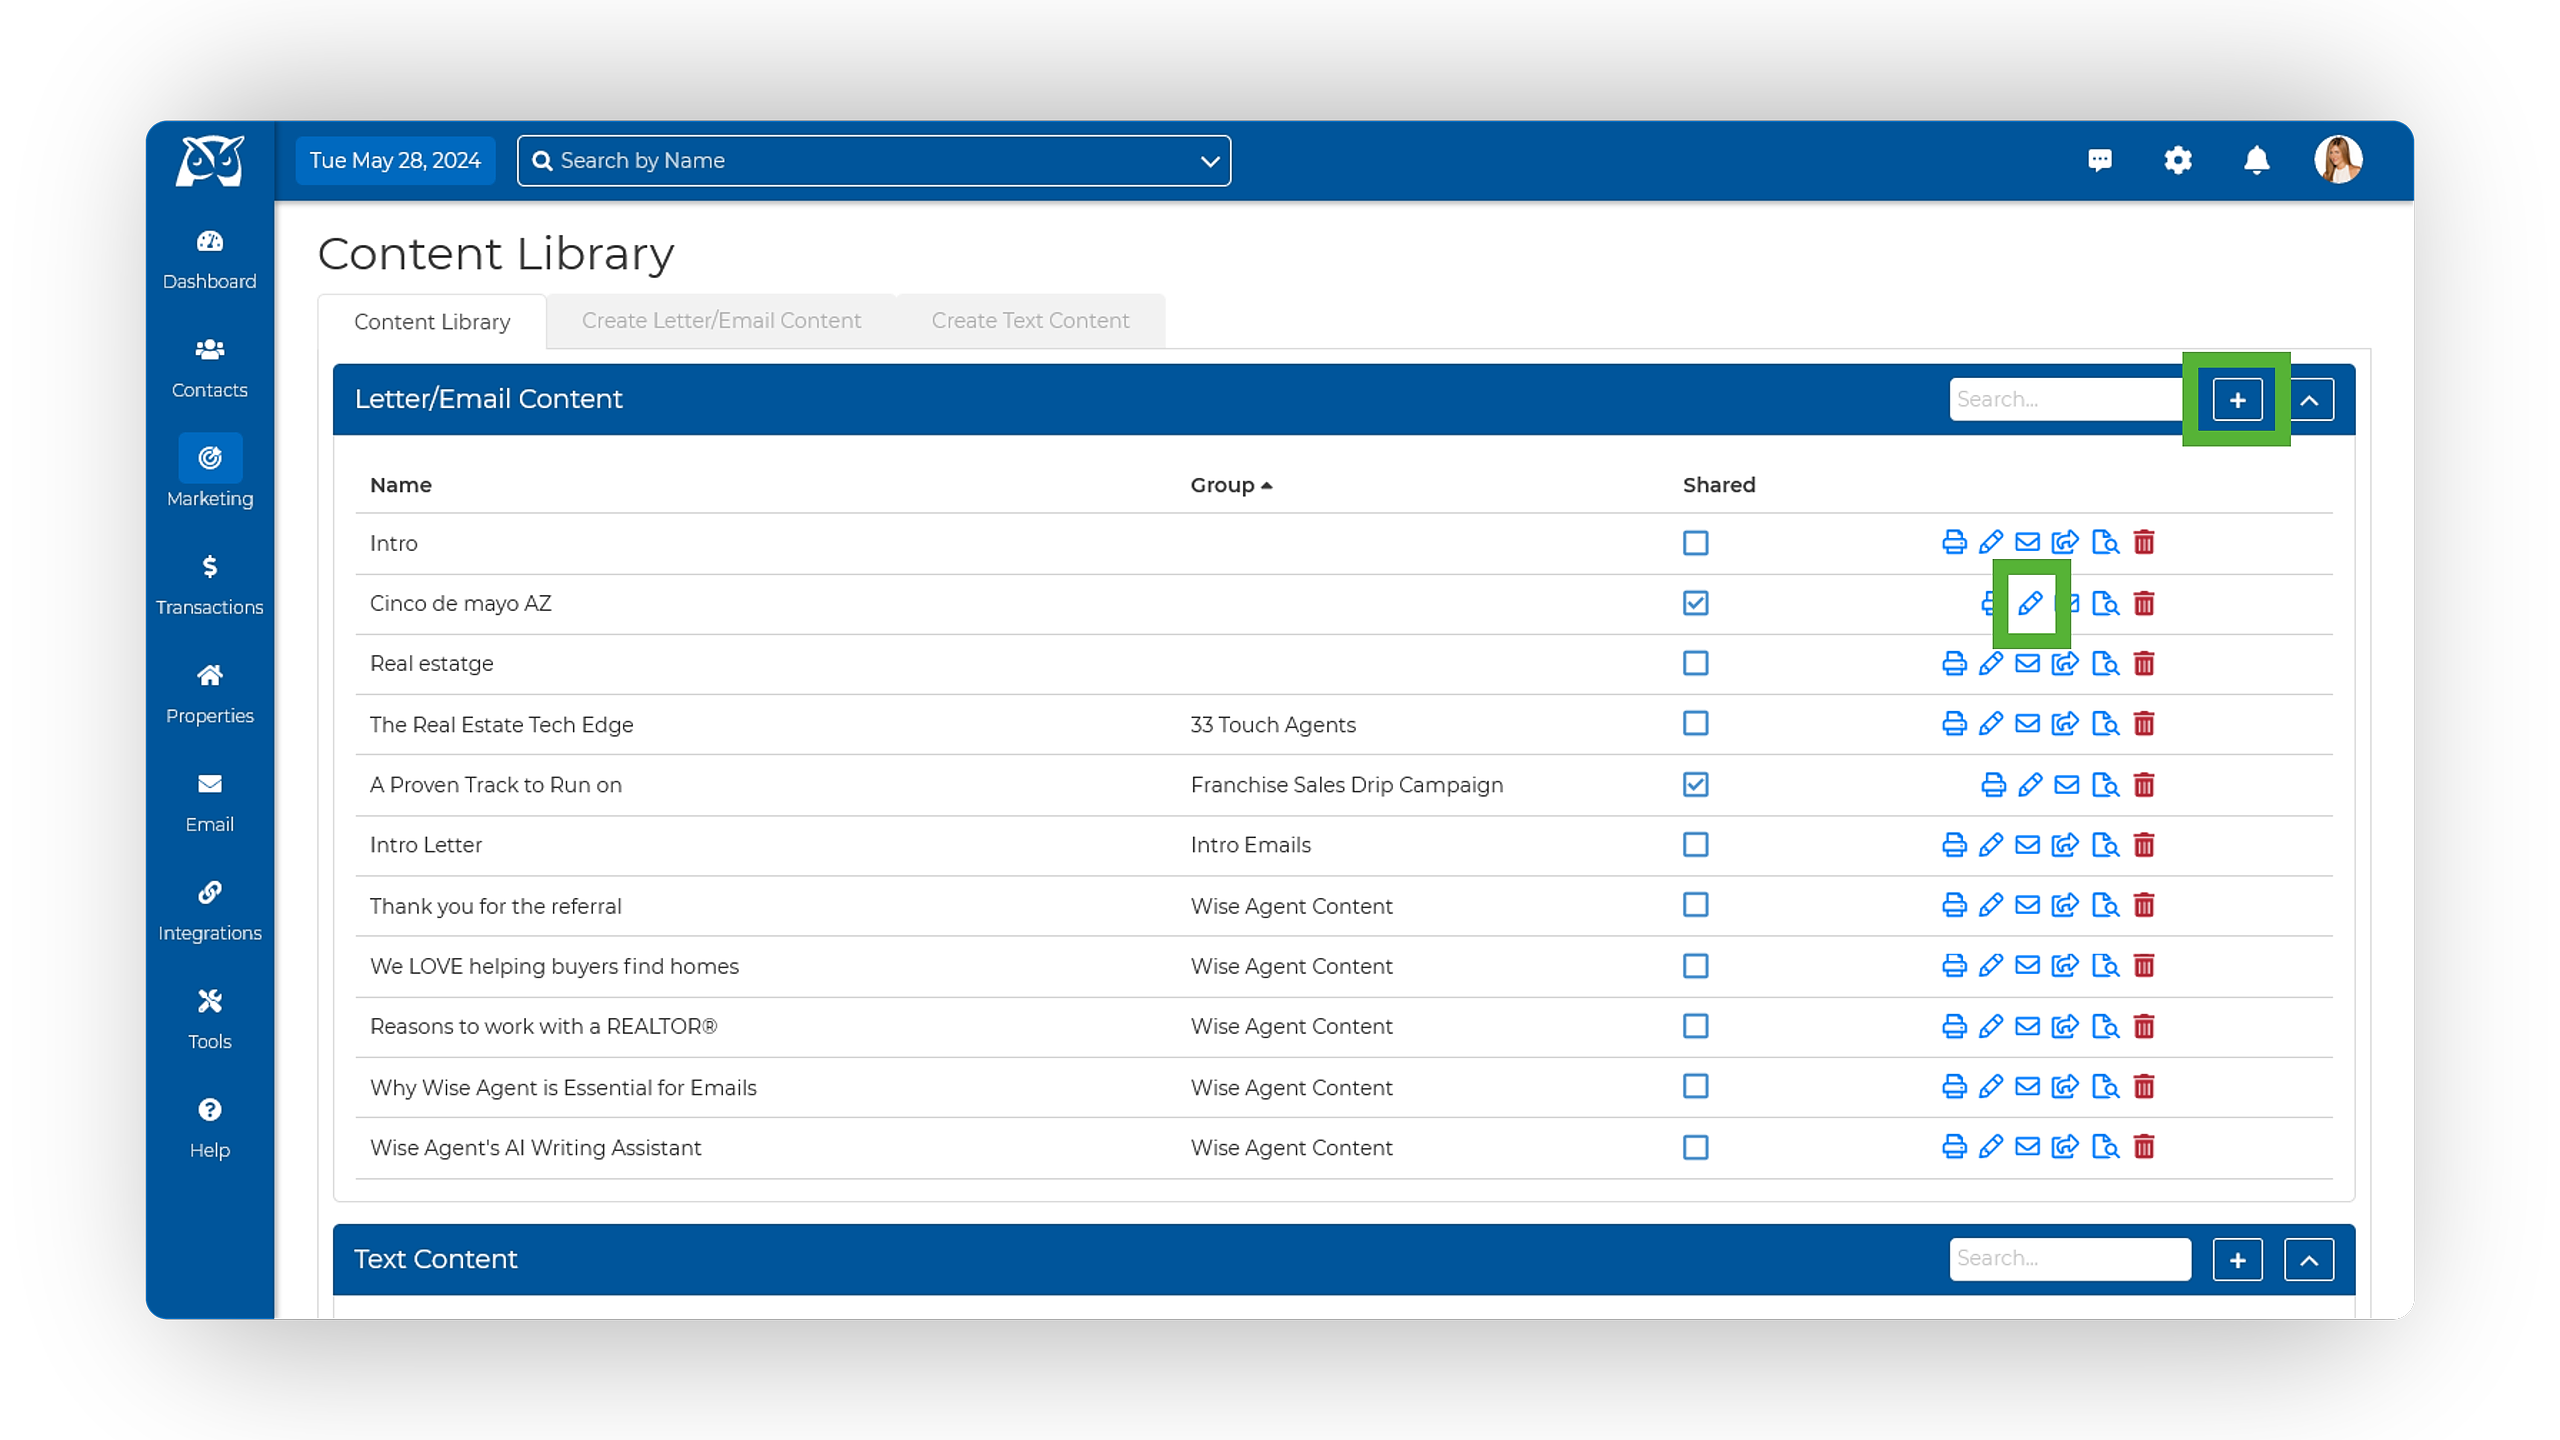
From the sidebar, select Marketing ➜ Content Library.
- On the Content Library, click on the plus sign icon ⊞ to open a new piece of content, or select the pencil icon to edit your existing content.
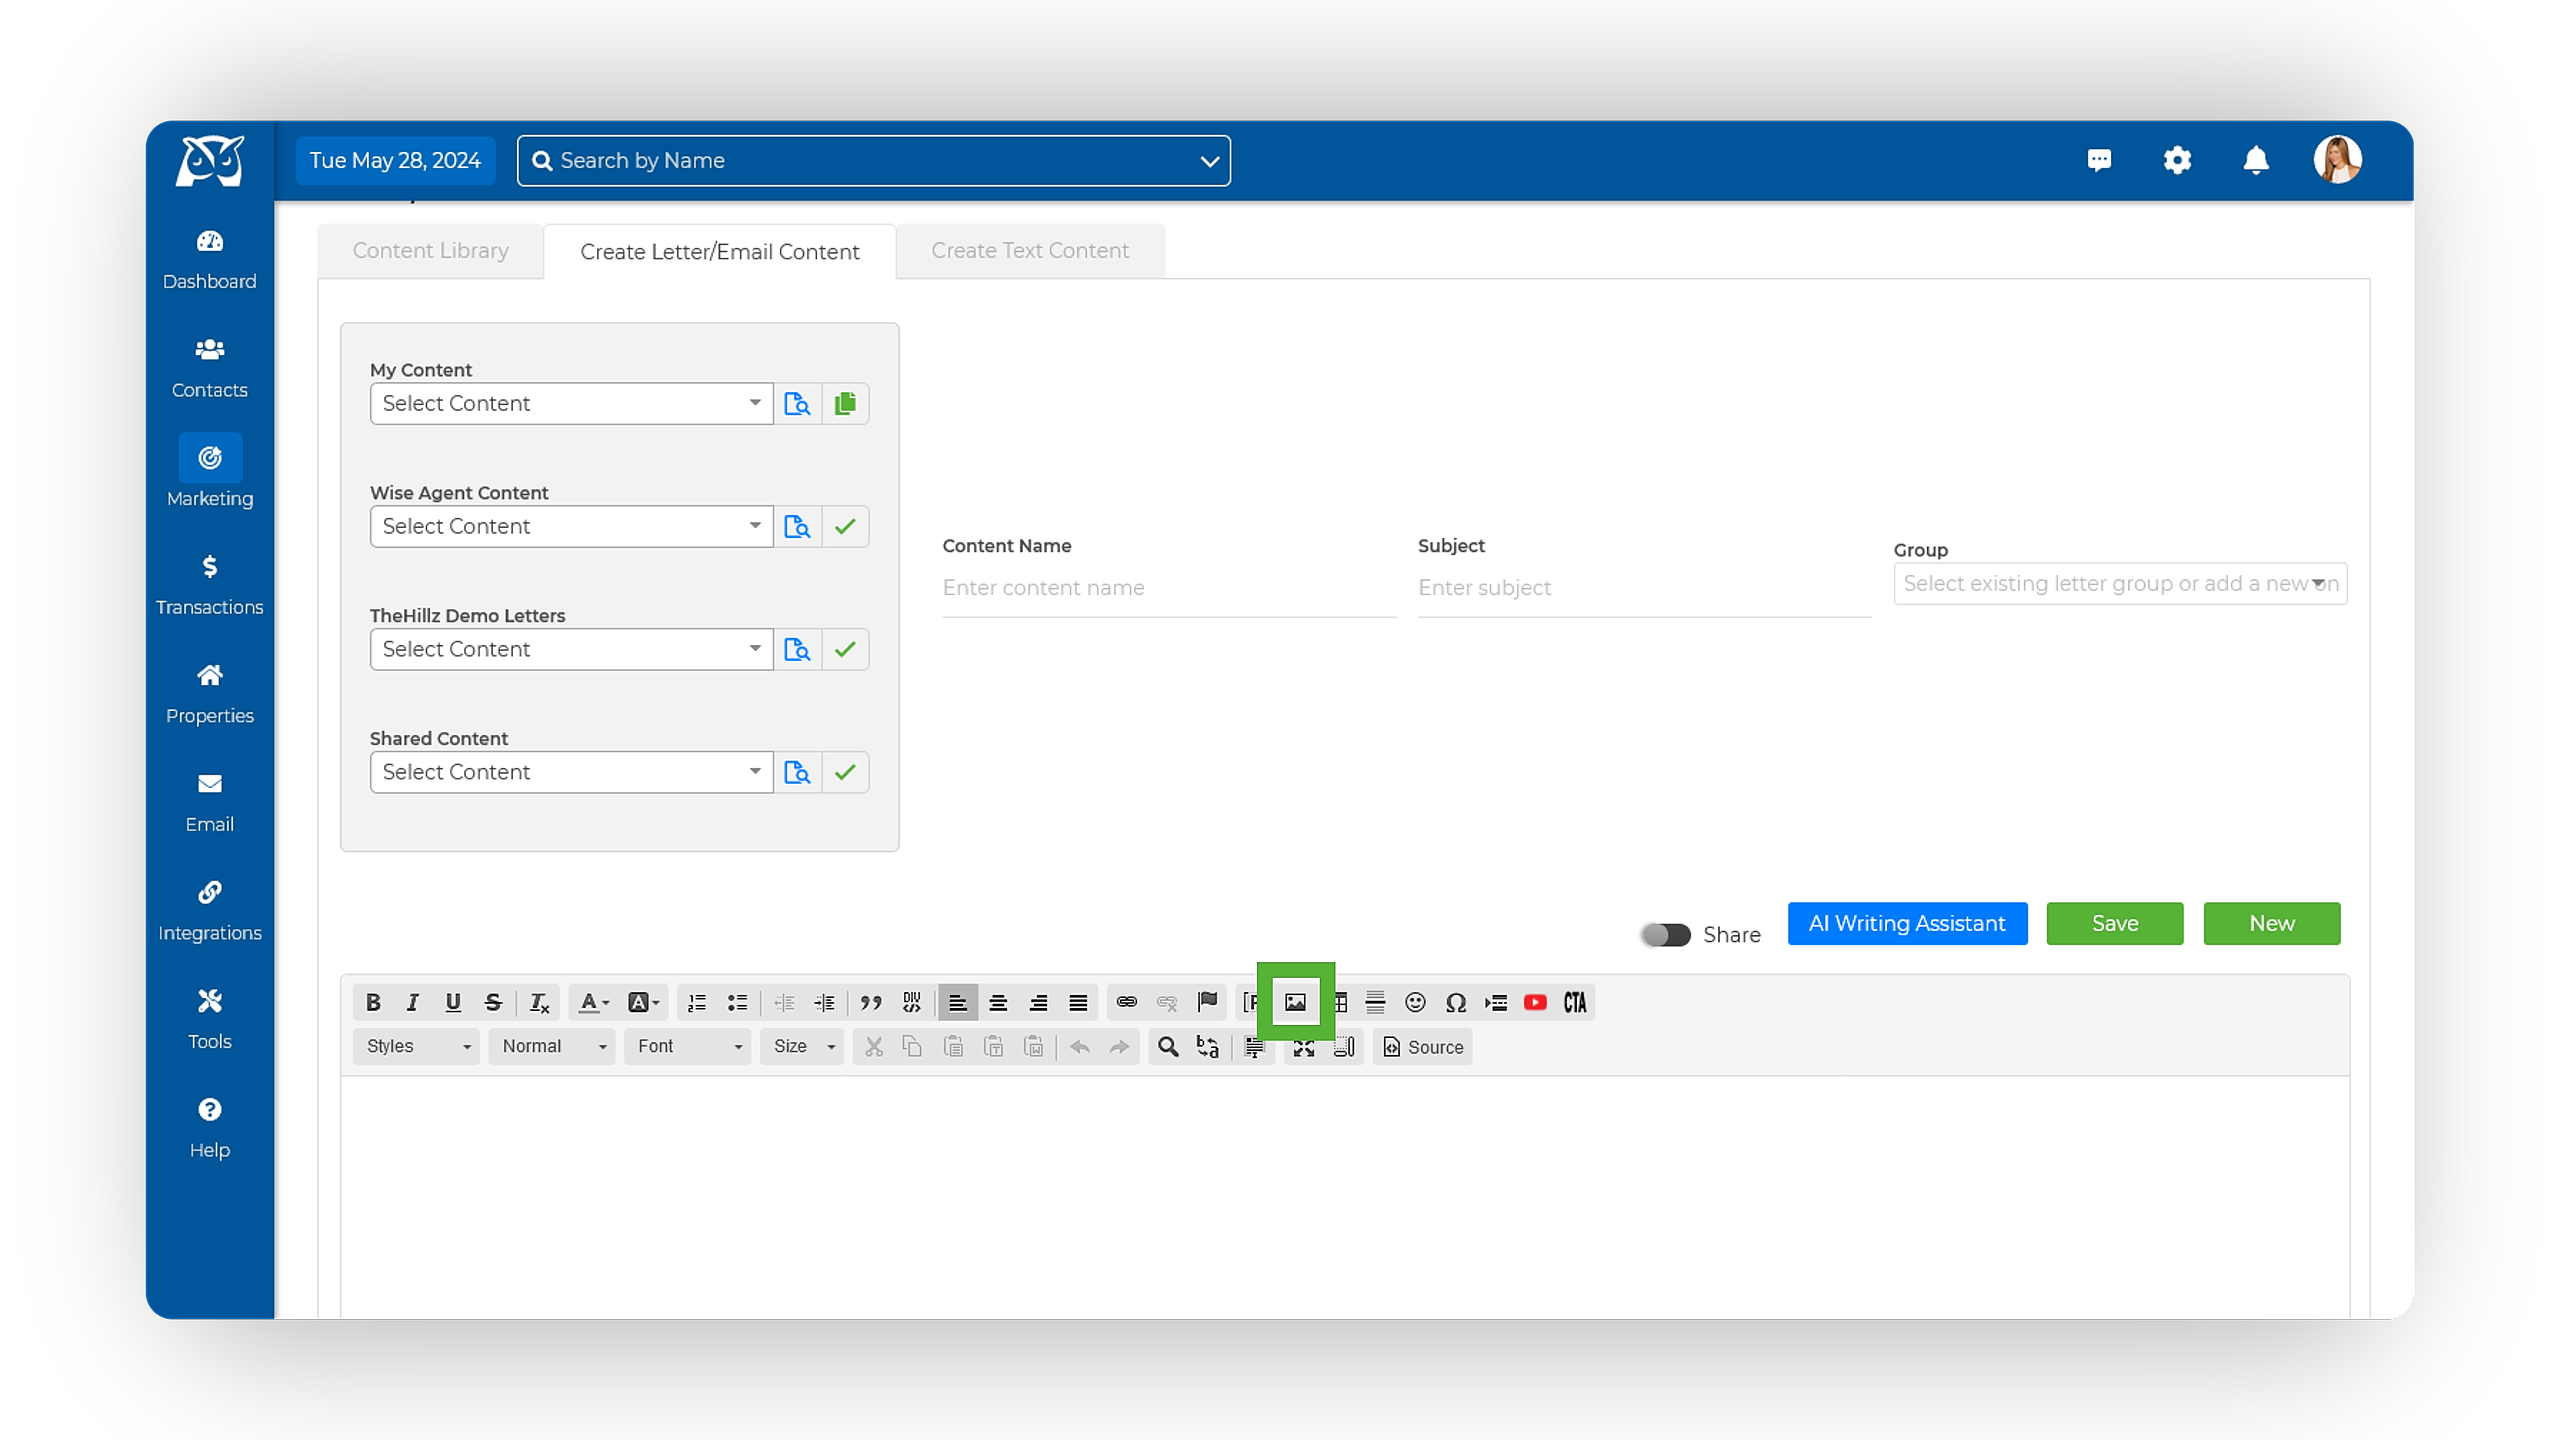
- In the text editor toolbar, locate and select the Image button located at the top right (represented by a mountain clip-art icon).
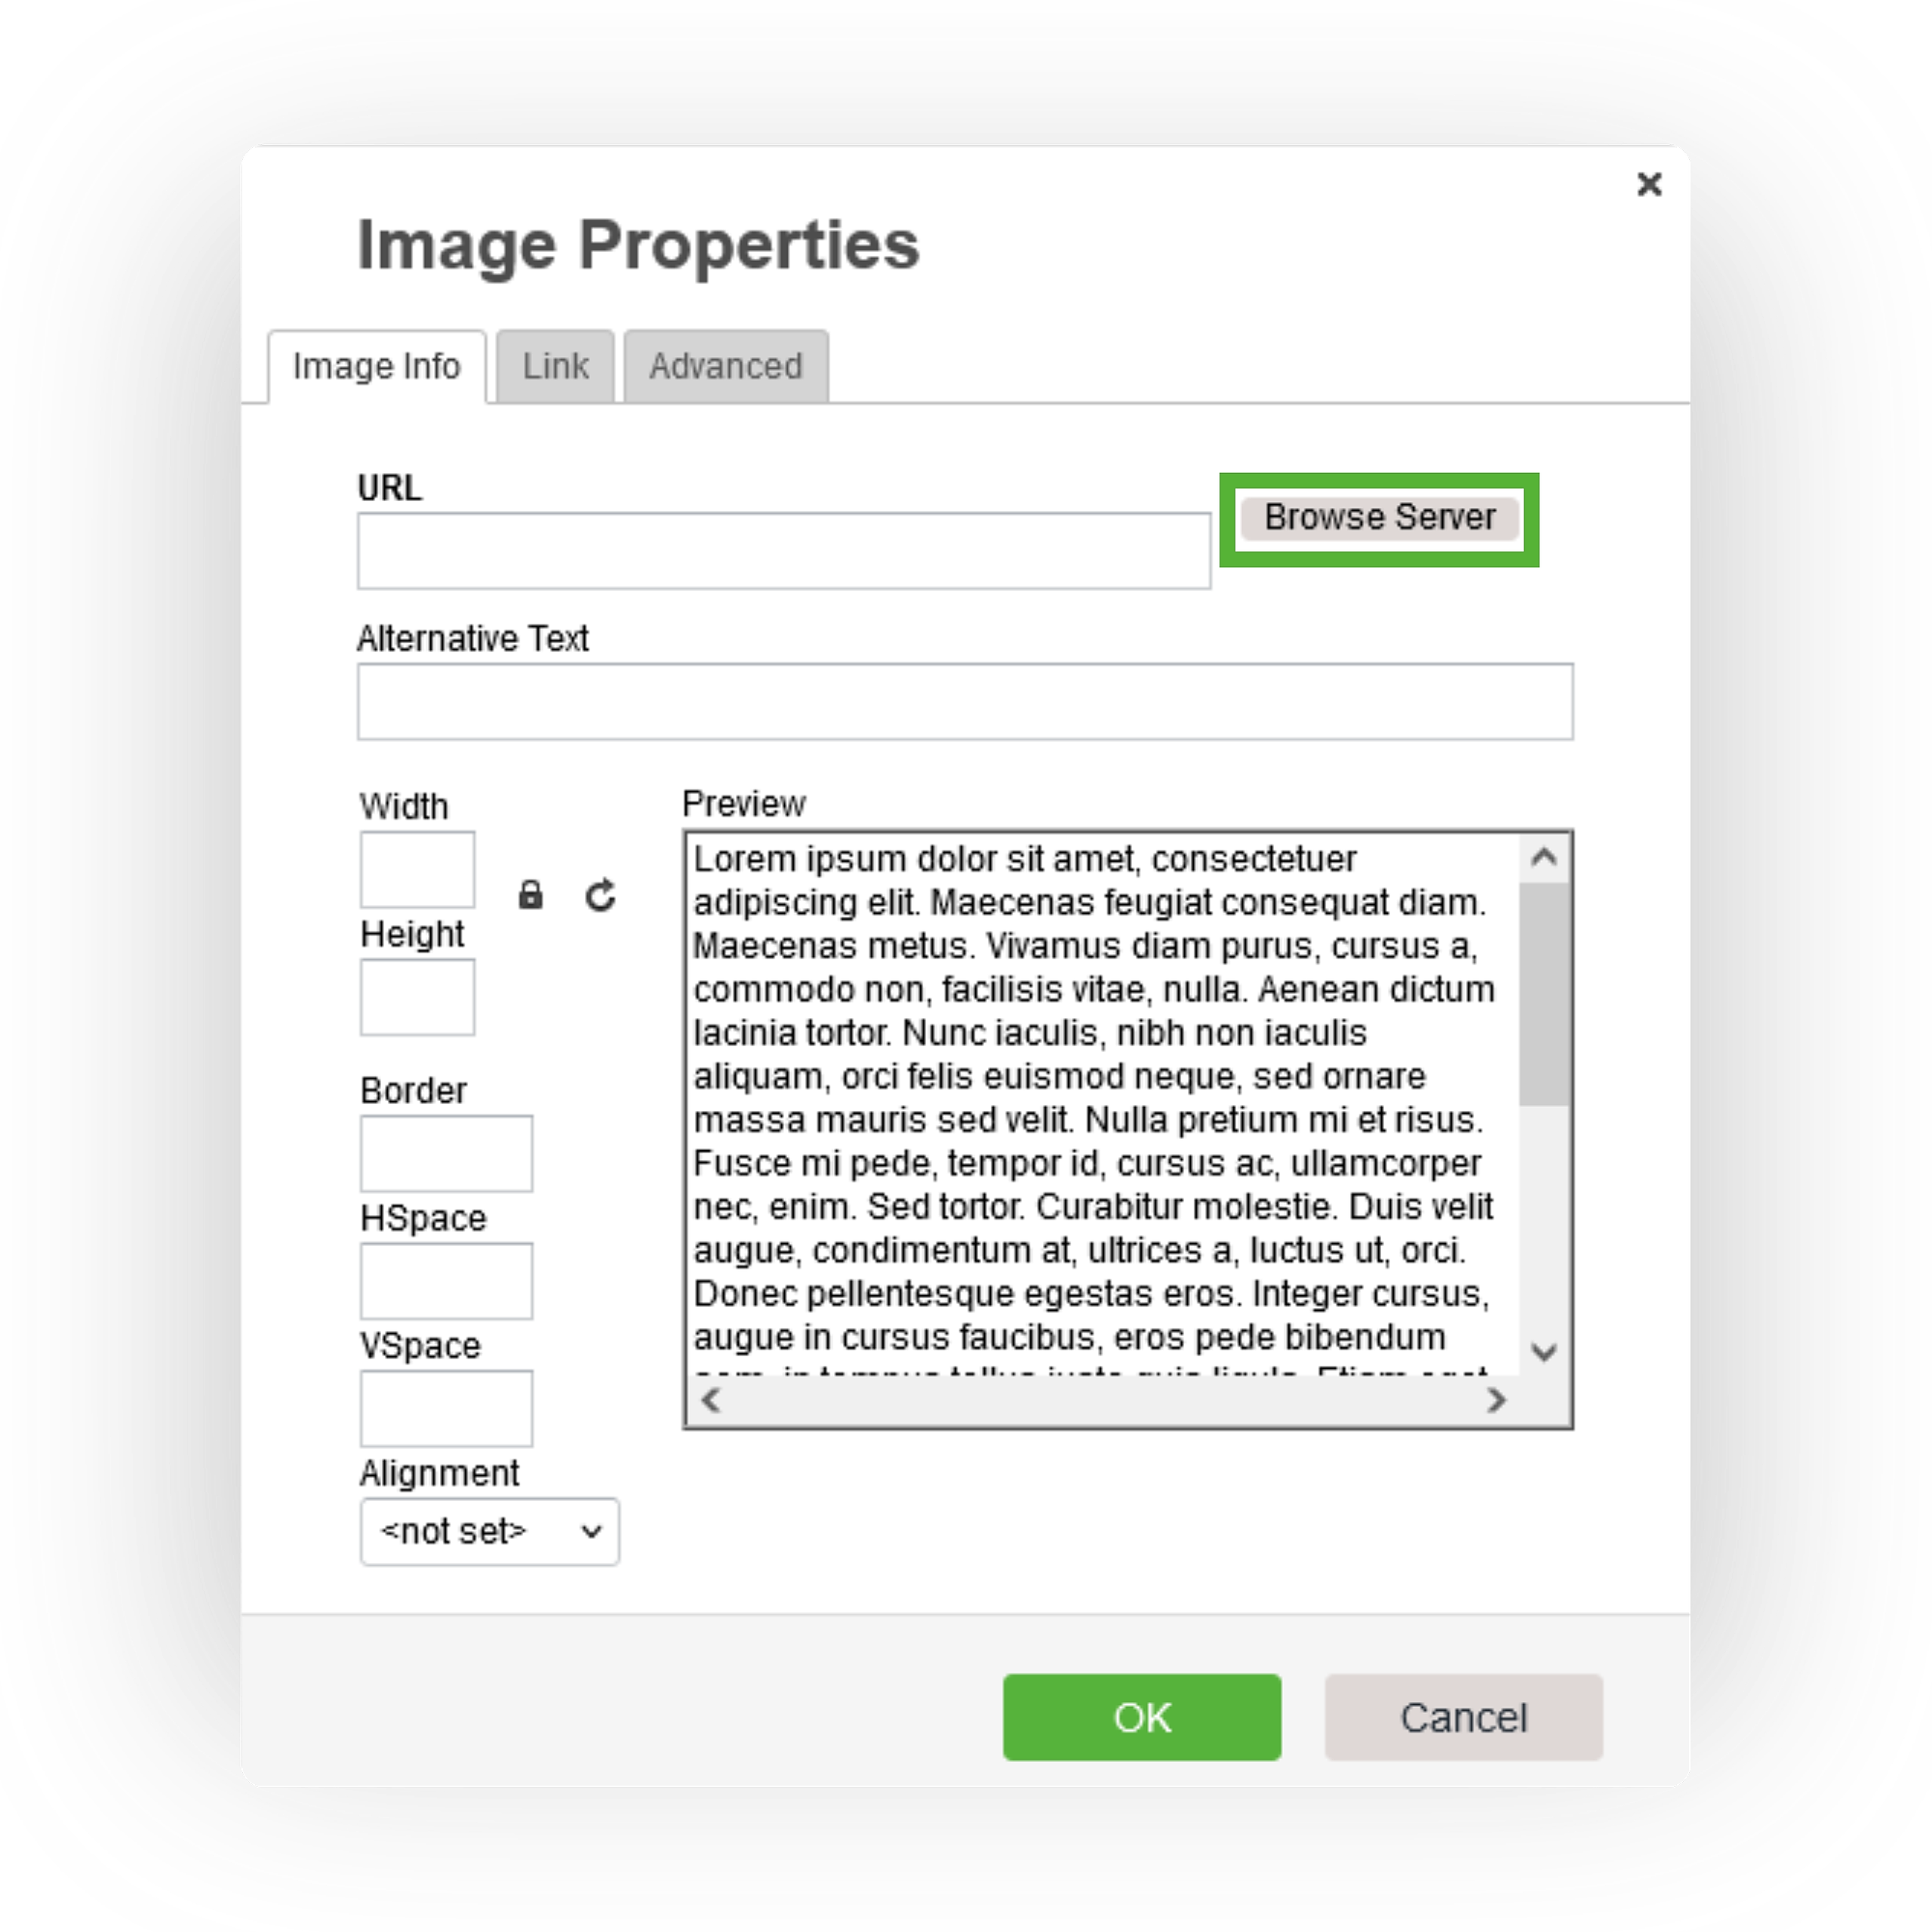
- When the pop-up window appears, click the Browse Server button to open your image gallery.
- Once opened, double-click the image you wish to insert.
- Once inserted, click Save to maintain your changes when finished.


