Compose Emails tab:
To send/schedule a new email to your contacts or vendors, follow the steps below:
1. Click on the Emails dropdown and select Email Contacts.
2. On the Compose Emails tab, enter your Subject and add a placeholder. (You can also add a placeholder to the salutation and in the body of the email.)
3. Add your salutation and select your Email Signature.
4. You can choose to send a copy of the email to yourself, and you also have the option to add the email to the contact's notes section. To the right, you will see the icons that are different content options for you to add to the body of your email.

Wise Agent stock content - this option gives you infographics and content for a variety of occasions

These are your previously created/saved letters, emails, and newsletters.

The Shared Content option allows you to select any content that is shared with you from another Wise Agent account through a promo code.

Allows you to add your landing page link to the body of your email with a description and image.

You can add a property from your Properties list with an image and property information.

Add an article/s from the blogs you added to your RSS feed.

Attach files by uploading from your device or selecting existing files from checklists and contacts.
5. Type your message in the email editor. You can include placeholders, images, Youtube videos, and a Call-To-Action (CTA) button. Additionally, you can copy an HTML code and paste it into the Source button.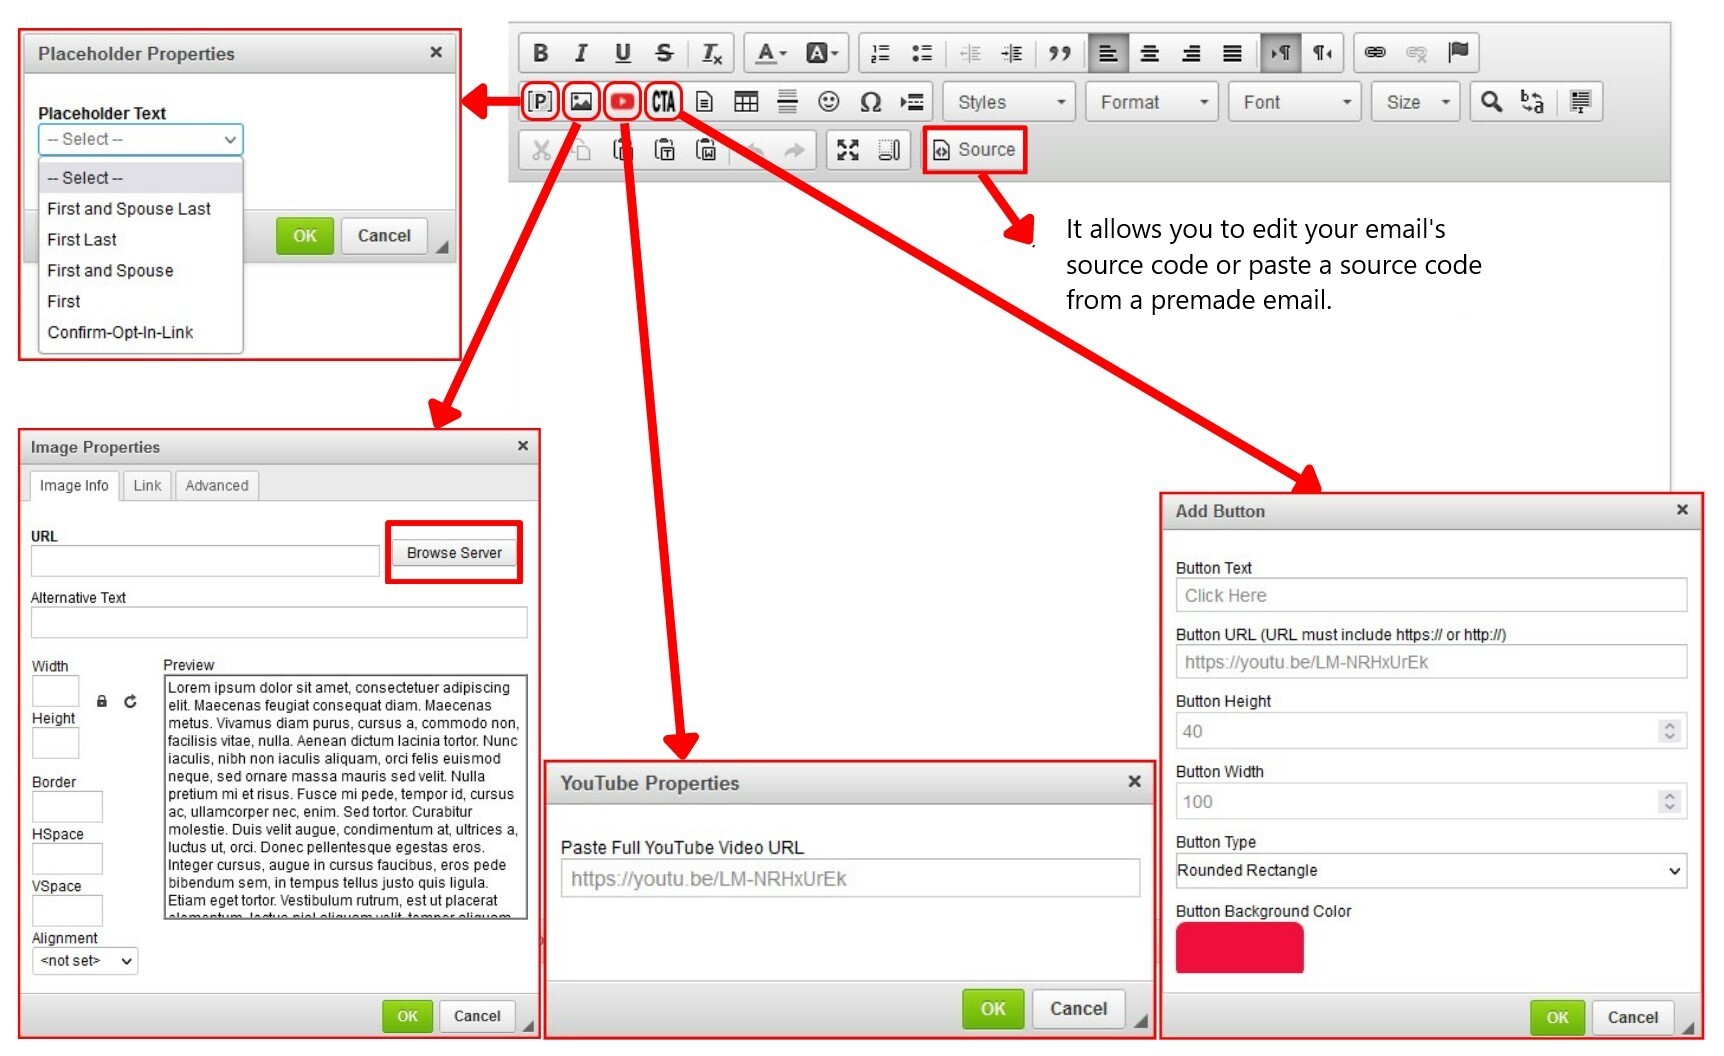
6. To preview your email to see how your email will look, scroll down and click the Preview button.
7. Once you are done and ready to send out your email, hit the Save button to save your draft.
8. Below the email editor, select the contacts you want to send the email to. You can select contacts individually or check off the box above the list to select all contacts on the current page.
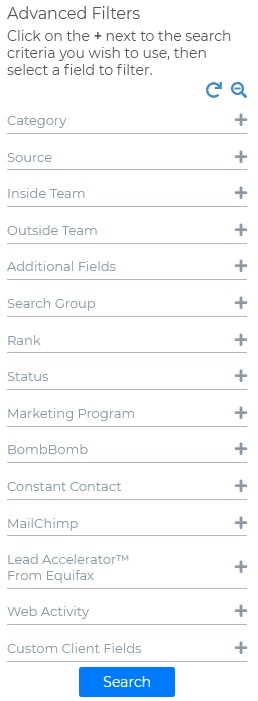
You can use the Advanced Filters feature on the left-hand side to narrow your list based on Categories, Ranks, Statuses, and more.
9. Once you have all the contacts you want to send the email to, click on the Send/Schedule button.
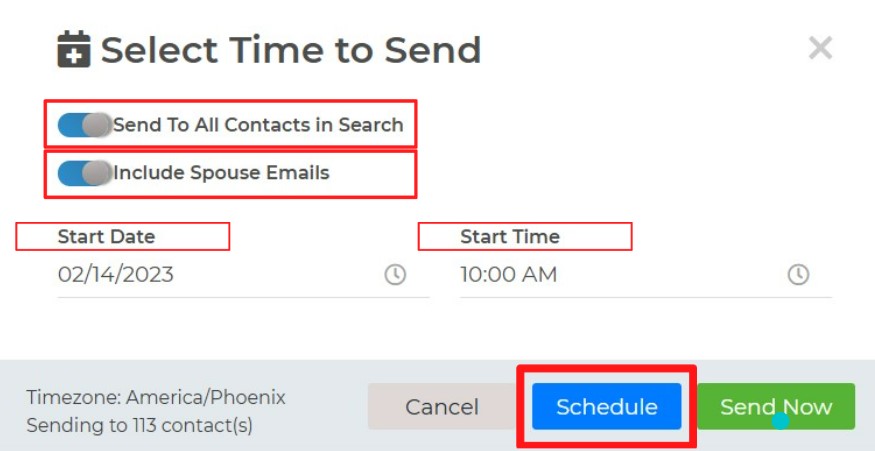
10. The modal below also allows you to select all contacts in the search and include the spouses. You can either schedule the email to go out on a specific day and time or send it right away. Keep in mind that you can only send 2500 emails per day. If you exceed your daily limit, the system will send the remaining emails the following day.
You will receive a confirmation message once your email is sent or scheduled. Below are two example messages you will get:
When you scheduled the email:
When you sent the email immediately:
The "Show Vendors" button will display all of your vendors so that you can send them an email, similarly to how you would send an email to your contacts.
Previous Emails tab:
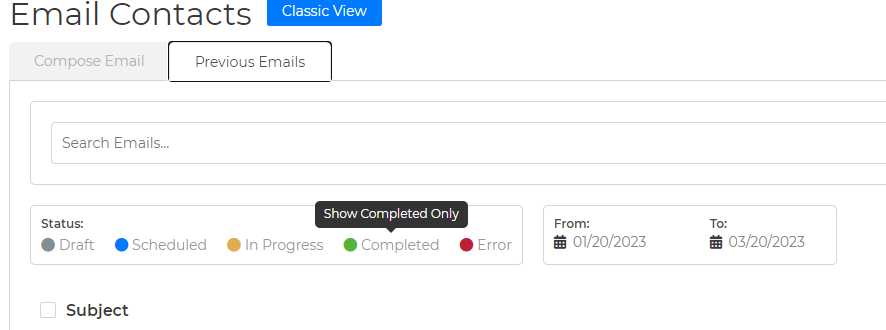
Status - Each color indicates the status of any emails you sent or scheduled. When you click the status name in the legend, only that type of email will be displayed. The filter will be removed if you click the same status name again.
Draft: You saved an email but did not send it.
Scheduled: When the email is scheduled to go out.
In Progress: When some of the batches are already sent.
Completed: When the email was sent to all the contacts on the list.
Error: When an email is scheduled to go out but fails to send at its scheduled time, the system will attempt to send it out every 5 minutes for 15 minutes from the originally scheduled time. If the email fails to send after the first 15 minutes, the email job status will update to "Error."
Here are all the other actions and options you have on the Previous Emails tab:

Clone & edit - You can make a copy of the email along with any attachments and edit the copy. After editing the copy, click the Save button, and a new email campaign will be created.

Edit - Allows you to edit any previous emails. Any contacts who have already been scheduled to receive this email campaign are not included in the contacts displayed in the contact list. Clicking the "Show All" button will refresh the page to allow all contacts to show.
Pause - To pause the entire email. If you have more than one batch and want to pause one of the batches, click on the View Stats icon > click on the ellipsis icon to the right of the batch > and select Pause.


Resume - To resume sending the email. You can resume the entire email or just any batch.
Reschedule - You can reschedule the entire email or a specific batch.
View Stats - To view your email statistics, such as the number of emails sent, delivered, opened, bounced, complaints, and unsubscribes. There is also a clicked link report for any links in your email.
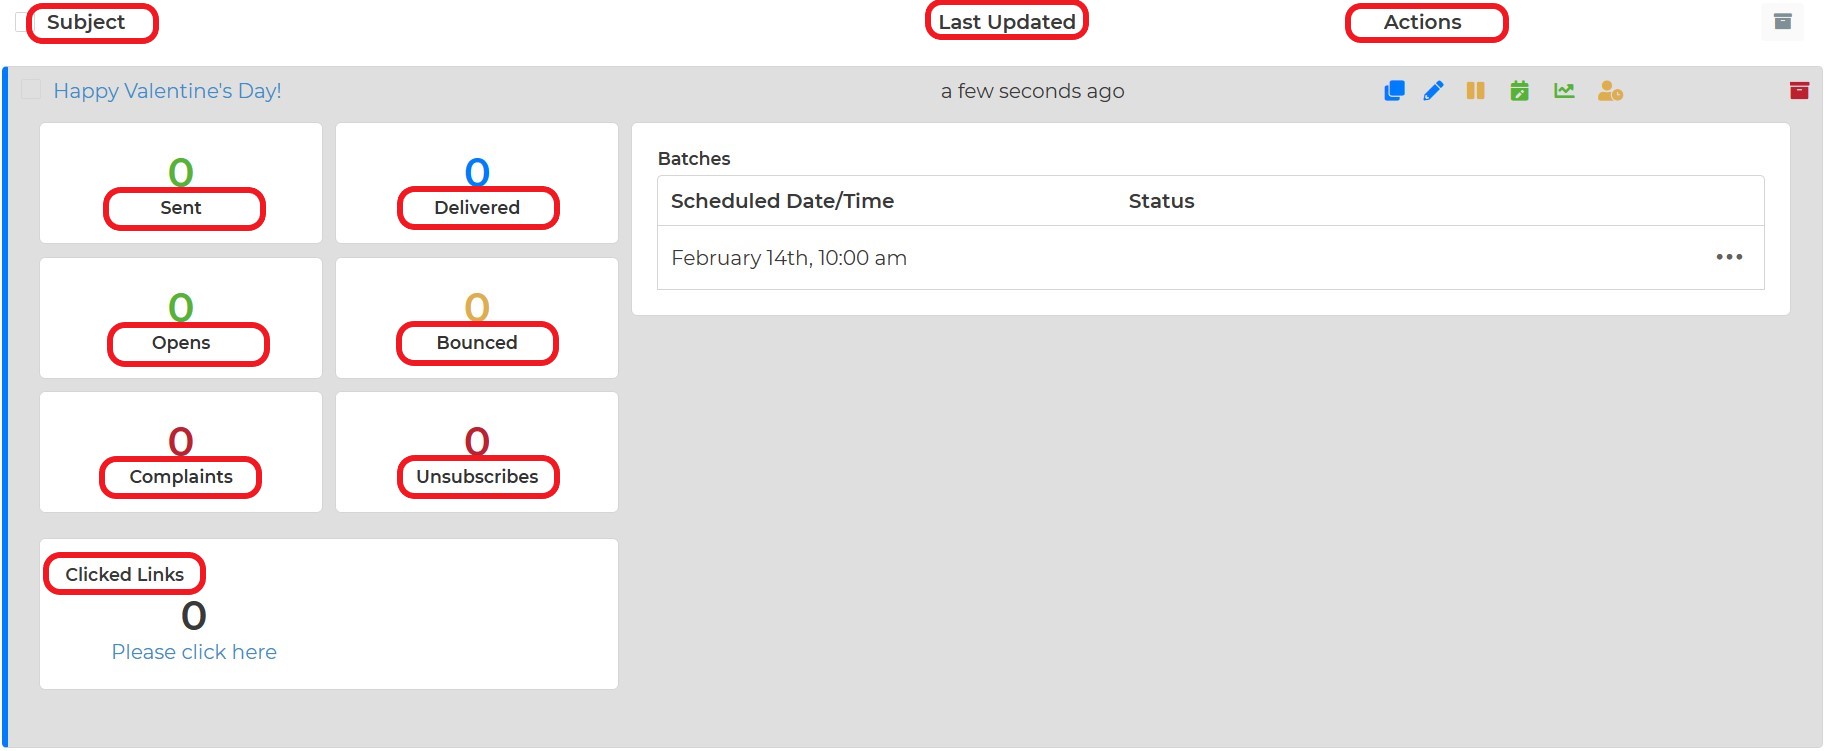 *Remember that all bounced, unsubscribed, and complaint emails will be handled by Wise Agent automatically, so you won't need to worry about removing them from any of your categories. You can always search from the contact list for these contacts using the categories that will be appended.
View Sent Contacts - To view contacts that were sent with the email. When you click this icon, you'll be taken to the contact list page, where you can see all of the contacts who have received the email.
View Unsent Contacts - To view the contacts that have not been sent with the email. When you click this icon, you will be taken to the contact list page, where you will see all of the contacts who have not yet received the email.
Archive - To archive the email.
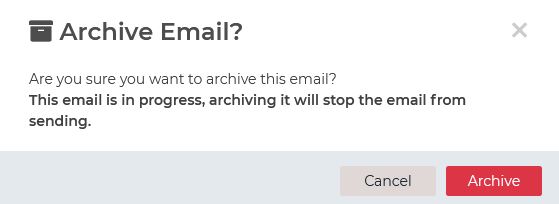
When you archive an email, a new modal will appear, asking if you want to archive the email. Click the Archive button to proceed.
You will find your archived emails by clicking on the yellow "Show Archived" button.
You can also search for any of your previous emails in the search bar.


